| Manufacturer: | Estes  |
Brief:
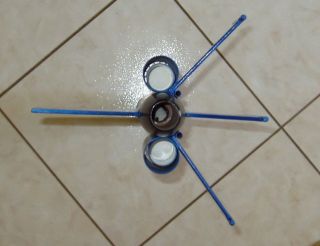
I generally scavange whatever rocket parts I can for future use. This is the
story of such a rocket. It is BT-60 based and flies on 24mm motors. I also
installed two outboards, although now that it's built, I don't think I will use
them. I may add LEDs to the outboard pods, since the cones are translucent and
are not solid.
Construction:
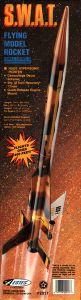
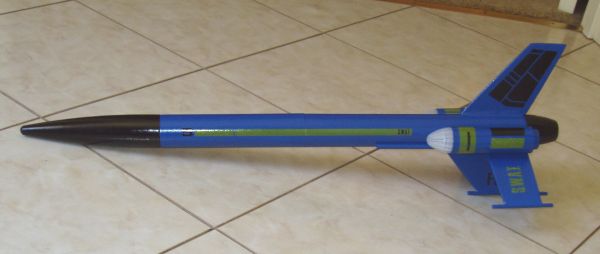
- Fins from the Estes S.W.A.T. This kit was purchased years ago at a close out sale and was used as parts. I recently ran across the fins and went from there. While I was thinking about finishing, I ran across the decals sheet too. I used the 'fins again', hence the silly name.
- One Mean Machine. Destroy/lose it as you see fit, but make sure the nose cone is recovered undamaged.
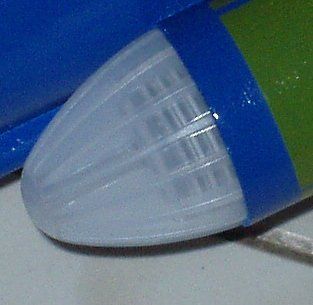
- Caps from the current style of Air Wick® air fresheners fit a BT-55 nicely and look good on the strap-ons.
- You also need some BT-55.
- I used two pieces of Totally Tubular T-2 tubing, both for trim and to use as a launch lug.
- One FlisKits Deuce's Wild! cone, which becomes the tail cone.
- Three pieces of Totally Tubular T-50mf (thick wall, foil lined) for the motor mounts.
- Kevlar® twine, elastic and a hook eye for the shock tether.
- Parachute from the range box.
- Scrap junk for the payload shoulder, motor blocks, etc.
- Clay nose weight.
The fins were already cut out (I forget whether they were die cut back then) and three had dowels already installed on their tips. I tried various orientations before I decided on this configuration. The side fins both extend downward and rest against the side pods.
The BT-55 pods have a 24mm motor mount installed. This is not centered but rather rests against the side of the tube where it meets the main body tube. I improvised solid motor blocks by capping the end with a cardboard circle and backfilling with Gorilla Glue. If I ever used these, I'd also have to use a tape thrust ring. I used some scrap tubing to make a shoulder for the plastic caps to rest against. These caps were eventually glued in with Liquid Nails, but only after all the painting and decal sealing was completed.
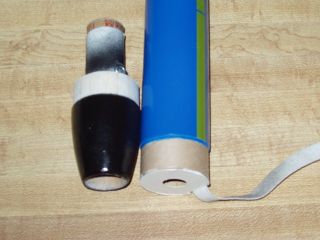 I have had a
couple of Deuce's Wild! cones for a while and decided to use one as a tail
cone. I split it in half and hollowed it with a combination of a wood carving
knife, a Dremel grinder, and a spent casing wrapped with sandpaper. I installed
an eye hook in the balsa as an attachment point for the Kevlar®
leader.
I have had a
couple of Deuce's Wild! cones for a while and decided to use one as a tail
cone. I split it in half and hollowed it with a combination of a wood carving
knife, a Dremel grinder, and a spent casing wrapped with sandpaper. I installed
an eye hook in the balsa as an attachment point for the Kevlar®
leader.
I had two smallish pieces of BT-60, so one became a payload section. The shoulder is a small scrap of 38mm tubing with a lengthwise section removed. A paper cap keeps the ejection from blowing through and a piece of elastic was epoxied to the inside of this shoulder.
Finishing:
The nose and tail cones are painted black and the body tube is blue. Both are
Painter's Touch paints. I added many of the decals from the original sheet.
These match the paint scheme nicely, although the yellow decals seem a bit
washed out with the dark background.
Flight:
I added clay to the nose cone until the rocket passed a swing test. It's weight
grew, so a D12-3 was required. I angled the rocket into the wind a bit to keep
it from the tree line. This resulted in a near perfect ejection and a nice
recovery.
Summary:
In my opinion, this rocket looks pretty good considering it was cobbled
together from various parts from other rockets--and even air fresheners! Since
it will fly on a D12, I may eventually add LEDs to the side pods for night
launches. If so, I will also add another BT-60 to move the cone forward, which
would allow me to remove some or all of the nose weight.
 |
 |