| Length: | 12.75 inches |
| Manufacturer: | MPC |
| Skill Level: | 1 |
| Style: | Scale |
Reviews copied, with permission from Sky High Hobbies - Your Vintage Rocket Source.
 Brief:
The ASP-1 kit from MPC is one of their Miniroc series of kits that use the smaller 13mm minijet type rocket engines. It's a 1:11 scale replica of a US sounding rocket. The real sounding rocket was originally designed in 1955 by Horning-Cooper, Inc. under Navy contract. It was used as a way of making measurements inside the mushroom clouds of thermonuclear explosions in the Pacific at Bikini Atoll.
The full size version was 6.50" in Diameter and 144.0" long. It was powered by a solid rocket motor that generated 5850 pounds of thrust for 6 seconds. This motor accelerated the real ASP-1 to speeds in excess of 5350 feet per second and pushed 25 pounds of scientific instruments to over 200,000 feet. It was first flight tested at White Sands proving grounds in February of 1956, and then used in operation Redwing at Bikini in mid 1956. Following this operation the ASP was used as the second stage of the Nike-ASP rocketsonde by NASA.
The MPC ASP-1 model Rocket had set several performance records here in the
US and it also set an international world record as well.
The kit contains:
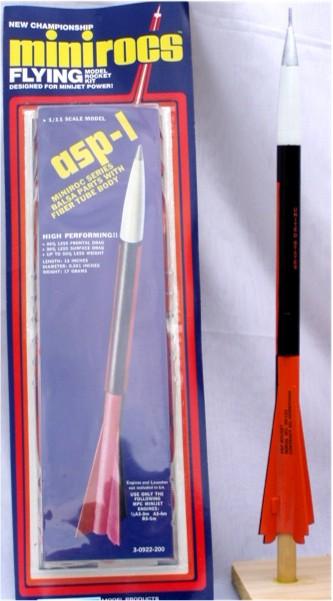
Like many MPC kits the ASP-1 comes in a cardboard backed plastic blister pack. Incorporated in the plastic blister itself are many vacuum formed customizing detail parts. These can be carefully cut from the blister, trimmed and then glued to the rocket to simulate things such as cable shrouds, vents, scoops, pilot canopies and the like. Be sure that if you use these parts you only use Enamel paints.
The ASP-1 uses a 10-inch 6 sided parachute for its recovery. This is a bonus, in my view, as most rockets of this size only use a streamer for recovery. I recommend using a small dab of glue in the chute gripper tabs to make sure that this 30+ year old parachute doesn't come apart during descent. A small lead nose cone weight is included for better stability. The eye screw is screwed through this and then into the balsa nose cone. Use a dab of glue to make sure it stays secure.
There is a nice little card of water slide decals included with this kit but the real ASP sounding rockets were sparsely adorned with just a few markings. These markings were the rocket type, serial number, and contract number, but you can, of course, decorate it anyway you want. There are many extra decals in addition to the above mentioned decals that are required for an accurate scale replica.
There isn't an engine clip for this rocket so a couple wraps with masking
tape around the engine is recommended to keep the engine secure before launch.
Just make sure there isn't too much tape so that the engine can eject properly.
Construction:
It's a very easy kit to build that has a number of different build variations. When building this kit you have the option of building the "super detailed" version. This version will require some extra balsa and/or card stock and a small piece of thin dowel rod that are not included in the kit.
Regardless of which way you decide to build this kit, you will have to be very careful with the balsa stock. Some MPC kits have die cut balsa stock and some do not. The ASP does have die cuts in the balsa stock. It is quite thin at 1/16th of an inch thick, so it requires a little more care when cutting out the fins and sanding them. The fins are also quite small since it is a Miniroc, so again, be careful when sanding and mounting them.
I cut out and pinned together the 4 fins and sanded them to be identically sized. They were then unpinned and the leading and trailing edges were feathered into compound angles for better aerodynamics. The engine mount is a simple 2 piece assembly with just an engine block that is glued into the forward end of the mount. The whole mount is then glued into the body tube flush with the end of the booster. I used an Estes fin marking guide to lay out the position of the fins and the launch rod guide. If you don't have one of these there is a paper fin location template that you wrap around the booster tube to mark the fins proper positions.
Once the fins were mounted and secured with 3 coats of glue fillets, I decided to go for the super detailing by cutting out the paper templates used to fabricate the detailing parts.
I used extra balsa stock I had laying around to make the fins trailing edge spinerons, and the scale fin locating tabs. A small length of balsa dowel rod was cut to make the nose spike which I glued into a small hole that I drilled into the point of the nose cone. Never use a nail or wire or any other kind of steel to fabricate this piece. If you do, this rocket could become a deadly weapon.
I assembled the 6 sided 10" parachute and mounted the shock cord in the booster tube to finish off the building of this cool little rocket.
The real ASP sounding rockets were flown with 3 different color schemes. These different paint schemes are shown in great detail in the build instructions. They are rather simple painting instructions, but it will require some careful masking to get the model rocket to look like the real thing no matter which scheme you decide to paint your replica.
I choose the black and orange check pattern for mine.
Summary:
The ASP-1 is a very fun kit to build. With a nice smooth finish it will
really scream to very high altitudes with the more powerful 13mm engines
available. If you have the extra balsa stock, build the super detailed version
for a great looking little scale rocket that was once used to fly through
thermonuclear mushroom clouds.
 |
 |
Flights
|
|