| Construction Rating: | starstarstarstarstar_border |
| Flight Rating: | starstarstarstarstar |
| Overall Rating: | starstarstarstarstar_border |
| Manufacturer: | PD Rocketry |
Brief: Construction: The instructions for this kit are an actual copy of the original Estes kit, so there's nothing resembling a "gotcha". To be honest, the only thing I used the instructions for was decal placement. (This is obviously true if you look at my fin placement. Oops.) Everything about the build is pretty much instinctive if you've had previous experience building Estes kits of this era. Construction involved shaping the edges of the fins, installing the balsa bulkhead in the bottom of the payload section, and assembling and installing the engine mount. I went off the board here and tied a long piece of 250# Kevlar® cord around the engine mount, then ran it under the forward centering ring. It's not that I don't trust the suggested Estes-style paper mount, I just think that a kit of this quality deserves a recovery system that's as up to date as possible. (Nostalgia only goes so far.) Finishing: Construction Rating: 4 out of 5 Flight: Recovery:
Flight Rating: 5 out of 5 Summary:
Pimp Daddy's A-20 Demon is a dead ringer for the original Estes kit with all of the appropriate decals, the 24mm power, and the payload section that you'll remember from the original. While it is only a simple 4FNC project, you wind up with a rocket that's as long on looks as it is on performance. The kit is a dead stock clone of the original and comes packaged in a traditional bag with hang tag, which only adds to the vintage experience.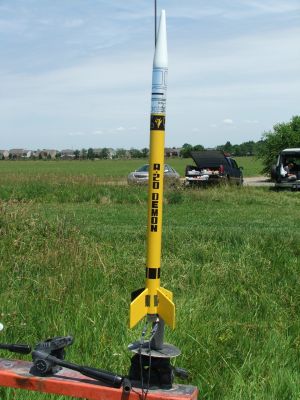
The parts list:
Finishing was a simple matter of applying thinned Elmer's Fill 'n' Finish to the body tubes, nose cone, and fins. After sanding, I primed the whole rocket with Valspar white primer, then sprayed everything but the nose cone with Valspar Bumblebee Gloss. The nose cone and payload section were then painted with Valspar gloss white, while a single fin was masked off and painted Valspar gloss black. Once the paint had cured for several weeks (as we got rained out one week), I applied the decals, which were a pleasure all to themselves. Pimp Daddy had recently switched to an Alps printer and decal application is a simple matter of lining everything up correctly. The foil stickers are like any stickers you've ever worked with except they are better looking. Best results are obtained by taking your time, especially with the big wrap sticker that covers the payload section. I had to trim mine ever so slightly to keep from having a bit of overhang, but other than that I was very pleased with the ease with which it applied. The best way is the way the directions say to apply it: draw a straight line on the payload section, line up the sticker, and roll it slowly. The rivet details for the fins should be first bent on the center line then placed gently into the fillet area, taking care to line each up with the previous one. (Starting at the back of the rocket can also help to hide your first rather clumsy attempts from all but the most discerning eyes.) The finished product is almost too cool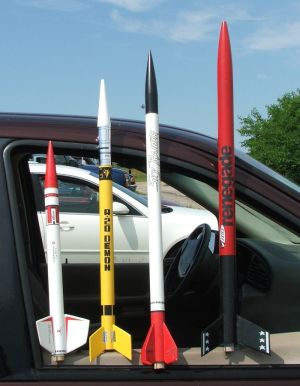
Rockets like this are likely what will keep me from ever venturing any closer to high power than the occasional F (and only because I already have two rockets that call for a motor of that size, and both happened to be gifts). The A-20 Demon truly screams off the pad on a D-12, looks great doing it, and doesn't come close to over flying the field at the VOA. Both flights to date have been on relatively calm days and were impressive in their speed off the pad, dead straight flight paths, and altitude. For the first flight, the Demon was painted but without applying the decals. For the second flight, I had not only found time to finish the decals but also to refurbish my battered clones of the other rockets that were displayed on the 1977 Estes catalog page with the Demon. Also on the flight line that day were a Thrustline Cherokee D, an Estes Sky Raider, and an Estes Renegade, all of which had flown previously and all of which had suffered some kind of damage. It was a very cool theme launch, one that I'd like to do in the future with the Mini-Brute page.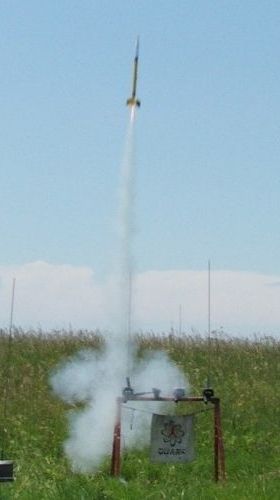
I used an extra long piece of Kevlar and elastic to lessen the potential "shock" on the rocket at ejection. This seemed to work well as the ejection looked to be fairly gentle from our vantage point on the flight line. There were a few muttered "separation" comments from some of the others as the body tube looked like it was falling away from the parachute. The shock cord did its job though and everything came back in perfect shape on the Mylar chute. I hadn't previously been a big fan of Mylar, but lately I've allowed myself to be won back over.
PROs: Awesome looks and performance. A dead on replica of a classic Estes kit, right down to the hang tag.
CONs: Lack of Kevlar in the recovery system (but I had my own).
Overall Rating: 4 out of 5
 |
 |
Flights
|
|