| Construction Rating: | starstarstarstarstar_border |
| Flight Rating: | starstarstarstarstar_border |
| Overall Rating: | starstarstarstarstar_border |
| Manufacturer: | PD Rocketry |
Brief:
A clone kit of the early '80s era Estes Solar Sailer, model #1297. This is a fantasy space vehicle and a nice
builders kit. It is a single stage, 3FNC with some extra balsa structure and a nice set of decals to dress it up. The
finished model looks good and flies better.
Construction:
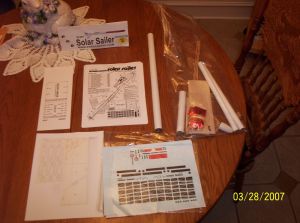
A very nice bag of parts includes:
- 2 BT-50 (24mm) body tubes, 18" and 6 1/2" long
- 2 BT-20 (18mm) body tubes, both 12" long
- 1 BT-20 tube coupler
- 4 AR2050 centering rings
- 1 mylar motor hook retention ring
- 1 balsa nose cone
- 1/16" sheet balsa
- 1/8" wood dowel stock
- 18" x 1/8" elastic band
- a copy of the original printed balsa fin and truss template
- a copy of the original instructuctions
- a PDR intruction mod for the motor hook attachment
- a single decal sheet with a wax paper protector (nice)
- a 24 inch red mylar parachute with Kevlar® shroud lines attached (double nice)
The kit comes with a copy of the original Estes instruction sheet which I always found to be well done. PDR includes a modification to the engine hook retention on a separate sheet; it involves replacing the mylar ring with a paper ring to secure the hook to the body tube. The original kit did not include a thrust ring, depending on the hook alone to secure the forward movement of the motor. This works well enough but I kind of miss a thrust ring. The biggest challenge with this model is cutting balsa. The original kit came with balsa stock printed with the fin and truss patterns. PDR provides a paper copy of the printed stock, and you get to cut out the templates for 3 fins, 3 trusses (each of which is made from 2 pieces balsa), and 3 braces. Then you line everything up and start cutting. I made a copy of the template page before cutting them out so I could use it to help line up all pieces on the balsa sheets. The rest of the build proceeds per the instructions. The shock cord anchor placement at the forward end of the BT-20 proved to be problem.
Finishing:
All that balsa needs to be sanded and filled so chose your favorite filler and have at it. I prefer watered down
Elmer's Fill 'n' Finish. I used Rustoleum gray sandable primer which filled the body tube spirals nicely. The nose cone
required a little extra sanding but was of good quality and finished up nicely. The stock two color paint scheme is
simple: white with red on the forward 1/3 of the airframe. The decals make the difference but you don't get a lot of
help with the placement in the instructions. I used the PDR hang tag and the
JimZ site for assistance here.
Construction Rating: 4 out of 5
Flight:
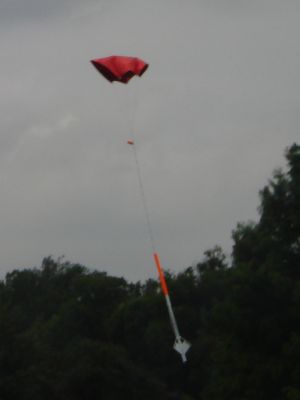
You have a big 24" mylar parachute to fit into a 1" diameter tube. I dusted the chute with baby powder and
carefully folded and rolled and wrapped it up into as small a package as possible. I used 1 sheet of wadding and some
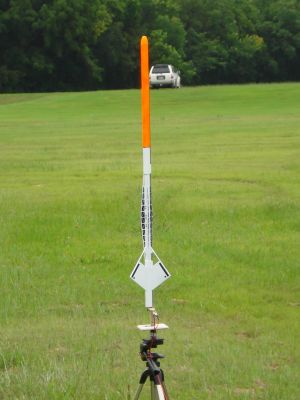
dog barf (cellulose attic insulation from my favorite home improvement center). First flight was arrow straight on a
B6-4 to a nice altitude of maybe 300 feet.
Recovery:
The placement of the shock cord anchor at the forward end of the BT-20 leaves it exposed to hot ejection gases. It's
very difficult to get any wadding into that area. Sure enough, after a perfect boost and coast to apogee, I saw the
nose cone, shock cord, and big red 24 inch parachute separate from the airframe. I cringed at what I thought would be
the inevitable lawn dart, but the body started a rapid spin around it's long axis and landed almost horizontally not
more that 5 or 6 seconds before the nose cone. No damage whatsoever. I repaired it with a tried and true Estes tri-fold
paper mount about an inch below the nose cone shoulder and have two more successful flights to date.
Flight Rating: 4 out of 5
Summary:
The Solar Sailer is one of a real nice series of clone kits from PDRocketry. It's a cool looking rocket and a great
flier. If you leave the shock cord anchor in the stock position, you will need to take more care than I did try to get
some wadding down into that space.
Overall Rating: 4 out of 5
 |
 |