 Finishing:
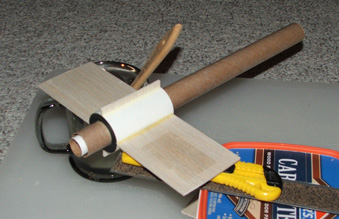
While not outlandishly difficult, finishing the Aquarius required several out of the ordinary masking steps. Once the rocket was complete except for the attachment of the tube fins, the body tube spirals and balsa grain were eliminated using the standard method of thinned Elmer's Fill & Finish and sanding. When the sanding was complete, all three pieces of the rocket and the 12 individual discs that would eventually cover the six tube fins were sprayed with Valspar white primer. The rocket itself was then sprayed with Valspar gloss white. The top portion was then masked off 1" above the BT-60 fin can tube and at the tips of the pod mounts, and the lower section was sprayed with Valspar silver.
The next step was to paint both tube fin sections. The catalog picture shows these painted yellow, but I had recently broken the spray tip off of my only can of yellow paint, lodging the remains down in the hole and making getting it out without a mess a near impossibility. Because of this I went the fluorescent route with Red Devil yellow after masking off a 1/8" strip on one side of each tube structure. (To allow the glue to grab better.) The end caps were shown as red on the package, but I wasn't wild about how my red looked next to the day-glo yellow, so I went with my trusty no-name fluorescent orange. When I was satisfied with the coverage, including the sides of the end caps, I glued the caps into place. When this had all dried I sprayed both sections with clear gloss to give the decals a smooth surface to bond to, removed the masking tape strip, and glued the tube sections to the mounting finlets.
Construction Rating: 4 out of 5
 Flight:
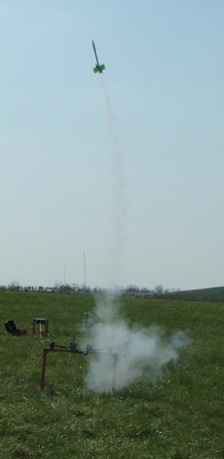
Despite its unorthodox look, the SSA is a decent performer, although the large rear fin/tube area virtually guarantees some kind of windcocking in even the slightest breeze. This isn't any kind of a problem as the rocket never shows an inclination to get completely sideways and the windcocking usually allows for a closer recovery. It has flown twice thus far, once on a B6-4 and once on a C6-5. The two flights, in similar conditions, were almost identical except for a slight difference in altitude, which is to be expected.
The B6-4 flight was of decent height and followed a gentle arc to the south. As expected, it drifted back behind the flight line on the same breeze, making for a nice, short recovery walk. After the flight I noticed that one of the large "solar panel" decals had come off. It was later found between the flight line and the pad, but I'll have to print off another set.
The C6-5 flight was noticeably higher and easily the more impressive of the two. This time the path followed more of an arc to the southeast, then drifted further into the veggies. A longer recovery walk, but a much cooler flight. Unfortunately another of the solar panel decals came loose and floated out of the park. I didn't make that recovery walk.
Recovery:
Flight Rating: 5 out of 5
Summary:
PRO: Sharp looks. Cool decals. Seldom seen at the pads.
CON: Outdated recovery system. My SSA arrived with a badly crunched body tube, but I had plenty of replacement on hand.
Overall Rating: 4 out of 5
 Brief:
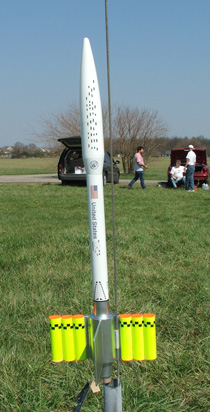
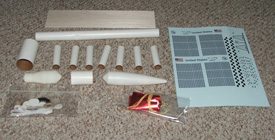 The instructions included with this kit are copies of the original Estes instructions and as a result, they're clear and easy to follow. Despite the rather out of the ordinary styling of this kit, the build is very simple and progresses quickly. The tube fin pods are what gives the rocket its unusual looks, but constructing these is just as simple as making sure the tubes lay flat when glued and that the ends line up. Other than that the only construction details worth mentioning are the upgrade that I made to the recovery system, the by now standard switch from the Estes tri-fold mount to a length of Kevlar tied and glued behind the engine block. Overall a nice weekend build and a finished product that gets noticed at the pads.
