Bif's Rocket Emporium Papernator (Plan)
Bif's Rocket Emporium Papernator (Plan)
Contributed by Nick Esselman
![[Picture]](/images/archive/images/ratings/rating_papernator.gif) (04/01/04) Searching around on the
EMRR
Affiliates Links Page, I went to Clive Davis' page and found his free paper
rocket: Bif's Rocket Emporium Papernator. After doing a number of
free rockets found throughout the
Internet (See my
"Free" Paper-Rocket Comparison Page), I decided to add one more
to the series. Clive's rocket plan was entered into FlisKits' Design of the
Month and won for September 2003.
(04/01/04) Searching around on the
EMRR
Affiliates Links Page, I went to Clive Davis' page and found his free paper
rocket: Bif's Rocket Emporium Papernator. After doing a number of
free rockets found throughout the
Internet (See my
"Free" Paper-Rocket Comparison Page), I decided to add one more
to the series. Clive's rocket plan was entered into FlisKits' Design of the
Month and won for September 2003.
I printed it on 110lb Card Stock (Georgia Pacific brand purchased from WalMart) and then got busy.
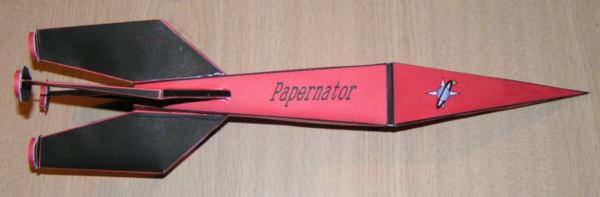
The rocket patterns were on 5 pages and then there were 2 additional pages of instructions. The design of the rocket is unique and detailed. The color-scheme is nice as well.
You will need to provide a recovery system including a shock cord and parachute. You will also need clay nose weight. Clive recommends a 12" parachute and an 18" shock cord.
Clive also recommends that you have an X-acto knife and wood glue.
CONSTRUCTION:
The construction of the rocket is straightforward. It takes some time to cut out all the pieces, especially the fin pods. Read the instructions closely and look at any pictures (FlisKits DOM) before beginning. I won't go through all the building steps, however, I will point out two areas that I had some difficulty.
The fins were challenging because of the number of cuts and folds. These fins are not a doubling over of the paper, but instead, they are built up and have a flat trailing edge. The leading edge is squared off and then they taper to the trailing edge. I had some trouble keeping the fins symmetrical. Three turned out good. One didn't (as you can see in the picture). I suppose that will provide some "spin stability".
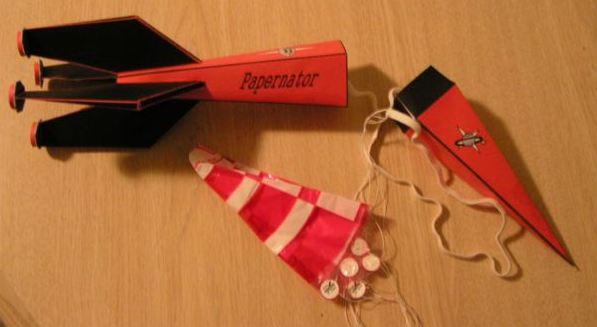
The other area that seemed difficult to me was the building of the fin pods. I read the instructions, really, but I just don't think they turned out correct. If I look at the picture on FlisKits DOM, it looks like one disk is saved as a bottom pad. I don't have that. So, builder, it's up to you.
The motor tube centering ring posed a small problem for me as well. I'm just concerned whether it will hold or not. It didn't seem to have a solid connection to the inner body tube. Nice idea and design though... just a builder error.
The nose cone shoulder is tapered in such a way that it slides into the body tube, but only until the shoulder's taper is wider than the body tube opening. (I guess after reading that it is an obvious statement, however, the design works, while leaving a small portion of the black shoulder exposed.)
I used 18 inches of 1/4" flat elastic for my shock cord. It was attached using the 3-fold paper method (outlined in the instructions) to the body tube and the nose cone.
I added a 12" parachute. This was a free one provided from an order with SemRoc. I constructed it per SemRoc's instructions.
I added Plast-i-Clay Modeling Clay for the nose weight. It was close to the 15 grams suggested, however, my objective was to gain the CG that Clive recommended.
Overall, for CONSTRUCTION I would rate this rocket 4 points. The instructions were good, but a bit more clarity on the pod's would help (at least me). The design is nice.
 FLIGHT/RECOVERY:
Clive recommends B4-2, B6-2 and C6-3 for motors.
My Papernator weighed in at 1.5 ounces.
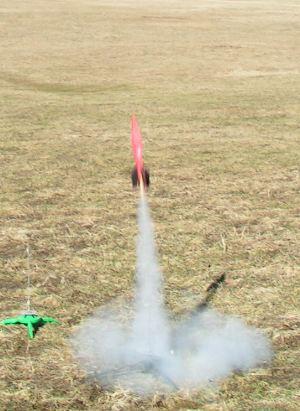
Well, I had an opportunity and yes, yes, I know it is not one of the recommended motors, but I went for it. I installed a 1/2A6-2 for it's first flight. The rocket successfully cleared the rod, reached about 15 feet altitude, turned and headed for the ground. Ejection was just before and the parachute did expand. Flight over.
I wanted to fly it again and when I was pushing in the new motor (an A8-3), the motor mount popped out. Hmmm, as I was concerned about. I re-installed it and feel I was much more successful this time. Gaining solid joints in the body.
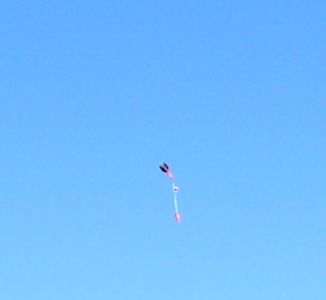
After a day or so, I loaded the A8-3 and flew it again. This time it took off and gained about 30 feet altitude, turned, ejected, and came in fast. The parachute never came out of the nose cone and it came in hard and fast. I'm warning ya, stay away from this descending rocket if it is not under 'chute. That sharp nose cone can hurt.
The third flight was on a B6-2, as recommended. It came off the pad nicely and with good altitude. The ejection was early and the 'chute did not come out again. It appears that it is being blown up into the nose cone and then never getting pulled out. Upon landing it damaged a fin. So, I have retired this paper rocket.
For FLIGHT/RECOVERY, I would rate this rocket 3 points. Maybe it's me, but a couple of things were irritating in flying this rocket. First, just to get the motor in. I had trouble getting my fingers down in-between those fins. Same issue for adding the ignitor. Also, it twice had the parachute blown up into the nose cone and it did not come out.
I give the rocket an OVERALL rating of 3 ½ points. This is a "free" rocket and in comparison with others I have done (See my "Free" Paper-Rocket Comparison Page), it holds its own for looks and ease of construction. I don't know what to do on this nose cone thing, except shorter shrouds and tie it closer to the base of the rocket... Well, perhaps another time.
 |
 |