| Construction Rating: | starstarstarstarstar |
| Flight Rating: | starstarstarstarstar |
| Overall Rating: | starstarstarstarstar |
| Manufacturer: | Saturn Press |
Brief:
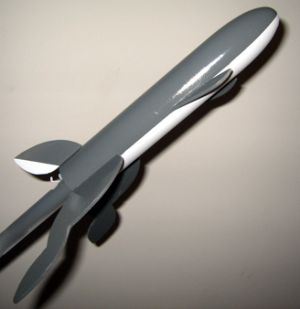
Single stage model that looks like a rabbit.
Construction:
Peter Alway provides plenty of parts in a list on the plan but most of them can be found in a Baby Bertha kit. (Is there anything you cannot do with a Baby Bertha?) You will have to supply some 3/32" or 1/8" balsa for the legs and tail. You will also need some cardstock for the ears. You could use the kit card from the Baby Bertha for that.
The plan calls for 7" of BT-60 for the body of the anti-carrot missile so you will have to trim 1/2" from the stock tube. (You can use this tube to make a ring fin in an Estes Sprite-like build ala the FlisKits Tumbleweed.) Once that is done, build the motor mount and install it per the Estes instructions. You can also use the Baby Bertha's shockcord and mount or upgrade as you see fit (Kevlar cord, etc). I used Titebond II and double glue joints throughout construction.
Cutting out the legs and tail comes next. Trace the patterns making sure they are aligned with the grain direction and cut them out. It looks like it would be hard to do with the many curves but it just takes some care to make the cuts. The hind legs and tail are evenly spaced around the rear of the tube like any 3 fin rocket. The front legs go in line with the hind legs. Peter notes that you want them to be as straight as you can make them to avoid any squirrely flights--this is a rabbit rocket after all! I didn't see a measurement for where to glue the front legs on, so I turned the rocket with the tail in the air, and glued the legs on so that the paws were touching the table, even with the front of the body. I see now on reading the plan again that Peter says the front of the legs should go 1/4" past the front of the tube.
The ears are traced and cut out of cardstock and glued to the nose cone. I painted mine before attaching them.
Finishing:
Peter gives the following tips for finishing: Paint white base coat. Leave white or mask off tail and spray paint upper side with appropriate rabbit color of your choice. I painted the ears (except where glue goes) separately, scraped paint from glue area on nosecone, and glued ears on last.
This is the sequence I followed, using Bugs Bunny as my inspiration for the color. I used America's Choice brand spray from Home Depot (made by Rustoleum) in flat white and smoke gray. I then used a thick black Sharpie to draw on the eyes, whiskers, nostrils, and philtrum (the technical term for a rabbit's mouth--who knew?) Because I always forget them before I paint, I added the launch lug last. I cut the lug provided in the Baby Bertha kit in half, and hid them in the joints between the legs and body.
Construction Rating: 5 out of 5
Flight:
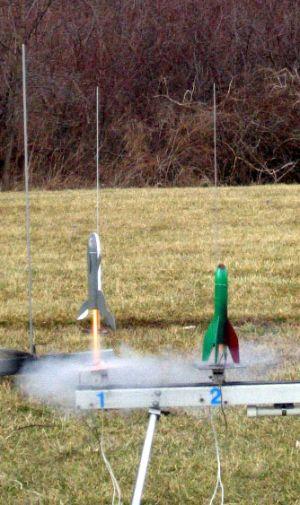
I flew my rabbit rocket at NARHAMS's KATE-3 section meet. The first flight was a shake down on an A8-3. Prepping the 12" Estes plastic chute was easy, just a few sheets of wadding, fold up the shroud lines, pop on the nose cone, and fly. The model flew very straight, arcing over in the light wind, and was recovered safely. I was worried about losing an ear because I didn't pay attention when I was painting and ended up putting the shockcord attachment ring right between the ears.
Later on I flew the rocket again on another A8-3 in the drag race competition. Because there were only 2 team entries, it was one flight takes all. My rabbit leapt of the pad first to gain a point and stayed up the longest (due to a shockcord failure of the competition) to earn me a 1st place finish. One club wag noted that it was the turtle who was supposed to win.
I flew it a third time that day, again on an A8-3 for a group of Cub Scouts. The idea of a rocket that looks like a rabbit really seemed to excite them, but it doesn't take much to get a group of cub scouts excited, does it? There was a strong gust of wind as the model coasted to apogee and spun it around. You may want to make sure you fly your rabbit in low wind conditions.
Recovery:
Recovery on the 12" Estes chute was adequate for a rocket of this size. Nothing broke on any of my 3 flights and the braided elastic (not the new rubber ones) held up well.
Flight Rating: 5 out of 5
Summary:
This is definitely a goofy rocket plan. It does make a nice looking, nice flying model that would be good as a small field demonstration flyer. You should be able to fly it on any of the motors suitable for a Baby Bertha so high flights on C6-5s should be easily made.
Overall Rating: 5 out of 5
 |
 |