Plastic Model Conversion 21st Century Toys - F-104 Starfighter Modification
Plastic Model Conversion 21st Century Toys - F-104 Starfighter
Contributed by Dick Stafford
 Brief:
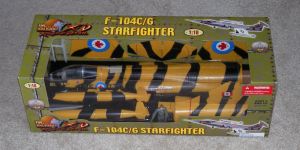
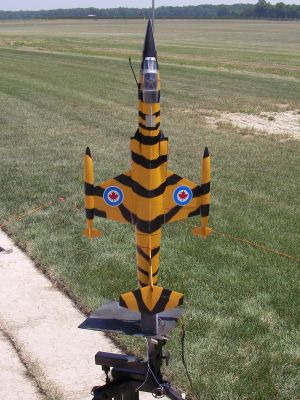
I bought this huge 1:18 scale F-104C kit from Sheri's Hot Rockets. It is almost 39" long (including the nose antenna), comes pre-built with only a few snap together sections, and is highly detailed. Moreover, they come pre-painted so I was pretty sure mine would look nice. They come in classic USAF silver, Vietnam-era camo, and Canadian tiger stripes. I'm plenty patriotic, but I love them stripes!
I haven't done many PMCs and am looking forward to seeing what others on The Rocketry Forum are doing to convert this model. Mine sports a 29mm motor mount and rear "zipperless" ejection.
Modifications:
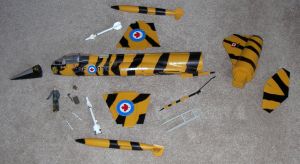
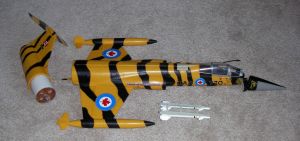
The model is more of a toy than a builder's kit. There were two main body sections, a nose cone, wings, wing pods, and a bunch of small detail items. I immediately decided that it should separate where the tail section mates with the front body.
Disassembling the body section was fairly difficult. There are several screws hidden underneath plastic plugs. I think these helped more on re-assembly than disassembly. Getting the plugs out to reveal the screws was itself difficult and I damaged several of the plugs as well as the surrounding plastic. Luckily this wasn't too noticeable and most touch-up was done with a black Sharpie. Once the screws were out, I carefully pried the sections apart. The stabilizer on the rear section was the most difficult and held some risk of damage. I got lucky.
 Given the location of the chosen separation point, I pretty much had to go with rear ejection. I then started fitting tubes to see what I had available and what would give the most room for recovery stuff. Others found BT-70 was a good fit, but I didn't have any on hand. (You can read the TRF link in the intro to see what others are doing to convert this model.) What I did have was Loki 3” phenolic liner and the associated paper casting tube stock.
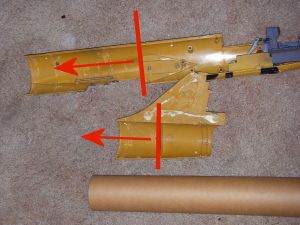
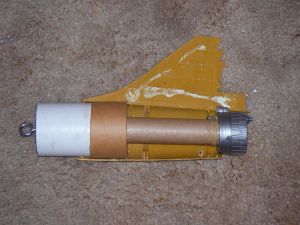
To get this to fit, however, some surgery was required. I started work by grinding out the end pieces and all internal protrusions from the inside of the main body and the tail section (see attached photo). This was accomplished with a Dremel cut-off disk and sanding attachment. The rear landing gear was of course removed, and as you will see the doors provided a convenient access point to help in assembly and for attachment of the launch lug. The front gear was kept, mainly because all forward-mounted weight was helpful. I retained the plastic jet nozzle in the rear, grinding it to fit when the tail section was assembled.
Construction:
Parts list:
- The F-104 plastic model, of course
- Loki 3” phenolic liner and associated paper casting tube (~2.5” OD)
- ¼" tubular Kevlar
- Giant Leap phenolic 29mm tubing
- One 2.5”-29mm CR (modified Giant Leap 3” ring)
- ¼” ply for bulkheads (3)
- Eyebolt with hardware for shock tether/chute attachment on tail section
- Long bolt (head cut off) and suitably sized washer for positive motor retention
- Kevlar twine to help attach the bolt to the motor tube
- 48” lite-nylon ‘chute (portable between rockets)
- Lead shot (NC weight)
- Small bolt to help hold the nose cone on
- First-Fire igniter tube and basswood spacer
- Plastic cement for plastic-plastic joints, Gorilla glue for plastic-to-anything else, and epoxy for nose cone weight and motor retainer
Since I haven't fully recovered from my HPR days, I decided to go with a fairly standard "zipperless" scheme as shown on ROL INFOcentral's page on Anti-Zipper Design. There is a section of the phenolic tube in both the body and tail sections and the casting tube was used as a shoulder on the tail section. The 29mm motor mount extends from the top end of the coupler to the rear of the model and is centered with a single ring. The motor tube terminates on a home-made bulkhead over the eyebolt retaining hardware. The top of the motor tube and the bulkhead are drilled to allow it to pass gas. I normally would drill holes with the equivalent cross sectional area as the 29mm tube. The tube itself got enough holes, but I was afraid of weakening the bulkhead so I cut back on the number there.
 Motor retention is via a bolt (with its head removed) that is epoxied to the rear of the motor tube. For some added support, I first wrapped Kevlar twine around the tube and bolt.
The parachute tube is installed in the main body. I was a little worried about the tube pulling out since I knew there was going to be a lot of nose weight. As a result, the ¼” tubular Kevlar® is attached to a bulkhead that is mounted just above the main support bars that hold the body section together. These are just above the top of the tube. The Kevlar® runs through another bulkhead that is mainly used to seal the tube.
After the innards of both top and body sections were individually complete, they were glued in at the same time using Gorilla glue. This ensured that all the parts aligned properly.
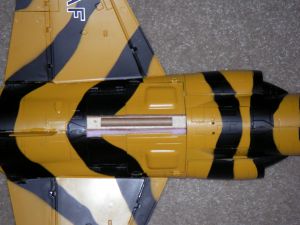
 I used a section of a First-Fire igniter tube as a ¼” lug. A basswood spacer is attached to the parachute tube through the model's rear landing gear bay. The lug is then glued to that. One bay door was trimmed to fit and both are held closed with clear packing tape.
I knew this was going to need lots of nose weight. Various opinions and computations bounced around on TRF. People talked of CG/CP, cardboard cut-outs, and neutral-points. TRF member ZOG43editor reported via George Gassaway that, on a 1/32 scale F-104 model, the CG should be no further than 1/2" aft of the leading edge of the wing root. He guessed that the CG on this bigger model should be no more that 3/4" behind the leading edge. The actual NP was a bit further back, but I stuck with 3/4”.
As I pondered filling the nose with lead shot and epoxy, I also began to worry about it coming off at ejection time. I decided to add a bolt mounted from the inside of the body section that would also be embedded in the lead/epoxy slurry.
 The final specs: Fully loaded with motor, recovery stuff, ~7oz of lead, CG 0.75" behind leading edge of wing: 55.4oz!
Flight and Recovery:
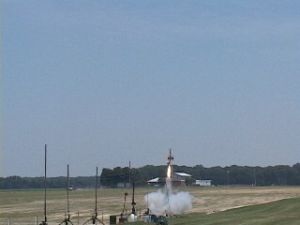
After hearing of my planned G77 flight, someone offered up an H128 and I bit. At first things didn't look so good. Although I had designed the motor mount to allow a longer motor, I'd never test fit one and the vent holes interfered with the motor. However, after some fumbling with my Ibeblip Engineering clamp-on thrust ring, I made it work. And it still balanced close to 0.75" behind the leading edge of the main wing's root. Only about half the ejection powder was used as there isn't much area to pressurize.
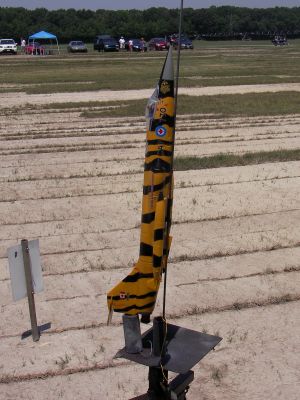
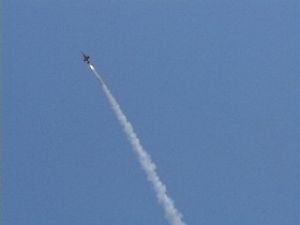
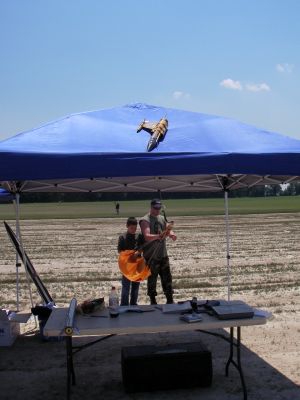 The boost was quick at about 20 degrees off vertical. I think this was due to rod whip and using a rail would have resulted in a vertical flight. The F-104 was stable! After burnout, it flattened out and tried to fly. Ejection occurred at about 6 seconds as planned. One fin came off, probably due to an abrupt stop at the end of of the shock tether and a poor plastic cement job. Anyway, nothing was broken, just disassembled. Then, it landed softly on top of the LCO tent!
Summary:
This is a great looking and fun build. If I were to do it again, I'd consider using the lighter BT-70 and a more classic LPR-style rear ejection scheme to reduce weight. It might fly on a G77, but I'm happy I didn't try on its maiden flight. I'm still programmed to think that I can always use a bigger motor. Unfortunately, I can't expect people to donate motors. One day it may go up on a G77.
 |
 |
|
|
Christian Schmelzer (November 4, 2023)
Very nice work! Many thanks for the detailed report. You don't happen to still have the parts from the Starfighter's main landing gear?
Best, Christian