| Construction Rating: | starstarstarstarstar |
| Flight Rating: | starstarstarstarstar |
| Overall Rating: | starstarstarstarstar |
| Manufacturer: | Public Enemy  |
 Brief:
This is your basic high power rocket. It would be great for L1 or L2 certification attempts.
Construction:
It came with a 36 inch body tube and an 18 inch payload bay, the fins are 1/8" Baltic birch, the centering rings are fiberboard but once you have a layer of 15 minute epoxy on there good and strong, the motor tube was a 38mm and the parachute is an orange 36 inch parachute.
The way the instructions tell you to assemble the motor mount wouldn't work so I set the instructions aside and built the rocket without them. I first began by cutting out the fin slots. The fin slots were already precut but not all the way. Then I began work on the motor mount I began by epoxying the notched centering ring at the top of the motor mount and let that cure. Then after it dried, I glued the second centering ring on. I put the motor mount assembly in and tacked the fins in place with some CA and let them dry. Then I pulled the motor mount assembly out and put epoxy fillets on the motor tube and fin tabs. I also covered the motor tube in epoxy while doing this to make sure the bond was extra strong and make the motor tube stronger. I also epoxied the third centering ring onto the back. After doing all that, I slid the 3/8" nylon strap through the notched centering at the top like on PML kits and then epoxied the piston strap to the motor tube. I folded up the shock cord and put it into the motor tube and epoxied the motor mount assembly into the BT. Since the slots went all the way to the end of the BT, I used rubber bands to prevent the BT from spreading out while epoxying the BT to the aft centering ring. I put the epoxy fillets on the outside and the booster was complete.
Next came the payload section, which started with epoxying the eye bolt into the bulkplate. Then I epoxied the bulkplate into the coupler for the payload pay. The last step was to epoxy on the 3/8" copper launch lugs on.
Overall this rocket was fairly easy to build and would be good for a second or third mid/high power rocket. There are no cons for construction of this rocket.
Finishing:
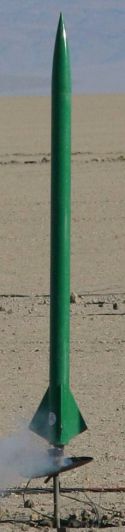
I try to do a different paint job from everyone else. How often do you see an all green rocket? Rarely. So I decided to paint my Performer all green. The finishing was easy. I put two coats on sandable primer and then I put on about 6 to 7 coats of green until it was perfectly glossy smooth. There are no cons about finishing this rocket besides it taking a lot of paint.
Construction Rating: 5 out of 5
Flight:
I choose the I154J for the first flight of this rocket. It was an awesome and perfectly straight flight to about 3500 feet. It was also the only all green rocket at XPRS IV 2005, I think. For the next flight I plan on using a H148 to test dual deployment, then an I195, I366, I300, and I284.
Recovery:
For only a 36 inch parachute and launching in fairly windy conditions, the rocket drifted about 3/4 of mile. I would say that the parachute is perfectly sized for this rocket and brings back the rocket nice and safely.
Flight Rating: 5 out of 5
Summary:
This is a great rocket. If you are on a tight budget and looking for a fairly good size rocket, then this is the rocket for you.
Overall Rating: 5 out of 5
Other Reviews
- Public Enemy Performer By Bert Garrison
( Contributed - by Bert Garrison) I am quite fortunate to live in the High Desert of California. Only 90 miles from the Lucerne dry lake, home of ROC , Rocketry Organization of California. While at one of my first group launches I met Roy Weid of Public Enemy Rockets . He always shows up with his trailer of bargain priced rocket kits. I picked up the 3" ...
 |
 |
Flights
|
|
K.A.C. (May 12, 2005)
|
|
R.B.W. (May 2, 2003)