| Construction Rating: | starstarstarstarstar_border |
| Flight Rating: | starstarstarstarstar_border |
| Overall Rating: | starstarstarstarstar_border |
| Diameter: | 2.10 inches |
| Length: | 42.00 inches |
| Manufacturer: | Public Missiles  |
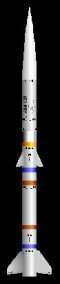
| Style: | Scale |
 Brief:
This scale model uses a 29mm motor mount for midpower to high power motors, and uses a parachute and PML's piston for recovery.
Construction:
The construction of the AMRAAM was much easier than I had predicted. The packaging was neat and informative. All of the parts were in the kit and in perfect shape.
The kit is made of a PML 54mm phenolic tube, 8 G10 fins, a 29mm phenolic tube for the motor mount, 2 thick plywood centering rings, piston retaining strap, piston, shock cord, 24" parachute, thick plastic nose cone, and a copper launch lug (which I cut in half for better support).
The instructions were not anywhere near what they could have been. They took up the equivalent of one piece of paper, and assumed a lot. I was lucky to have built mid-power rockets before so knew how to make good bonds with epoxy, etc. The instructions did have several useful diagrams.
One problem I had was that on the lower set of fins I could not tell which end went through the rocket and which end stuck out. They were very similar, but different enough to make a difference. I looked as closely as possible at the diagram provided and then tried what looked more like it. I'm still not sure if I did the right one! But the only time I think it looks odd is when it is held up to my Estes AMRAAM (of which I have know nothing of scale accuracy).
One thing I did like about the construction was materials. This was my first experience with Phenolic and G10. The materials weigh a lot more, but they are stronger than plywood and paper. The copper launch lugs were also very nice. I used 60 minute epoxy throughout construction and ended up with a very strong-seeming rocket.
The AMRAAM, with the exception of the fin problem mentioned above, was very easy to use. The upper fins fit perfectly in their notches, but the lower fins left a small bit of fin slot gap showing. I epoxied a small square of paper over this hole and spread epoxy over it. I sanded it once and now you can't see it, so no big problem. The AMRAAM didn't require any difficult construction techniques or special tools. Because it is promoted as a good mid-power/low-highpower rocket, and therefore a logical first high power rocket, I think the instructions could be made clearer. Overall a very nice kit.
Finishing:
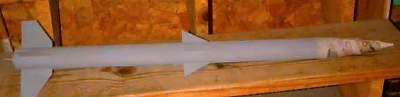
Finishing this model was not overly-difficult. The G10 fins are already nice and smooth, but the tubes have those nasty spirals which require a lot of filling for a decent finish. I used several coats of grey primer to smooth out imperfections (using white for the nose). In the instructions it tells you to look for decal strips for the colored strips, but I just painted mine on. The decals also proved to be very nice. I have no complaints about the finishing of this rocket.
Construction Rating: 4 out of 5
Flight:
The AMRAAM kit recommends F-H motors. Because of its high weight I would recommend flying it on high thrust F motors (F62, F80), or just sticking with G's and H's.
The first flight was on a G35-7, which worked great. I think that any G or H motor should work fine, except for the really long burn G's (G25, G33) which might not have enough kick for this model.
The AMRAAM is the easiest to prep mid-power rocket I have. Because the piston eliminates the need for recovery wadding, all that is required is to pack and insert the chute. Motor retention on my model consists of an Estes engine hook epoxied on (just like on Estes models). Although this systems sounds and looks simple and actually weak, it works fine. First I get a good solid friction fit with masking tape and make masking tape thrust ring on the rear of the motor, then I insert the motor and wrap the rear of it and the motor mount with masking tape. The masking tape acts as the primary system, with the engine hook as a great backup. On the first launch the AMRAAM's G35 ignited first try. The rocket leaped off the launch pad and went straight up. The 7 second delay was just right with this motor.
Recovery:
The shock cord on the AMRAAM is black flat elastic nylon strap, which attaches to the piston, which in turn attaches to a heavy duty piston-retaining strap. The chute has a large spill hole, but even with this it is near perfect for the AMRAAM. Recovery was a little slow, but overall it was great. The only damage to the rocket was some slight scorching at the base. This was my first mid-power rocket not painted black at the rear, so this was the first time I experienced this. It does give the rocket a sort of battle-worn look which I think is cool.
Flight Rating: 4 out of 5
Summary:
The AMRAAM overall is a great kit. It flies great, is a very strong and durable rocket, and the piston system eliminates recovery wadding. However, the kit doesn't come with motor retention and the fins didn't quite fit right in their slots. None of these were major problems.
The PML AMRAAM was my first PML kit. I normally am against almost all high power kits because most of them require so many replacement parts that they aren't worthwhile. While the AMRAAM has flaws, I still recommend it for those who don't enjoy designing their own rockets.
My only advice for someone building this kit is to add positive motor retention and use a good quick-cure epoxy. Other than that, have fun flying!
Overall Rating: 4 out of 5
 |
 |
Flights
|
|
D.J.D. (October 2, 2001)
H.D.C. (May 4, 2006)
|
|
T.B. (September 1, 2000)