| Construction Rating: | starstarstarstarstar_border |
| Flight Rating: | starstarstarstarstar |
| Overall Rating: | starstarstarstarstar_border |
| Published: | 2010-11-13 |
| Manufacturer: | Public Missiles  |
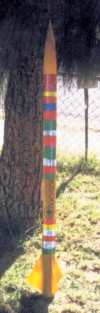
![[Rocket Pic]](/images/archive/images2/rp_pml_quasar1.jpg) Brief:
Single stage, all phenolic construction rocket for 54mm, 38mm and 29mm motors.
Recovers with bright blue and orange 34 inch parachute. Uses piston recovery
system too.
Brief:
Single stage, all phenolic construction rocket for 54mm, 38mm and 29mm motors.
Recovers with bright blue and orange 34 inch parachute. Uses piston recovery
system too.
Construction: All parts are there, and there are many. My first impression was that the kit is definite quality. Everything is strong and precision machined. The fins are G10 phenolic. Strong indeed. The body tube is kraft phenolic. In case you haven't used phenolic yet, I believe it's what you get if you take a kraft paper tube and impregnate the paper with epoxy. You get a strong tube that can stand high power motor speed and pressure, but may be brittle material. Take care not to drop or bang it.
The nose cone is a standard PML ogive hollow plastic cone for the 2.56 inch diameter tube. The chute is rip stop nylon, made up of eight gores of alternating blue and orange. Very bright and pretty. The shock cord is 1 inch wide flat white elastic, 5 feet long.
There is a piston recovery system, with the piston being phenolic with a plywood bulkhead. The bulkhead houses a screweye with bolts to keep it in place, and attached to it and the main motor tube is 5 feet of 1 inch wide web strapping--the piston strap. The shock cord attaches to the piston as well, making the shock system about 10 feet long overall.
The launch lug accepts 1/4 inch rods and is 4 inches long and brass.
The instructions have a few pictures, but could use more. This isn't a beginner's kit. I'm just the type who likes pictures and relates to them well. However, the instructions are written well. I'd like to see motor recommendations, though. However, I used Rocksim 3.0 from Apogee Components to choose the best motors.
 The tips were good in the instructions, as the parts fit very
tightly and you can really mess up if things are done in the wrong order. For
example, when to epoxy the centering rings. If you do it before the fins go in,
you might prevent being able to put the fins in their slots. I sanded some of
the parts to loosen the fit a little. After test fitting the piston, I found
that I had to strongarm it to remove it and figured that an engine's ejection
charge wasn't that strong. So I sanded it until the fit was smooth. I used an
orbital sander for this.
The tips were good in the instructions, as the parts fit very
tightly and you can really mess up if things are done in the wrong order. For
example, when to epoxy the centering rings. If you do it before the fins go in,
you might prevent being able to put the fins in their slots. I sanded some of
the parts to loosen the fit a little. After test fitting the piston, I found
that I had to strongarm it to remove it and figured that an engine's ejection
charge wasn't that strong. So I sanded it until the fit was smooth. I used an
orbital sander for this.
Finishing: There is a large, neat-looking decal, so I used it. It wasn't as cooperative as other decals, lumping or self-sticking, so I had to resoak and reapply to get it to work. But once it was on and flat and looks good. The body, nose, and fins are spray painted yellow, after a sanding and primer coat was used to smoothen over the spiral grooves. I also applied bands of metallized mylar craft paper around the body tube to add brightness and to help me locate it on the ground. The model looks nice. I especially like the effect of being able to see some light through the G10 fins.
Construction Rating: 4 ½ out of 5
![[Level 2 Cert Flight]](/images/archive/images2/rp_pml_quasar3.jpg) Flight: The only
recommendations is H through J. I did, however, test fly it with a G80-4 to
test the overall function, and the piston system worked great. PML does
recommend a little wadding above the engine to prevent piston strap failure.
The rocket isn't too hard to prep. To retain engines, you get interlocking Kwik
Switch motor tubes that screw together to allow different size motor use.
Aftward, however, there is no actual retainer supplied, so I use tape plus a
loop of piano wire that is bolted through the centering rings in the permanent
inner tube. This beauty flies STRAIGHT as heck. I can't wait to try larger
engines this weekend at my club's main launch.
Flight: The only
recommendations is H through J. I did, however, test fly it with a G80-4 to
test the overall function, and the piston system worked great. PML does
recommend a little wadding above the engine to prevent piston strap failure.
The rocket isn't too hard to prep. To retain engines, you get interlocking Kwik
Switch motor tubes that screw together to allow different size motor use.
Aftward, however, there is no actual retainer supplied, so I use tape plus a
loop of piano wire that is bolted through the centering rings in the permanent
inner tube. This beauty flies STRAIGHT as heck. I can't wait to try larger
engines this weekend at my club's main launch.
Additional Note: On Saturday, February 22, 1999, this is the PML Quasar on a J350-LW, on its way to my Cert 2 flight of 6500 feet. Cool, isn't it? Amazing what a good photographer can do. This is courtesy of my husband, Randall Whitlock. It makes it look mightier than the static shot.
Recovery: In case you haven't seen the piston recovery system, you have a web strap affixed to the permanent motor tube to the piston, which is a movable bulkhead fitting inside the main tube like a coupler. The piston then connects to the shock cord, which connects to the screweye in the bulkhead at the aft end of the 9-inch payload section where the rocket separates. The parachute is 34 inches in diameter with a 3 inch spillhole.
Flight Rating: 5 out of 5
Summary: Gorgeous, strong. But better read the instructions a couple of times as I did. You may need to gently sand parts for smooth fit, too. Good value for the money. I highly recommend this one.
Overall Rating: 4 ½ out of 5
Other Reviews
- Public Missiles Quasar By Ron Johnson courtesy of WildRocketry.Com
(by Ron Johnson courtesy of WildRocketry.Com) In selecting my first High Power Rocket and being a new to HPR, with little knowledge of materials and techniques, I wanted something that was easy to build yet robust enough for my Level 1 certification. I selected the PML Quasar. The finished Quasar is 56” long, weighs about 2 ½ pounds without motor. The kit comes with all ...
 |
 |
Flights
|
|
M.E. (June 30, 2003)
|
|
L.V. (November 24, 2002)