Modification Commander (x3) Modification
Modification - Commander (x3) {Modification}
Contributed by John Thro
| Manufacturer: | Modification |
 Brief:
I purchased three Quest Commander kits on clearance at Hobby Lobby, for a total of about $8.50. Since I had three of everything, I decided to use all three body tubes to build one long Commander. Also, I changed the fin configuration from 3FNC to, as it turned out, 8FNC.
Modifications:
I assembled the motor mount according to the kit instructions, using white glue.
Since the engine block has a v-notch cut into it for mounting the shock cord while still allowing the motor mount to fit into the BT, I also strengthened the engine block with thin CA. This is a pretty standard step for me anyway, but it's worth noting here since the engine block's structural integrity has been compromised by cutting into it. The motor hook is mounted in the usual Quest/Estes fashion, by inserting it into a 1/8" slit cut into the motor tube just below the engine block.
I then glued the motor mount into the first body tube with white glue, leaving 1/4" protruding from the end of the BT according to the instructions. This is a near-minimum-diameter rocket, so there are no centering rings.
Here's where I deviated from the stock assembly instructions for the Commander. I took one of the spare motor tubes and cut it in half by marking the midline with a pencil, then lightly pressing the blade of my hobby knife against the pencil line while turning the tube several times. After a few turns, the tube was cut nicely in half, making two body tube couplers. Using white glue, I glued one coupler into the top end of the first body tube, and the second coupler into one end of the second body tube.
Once those joints were dry, I then used white glue to glue the second and third body tubes onto the couplers, giving me a 30" long body. Here's another different technique that I used for the first time on this model, since the couplers were fairly short. I fitted half a sheet of copier paper around the first body tube and taped it together to make a snug wrap that could be slid along the body tube. Then at each body tube to body tube joint, I slid this "alignment wrap" over the joint until the glue dried. What I intended was for the body tubes to be aligned really well at each joint, and it looks like it worked perfectly. Also, the seams look really nice, too. Nothing out of round, and no gaps between the ends of the body tubes.
The Commander's instructions tell you to feed the shock cord back through the motor tube before you glue the tube into the body, so it won't accidentally get glued into the body. Now, since I had a 30" long tube for the body, I needed to add two more sections to the shock cord. Using the Kevlar cords from the other two Commander kits and tying them together and then to the end of the Kevlar cord already attached to the motor mount, I had a Kevlar cord that extended about 3" past the end of the body, once I fed it forward through the body so I could attach the elastic shock cord to it.
I tied a 1" loop in the end of the Kevlar and then tied the elastic cord to the loop. That way, I didn't have 3" of nice thin Kevlar ready to slice through the end of the body tube. For the elastic part of the shock cord, I tied two of the provided 18" lengths of elastic together. Then I tied the nose cone to the end of the elastic per the standard instructions.
All that was left were the fins.
The stock Commander has 3 die-cut balsa fins set 120 degrees apart. Two fins are larger and swept forward, and the fin that's shown as the vertical tailfin on the packaging is smaller and swept backward. I decided to use 4 of the large fins set 90 degrees apart, with two horizontal fins swept forward and two vertical fins swept backward.
Later, after using VCP to find the CG and CP of this rocket, I found that it was *extremely* overstable, with the CG more than 10 body diameters (calibers) in front of the CP. To reduce this, I did two things: I reduced the span of the 4 large fins by cutting 1/2" off their tips, and I added a set of 4 of the smaller fins from the Commander kits right at the CG of the rocket. Reducing the span of the large fins didn't really move the CP very much, although the model does look better with those fins a little smaller. Adding the smaller fins further forward on the body did the trick, though. VCP says that the CG is now about 3 calibers in front of the CP. Now very nicely stable, but not extremely so, so I went with this configuration.
Sanding and mounting of the fins is standard, although I ran medium CA glue along all fin edges to harden them, and then sanded the edges smooth. I mounted the fins to the body using CA glue and then added fillets of white glue in two passes to get decent-looking fillets. I also used a technique I learned here at EMRR, which is to punch small holes in the BT along the line where the fins will be mounted, to strengthen the bond by creating glue "rivets" along the BT. This also causes the CA to soak into the paper of the BT at each "rivet" point, which should strengthen things even more.
Construction:
This kitbash uses:
- 3 10" long Quest T-20 white paper body tubes (20 mm OD)
- 1 Quest 18 mm x 2.75" motor mount tube, cut in half and used as body tube couplers
- 4 of the larger Commander balsa fins
- 4 of the smaller Commander balsa fins
- 1 Quest 18 mm x 2.75" motor mount tube, used as the motor mount tube.
- No centering rings were supplied or needed, since this is a near-minimum-diameter rocket.
- 1 of the supplied motor retention hooks was used.
- 3 12" Kevlar shock cords from the Commander kits.
- 2 18" elastic shock cords from the Commander kits.
- 1 stock 20 mm OD x 2.5" (not counting the shoulder) plastic nose cone.
- 1 stock 1" x 24" hot pink plastic streamer, attached with a snap swivel for ease of replacement.
PRO's:
Packaging was good, no part missing, fit of parts was fine. Instructions are the standard Quest instructions, good illustrations and very easy to follow. Very easy build, even bashing three kits with my limited experience.
CON's:
Balsa fins were cracked in one of the three kits used in this project. Balsa was pretty soft and flexible. Die-cut fins were not cut very cleanly, but at least they were all cut to the same size in all three kits.
The only special technique was the paper tube alignment wrap I used because of the rather short couplers that were made from a spare motor mount tube.
The supplied BT's were nice shiny white paper tubes. I did no finishing other than sanding the fins as described above. I generally fly my rockets without painting them, but I'll probably prime/paint this one at some point.
Finishing:
Flight:
Recommended motors for the stock Commander are A6-4 (first flight), A8-3, B6-4, C6-5, C6-7.
Given the increased weight over the stock Commander and the fact that I didn't have any A6-4's, I used an A8-3 for the first flight.
Flight prep was the usual insert wadding - I used 3 squares of Estes wadding, fold and roll up streamer, stuff shock cord and streamer into rocket, put on nose cone. Motor retention was by the supplied motor hook. I used Estes motors, igniters, and plugs.
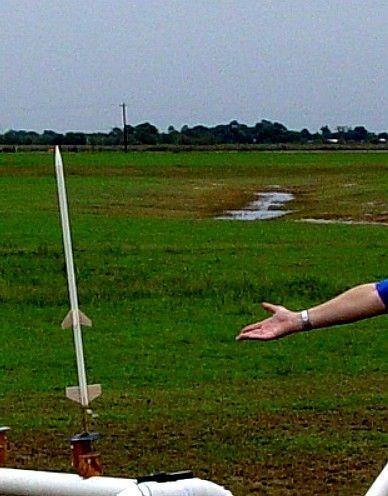
First flight was at the Challenger 498 club launch on 10-23-04, an intermittently rainy day at Rushing Park in Katy, Texas. Flight on the A8-3 was straight and low, to maybe 150 feet. Ejection was slightly past apogee, after rocket had arced over.
Shock cord was three 12" sections of Kevlar and two 18" sections of elastic tied end to end, with Kevlar mounted to the motor block and the plastic nose cone tied to the end of the final piece of elastic.
I installed the provided streamer at a knot in the shock cord about 2" below the nose cone, using a snap swivel for easy change-out. Recovery on the streamer was fine but faster than I like, which is true *every* time I use a streamer - I really prefer parachutes. Winds on the day I flew were pretty variable, so I used the streamer instead of a parachute. Although the streamer deployed just fine, the elastic shock cord was looped around the forward fins, so the body came down somewhere between horizontally and tail first. The rocket landed on an asphalt parking lot fins first, and about 1/2" from the back of one rear fin broke off along the grain. There was no other damage. This was the only flight of the day and the only flight so far.
Summary:
PRO's: I enjoyed building this rocket. It was my first kit modification, and I had to think a little bit more than usual about the build. This is a *good* thing! When I took it out of my van at the Challenger club launch, several people asked me what it was and told me how cool it looked, which is *also* a good thing!
CON's: Overall, I can't really think of any major CON's.
Related Products
 |
 |