| Construction Rating: | starstarstarstarstar_border |
| Flight Rating: | starstarstarstarstar |
| Overall Rating: | starstarstarstarstar_border |
| Manufacturer: | Quest  |
 Brief:
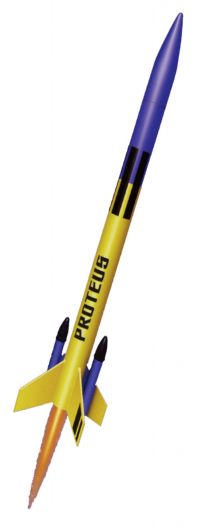
The Proteus is a Quest Skill Level 2 rocket kit it features; Cool sounding
rocket design features two simulated strap-on boosters and flights to 700 feet.
It is 18.5 inches in length with a 1.37inch diameter and should weigh less then
2 oz when finished. The usual stuff included, plastic nose cones, die cut balsa
fins and a plastic parachute. Recommended Motors: A6-4, B6-4, C6-5 When I saw
this rocket with the "simulated strap-on boosters" I knew that they
should be REAL strap on boosters, so I bought the rocket with this in mind.
Construction:
The kit was from Hobby Lobby and contained all the correct parts and the parts
were all in perfect shape. One main body tube with two booster tubes. The fins
were 4 die cut balsa with leftover for the booster mounts. The centering rings
are a thin uncoated paper and the usual motor clip. The parachute is also the
usual plastic chute with string and adhesive discs. Quest Kits come with a very
nice shock cord system, Kevlar®
string that attaches to the motor mount and good amount of round elastic.
I read the instructions and they seemed to be complete and straight forward, the usual for Quest kits. I was already planning my changes as I read the instructions, I was not planning anything drastic just two 13mm engines in the boosters and extra nose weight to accommodate the extra engines.
The one complaint, suggestion, upgrade, whatever you want to call it, is that the centering rings on this kit in my opinion were two flimsy. I would have like them to be just a bit thicker, but I used them anyway, I did change the glue for the rings. The instructions suggest using regular white glue, I used Gorilla Glue on the rings as it foams and expands and I feel that it really strengthened the rings. I could be wrong about that but the weigh penalty is low for the added piece of mind.
I also really like the nose cones with this kit, as they were not your run of the mill cones. The booster cones have a very nice knurl around the base and the main cone is not the usual ogive and they were all clean of extra flash.
When the kit was complete I tested the CG on the rocket and marked it. I then added thrust rings to the boosters and put in the engines that I was planing on using. I then added nose weight until I had the rocket balanced again.
 Finishing:
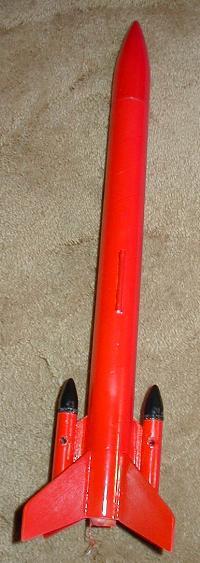
I gave the kit a simple paint job and was ready to launch. The paint stuck to
the main nose cone with no problem. I took off the booster cones as they were
in a nice shiny black plastic and I liked them just they way they were.
The kit comes with some nice self adhesive decals, I have not put them on yet but they look to nice.
Construction Rating: 4 1/2 out of 5
Flight:
I loaded two A10-3T into the boosters since the booster tubes were about 14mm I
had to add a couple of turns of masking tape to friction fit the motors. I did
not sim the rocket and was just guessing that the extra boast from the A10's
and the extra nose weight would require a longer main engine ejection delay so
I went with a C6-7.
I had made a 3 whip cluster clip for this launch and took the rocket to the pad. The launch went well but not perfect. The engines did not all light and the two that did were not at the same time. The right booster lit first and cocked the rocket on the rod then the main kicked in and off it went. Without power from both of the outboards the 7-sec delay was a little long but not too bad. The flight was a success and I went to prepare for a second flight when I found that I left the reset of the A10's at home.
From the flight that I had I would say that the C6-5 would be perfect on its own. I plan on flying it as a cluster again next month. I will post the flight logs then.
Recovery:
Flight Rating: 5 out of 5
Summary:
Overall I found this kit to be a lot of fun and easy to build the instructions
were done very well and the quality of the components was high.
Pro's:
- Can be used as is or clustered, Cluster configuration required only small modifications, cool nose cones, Kevlar® shock cord mount.
Con's:
- Whimpy Engine mount
Overall Rating: 4 1/2 out of 5
 |
 |