Estes Cosmic Interceptor
Estes - Cosmic Interceptor {Kit} (001351) [2013-]
Contributed by Mike Caplinger
| Construction Rating: | starstarstarstarstar_border |
| Flight Rating: | starstarstarstarstar_border |
| Overall Rating: | starstarstarstarstar_border |
| Published: | 2016-01-31 |
| Diameter: | 2.00 inches |
| Length: | 40.50 inches |
| Manufacturer: | Estes  |
| Skill Level: | 4 |
| Style: | Futuristic/Exotic |
 Brief
Brief
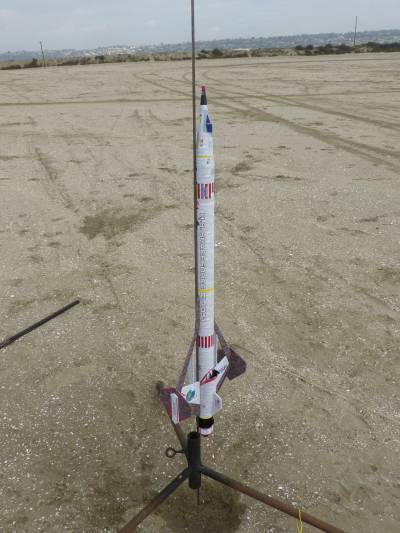
The Estes Interceptor, designed by Wayne Kellner and originally introduced in 1971, was perhaps the most iconic model rocket of its era. The kit was produced for 9 years and is fondly remembered by a generation of BARs (I had one but if I recall correctly never had the courage to fly it, it was just too pretty!) In 2008, after a dry spell of 28 years, Estes re-released both the original Interceptor and a 24-mm motor 1.5x upscale, the Interceptor-E, to the joy of the rocket community. But by 2011, everyone who wanted an Interceptor presumably had one, and Estes discontinued both kits. However, perhaps wanting to capitalize on their investment in nose cone molds, Estes released the Cosmic Interceptor, designed by John Boren, in 2012. About the only thing thing the newcomer has in common with the earlier kit is the Interceptor-E's nose cone and overall size; while the original Interceptor is basically a six-finned rocket with unusual fin shapes, the Cosmic Interceptor has two multipiece wings with a complex structure, an engine scoop, and an elaborate finned motor section.
I picked up the Cosmic Interceptor at a deeply discounted price on the Estes website in late 2015, so this kit's days may be numbered as well.
Components
The kit includes two sections of 2" body tube, a coupler, the Interceptor nose cone, a section of a little bigger than 2" tube for the engine scoop, three sheets of laser-cut wood and two of fiberboard, a long 24mm motor tube, centering rings, motor block and hook, a 36" elastic shock cord, a 24" nylon parachute, 1/4" launch lugs, and a sheet of water-slide decals.
Construction
The instructions are minimal but adequate. The marking guide for the motor tube is on the opposite side of the sheet from the motor tube instructions, which contain some critical spacing dimensions; this is unfortunate. Make a note of all of the dimensions before cutting out the guide. The instructions mention using a straightedge to assemble the three sections of the wing -- make sure to do this, as the alignment is important and the pieces do not line up perfectly by themselves. Also make sure to note details like the orientation of the rudders, which I managed to put on backwards initially.
I found the cutting and fit of the engine scoop and grill detail to be pretty challenging, especially getting the scoop to line up perfectly at the edge where it meets the top of the wing. It may help to dry fit everything and then glue the grill down first. I ended up with a small gap I filled with some glue.
The nose cone shoulder in my kit was extremely tight and required a great deal of sanding to achieve the proper fit. This may just be the luck of the draw with the molding process.
I built the motor mount stock, but filed down the front of the engine hook to insure that the closure of an Aerotech 24/60 case would fit. If you have any desire for larger motors than that, motor retention may be tricky with the fin detailing at the end of the MMT.
Finishing
One of the things that made the Interceptor so appealing was its multisheet decal set, containing US Air Force markings, maintenance instructions, and a lot of small detail. The Cosmic Interceptor decals are pretty lackluster by comparison. To make up for this, I used John Pursley's (accur8.com) vinyl skin kit for the Cosmic Interceptor, available on Ebay. This completely covers the model with thin, somewhat flexible vinyl; I believe the material is Papilio's inkjet contouring waterproof vinyl. It's easiest to apply the vinyl during assembly rather than all at the end. Per John's instructions, I prepped all of the wood components with a heavy coat of Krylon Crystal Clear and then sanded the surfaces and rounded all the edges. I also painted the nose cone with a coat of Rustoleum Painter's Touch gloss light gray. I started by applying the skins to the body tube, then assembled and skinned the wings, the strakes, scoop, and rudders (gluing each to the model as I went), and finally the nose cone. Getting the vinyl wrap to conform to the nose cone was quite troublesome. Fortunately the vinyl's adhesive, while it adheres well, can be carefully peeled up from a prepped surface if needed (and I needed to several times.) The only other painting was to the engine scoop grill and the motor aft fins, which I sprayed with Painter's Touch semi-gloss black before installation.
While I ended up with a few small gaps and wrinkles in the vinyl, overall the appearance of the model is very good, especially from 3 feet. John clearly put a lot of effort and imagination into the detailing, and it's well worth the price.
The vinyl doesn't add much weight over painting -- my model came in at 10.3 oz, and Estes estimates 10.1 oz.
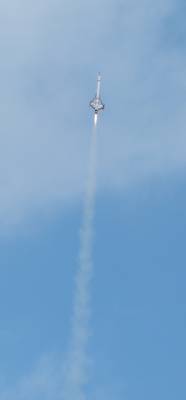
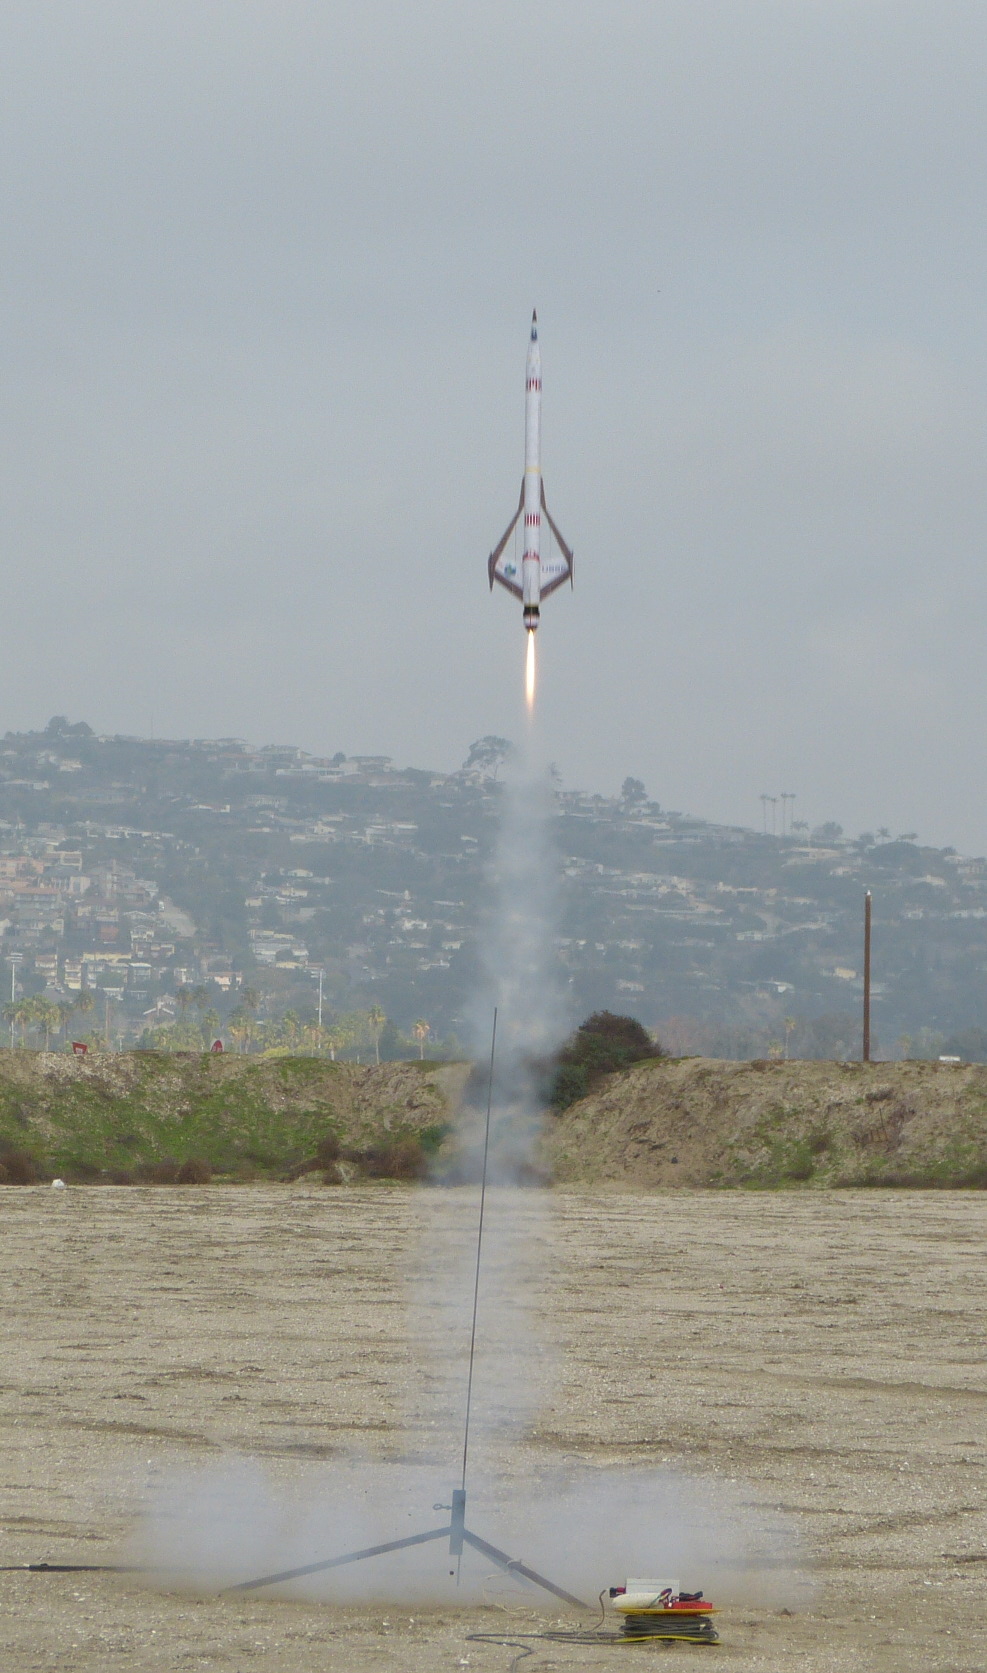
Flight
For the first flight, I chose an Aerotech E20-4. The boost was straight up, surprisingly so for a winged rocket, most of which have a tendency to weathercock -- the Cosmic Interceptor seemed to handle a 10-mph wind without issue. Ejection was less than 0.5 seconds early. Maximum altitude was 579 feet and the flight lasted 51 seconds.
Recommended motors are the D12-3, E9-4, E12-4, and E30-4. I'm skeptical that the E9-4 would be a safe choice except on very calm days. I'd have tested the kit on a D12-3 except I needed to address some issues identified during the first flight.


Recovery
The kit includes a 36" length of 1/4" elastic secured by the typical Estes tri-fold mount. In hindsight this isn't long enough: at ejection the nose cone snapped back and left an "Estes dent" in the BT, and also smashed in a corner of the nose cone and split it at the mold line slightly. (This may have happened because of the typical strong Aerotech ejection charge and the slight additional weight of the Altimeter 2 I was flying, but the shock cord still needs to be longer.)
The kit includes a good-quality red nylon 24" chute typical of larger Estes kits. It may even be a little oversized for this kit; the descent rate was around 12 fps. Fortunately the wind was fairly light and the model stayed on the field, barely.
Summary
Overall this is a nice kit, especially for the discounted price. The only significant issue is the short shock cord. It's definitely a builder's kit that will keep even an experienced rocketeer enjoyably occupied for quite a few hours. Accur8's skin kit was a worthwhile upgrade and sidesteps the need to fill all those wood surfaces. I was careful to make sure that the motor mount could fit an Aerotech F35 reload, and it'll be interesting to see how the model performs on that motor assuming I can figure out if any nose weight is needed. For now, it's a fine flyer on composite Es and I expect it would do well on the E12.
Related External Links
 |
 |
Flights


|
|
Steve Lindeman (February 15, 2016)
Very nice looking rocket. Have mine half finished but am going with a paper coating and then stock finish. Made a couple other modifications also. Modified the tube coupler and made it into a baffle and the anchor point for the recovery system. Also added some steel wool wire inside baffle to aid in trapping hot gas particles. Can't wait for the weather to warm so I can start painting.
Sponsored Ads

 - 47776017535")


|
|
Keoki Gray (February 4, 2016)
Yea! I've finished my Cosmic Interceptor--with John Pursley's outstanding vinyl skins, too--and have to agree completely with Mike Caplinger's review. I found them easy to use and the finished product is striking! Have not flow yet, but soon.
I also have a set of skins for a Cosmic Interceptor conversion to an upscale Vindicator, and a set for the "Twilight Interceptor" that I'm cloning (with a 24 mm motor mount). The skins get easier to use with practice, and the results have to be seen in person. If you are tired of filling/sanding/filling balsa, using the skins is a nice, new skill to cultivate.
Thanks for the review.
Keoki Gray