| Manufacturer: | Scratch |
Brief:
H-Pod is an extension (downward) of the I-Pod/J-Pod/K-Pod series of HPR tubefin designs I presented in the March 2008
issues of Sport Rocketry and Rockets. Like its big brothers, H-Pod uses 7 tubefins instead of the
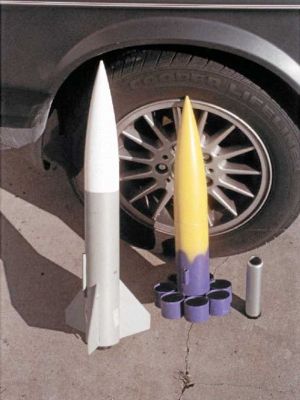
customary 6. Being 3 inches smaller than the popular 29mm mid-power LOC Onyx, H-Pod is one of (if not the) smallest,
lightest 38mm rocket you will find. It's lightweight because even with the huge (relatively speaking) 38mm 2-grain CTI
casing filling up the 9" body tube, H-Pod requires not a bit of nose ballast. H-Pod was designed to be the
smallest rocket flyable on the CTI 2-grain case, using the "stubbiness" rules outlined in the December 2007
Sport Rocketry article to enhance tubefin performance by reducing drag coefficient (Cd) to that of
"normal" rockets.
Construction:
A few tricks are needed to make H-Pod possible. First, the base of the 3" LOC cone is partly cut away to make
room for the recovery system. Second, a system of shim spacers it needed to make seven 54mm tube fins fit perfectly
around a 75mm body tube. Third, to handle the performance without shredding, the outer surface of the tubefincan is
lightly fiberglassed. Even with all this, H-Pod is easily scratch built, including cutting out parts and painting, in a
couple of hours.
Parts include: 9" of 3.0" LOC body tube, seven 1.75" pieces of LOC 54mm motor tube for use as the tubefins, 8" of LOC 38mm motor tube, two quarter-inch centering rings (38mm x 3"), a 3" LOC cone, 24" Top Flight chute, and 1.375" brass tube as launch lug (1/4" ID). Its only about $25-30 or so worth of parts.

Parts were cut from stock with a superfine (32 teeth/inch) hacksaw and $9 Home Depot plastic mitre box. 5-minute epoxy was used throughout. For first step, five of the seven tubefins (not all!) had glued to them a 1/4" x 1.5" spacer strip cut from 1/8" LitePly. Using one of the 2 tube fins without the spacer strip (were you paying attention?), the first tube fin is attached 1/4" from the bottom of the body tube with both tubes on a flat surface to assure perfect alignment. The spacer strips are used as the contact points to the adjacent tube fin (not to the body tube!). Then add the next tube fin to the assembly, aligning it with the first, and so on, until 6 have been added. Tubefins are epoxied to the body tube and to each other. The last tube fin may require zero, one or two spacer strips to fit perfectly, depending on your materials, and a bit of fitting and fiddling with sandpaper will be required to get a perfect fit.
The motor tube assembly is glued together in the usual way, with the aft centering ring 1 3/16" from the end and the forward centering ring 2 1/4" from the top. I anchored the recovery system to an 1/8" size eye-bolt screwed into the upper centering ring, so do that at this step and tie on the shock cord before installing. Motor tube assembly was installed in the usual manner. This means the motor sticks out about 1 5/8" from the back and even more when a 29mm motor with adapter is used. Not to worry, H-Pod has no balance issues and needs no nose ballast regardless of what motor is used.
Launch lug is glued on 1.25" above the tube fins and exactly in line with one of the triangular spaces between two of them--the launch rod has to pass through here, so try to pick a triangular space you haven't slopped too much epoxy into when attaching the tube fins. Lastly, the fin can must be reinforced for 500 mph flight by lightly glassing the outer-facing surface of each tube fin. I do this by mixing a dime-size gob of epoxy right on the tubefin, smearing it evenly, and then laying on a 3-3.5" strip of 1.5" glass tape, smoothing it to remove bubbles with a Band-Aid covered finger tip. Those who actually know the right way to fiberglass probably will have a better method. This creates a rigid, bulletproof fin can that resists rocket-shredding "tubefin flutter" at 500+mph.
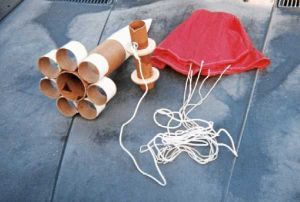
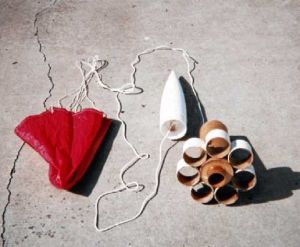
To modify the LOC cone, simply saw off the bottom half of the "hip" that fits into the rocket, leaving 1.5" or so. Create an anchor for the shock cord by tack-gluing in a piece of 1/2" dowel rod cut to exactly fit (use sanding to make it perfect) the cone interior just above the "hip". Make the glue joints secure by puddling more epoxy around it and pressing in around it on all sides lots of wood scrap and junk. The shock cord is tied to this anchor bar with a secure knot like a bowline. Good to attach the chute to the midpoint of the 8'-long piece of para cord used as the shock cord. Although several skeptics worried to me that the parachute would be stuffed past the dowel rod into the hollow cone on ejection, this really can't happen with the 3-4" cones and a wadded up chute. I do add a bulkhead behind the dowel rod on 5.5" cones, but its probably unnecessary.
Finishing:
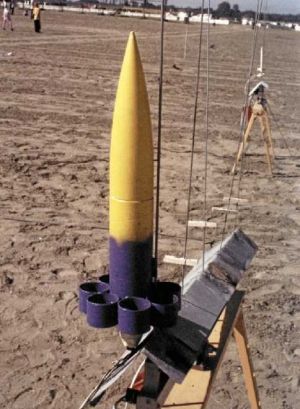
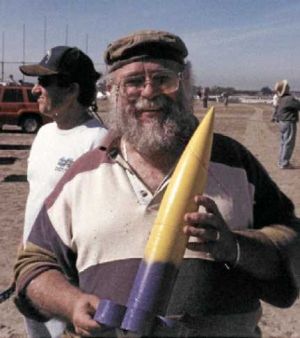
Finishing was with rattlecan Tamiya purple and yellow. As the photos show, I used a small Nomex®
protector also.
Flight:
Maiden flight was on the CTI H143SS-8 the H-Pod was designed for and couldn't have been better--perfect launch to
1683' (I used a tapped-on "parasite pod" for a Perfectflite Alt15 altimeter. I also flew H-Pod on a CTI
H153-8, CTI G79SS-7, and AT G80-4, giving climbs of 1852' (avg of 2), 1124', and 865', respectively. The simulation
calculated Cd values are plotted vs velocity on the attached graph, showing the classic inverse variation of drag
coefficient (Cd) with speed (=motor size) that is characteristic for tubefin designs. Cd is mostly constant for
"normal" finned rockets. You use this graph to select motors and delays for H-Pod or just use what I found to
work. The minimum motor I've tested is the E30-4 and F20-4. This F-motor is marginal, and I'd recommend no less than an
F50-4 for a decent flight (about 700'). The observed Cd(500) for H-Pod (drag coefficient at 500 mph) is 0.93 from this
graph, while the calculated value from the Dec 2007 Sport Rocketry equation:
Cd(500)= 1/([4.96/length above tubefins divided by diameter]) + 0.307)
This works out to Cd=0.87. Not bad for a simple equation that estimates tubefin rocket best drag coefficient (Cd(500)) from just external dimensions. At less than 1700' on an H143SS (or somewhat less on the similar AT H123), H-Pod doesn't fly too high to be a nice, inexpensive Level 1 rocket for those who like scratch building, and it flies well on less costly mid-power sport motors. It flew great at the June 2008 ROCSTOCK on just a G69-7.
Summary:
PROs: Easy and cheap to scratch build HPR rocket for sport and L1 cert. Honest and wind resistant. Ultra-portable and
durable--just toss in the trunk, no delicate fins to break off.
CONs: On its 24" chute, tiny H-pod can be hard to see at 1700-1800', at least for me. Limited choice of motors, due to size, but you don't want to try I-power anyway, it will shred for sure at the 600+mph it will produce. Tubefins hate Mach 1 (it has never been done, I think). You do need to glass the tubefins as recommended, unless flown only on G-H power over grass or the like.
Sponsored Ads
 SEM-KM-10")
 SEM-KM-11")
 (2pk) SEM-KM-10")
 SEM-KM-11")


 |
 |