Aerospace Speciality Products 18mm Streamer Duration
Aerospace Specialty Products - 18mm Streamer Duration {Kit} [?-]
Contributed by John Lee
| Construction Rating: | starstarstarstarstar_border |
| Flight Rating: | starstarstar_borderstar_borderstar_border |
| Overall Rating: | starstarstarstar_borderstar_border |
| Manufacturer: | Aerospace Specialty Products  |
| Style: | Contest |
Brief:
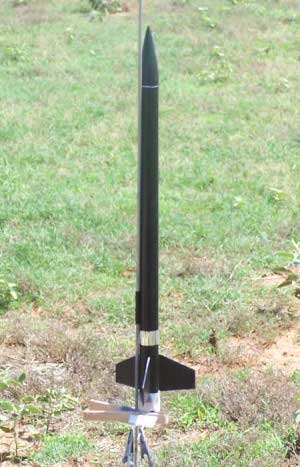
The Hangtime is a rocket offered by ASP specifically for duration competitions. They offer versions in 13, 18 and 24mm outfitted for either streamers or parachutes. This review is of the 18mm streamer version.
I'm not much into competitive rocketry except as a spectator but I occasionally decide to give simple events a try. I built this one for an informal contest my section is putting on.
Construction:
Construction begins with marking the fin and launch lug lines on the body tube. The instructions provide a template of the type where you set the end of the BT on a circle and mark the appropriate lines. I tend to prefer the wrap-around templates myself but this one was certainly serviceable. A door frame was then used to extend the lines. A tick mark was placed 1/4" from the end on each of the fin lines and 3" from the end on the lug line. The lines were then extended using a door frame.
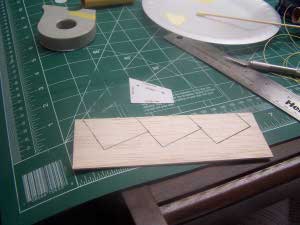
This kit does not provide precut balsa. You get a sheet of stock material and a template you cut out and use to mark out the fins. The lines were transferred to the balsa with a ballpoint pen and then the fins were cut out using a steel ruler and razor knife.
 Next comes some reinforcement of the forward end of the rocket. Some thin CA is wicked into the first 1/4" or so of the BT. After it has cured, it is sanded smooth. A 1/16" deep notch is then cut into the end of the BT lining up with one of the fin lines. The purpose of this notch is to accommodate the recovery system.
The instructions go into exhaustive detail as to the best method of streamlining the fins into a teardrop shaped profile. All well and good but its way over my interest level. I settled for rounding the leading, outside, and trailing edges.
The instructions say to install the fins 1/4" forward of the rear end. They also say to use CA. This made things almost too easy.
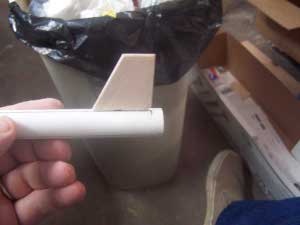
When the CA had set, I almost began to fillet the fins with yellow glue but I stopped and actually read the instructions again. Filleting does not take place yet nor is glue recommended.
 The kit comes with a length of Kevlar thread. The next step is to cut off a 6" piece of the Kevlar and set it aside for later. The length that is left is tacked down with CA along the root edge of the fin aligned with the notch cut earlier. You need to use a wire or something similar to hold the Kevlar® straight and in place until the CA sets up. The instructions recommend using an accelerant but I had none handy.
The instructions call for the filleting to be done with CA, presumably thick CA. I was interested in giving this a try but inspection revealed that all mine had hardened up due to leaving the cap off. The instructions also make provisions for filleting the fins with yellow glue and I adopted this approach, going very slowly and building the fillets up over several layers.
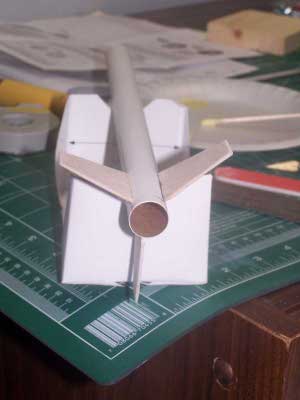
One activity that could be completed while the filleting was going on was the installation of the launch lug. It is mounted with its aft end 3" from the bottom. It was secured with CA by means of sliding the lug onto an aluminum rod, applying the CA to the lug and then pressing the rod and lug into place on the marked line. The rod was helpful in getting it to line up straight. It was withdrawn once the CA set up.
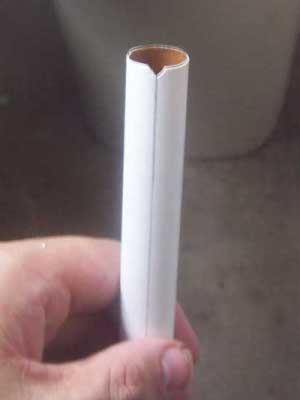
The nosecone is extremely thin and light vacuformed plastic. It comes in two pieces, the ogive and the base. The instructions say to use a razor knife to drill a small diameter hole in the base, just big enough to pass the Kevlar® thread through. The thread is then knotted. I added a dab of glue to keep it from pulling out.
The two pieces of the NC are then fitted together and glued. I used liquid plastic cement very sparingly. I suspect it would be easy to melt through the plastic.
Finishing:
I sealed the fins of the Hangtime with 3 coats of sanding sealer. I sanded between the 2nd and 3rd and after the last coat.
I realize that many contest models are flown "naked" but I never liked the looks of unfinished rockets. Since I am not a big competitor, I decided I wanted to go ahead and give it a simple finish. I wanted this to get done with a single coating of spray paint and no primer. In order to cover up the pencil marks, I chose black.
Before painting though, I used some masking tape to cover up the external Kevlar shock cord. I then sprayed the black.
Construction Rating: 4 out of 5
Flight:
I got this rocket for a friendly competition in my local NAR section. The event was to be a B impulse streamer duration competition. I wanted to give it a whirl but did not want to work too hard at it. I figured to go with a kit made for the purpose.
It came with 2 tracing paper streamers measuring 6 x 60 inches along with instructions on how they should be pleated and prepped. It also came with a mylar sport streamer. I dutifully folded the streamer and packed it using some tips from some real contest fliers. For the competition, I chose a B6-6. I just knew I had a shot at this one.
There is no thrust ring. You just run tape around the motor and the BT and set it off.
5, 4, 3, 2, 1, ignition. It took off up the rod and a few feet later went squirrelly, looping all over the sky but never very high. When it stopped thrusting, it plopped to the ground. A few seconds later came the ejection pop. It blew the NC but the streamer stayed put.
Checking it out, the streamer was not in too tight. It pulled out easily.
Chan Stevens tells me that getting a Hangtime to be unstable is quite an accomplishment. Later in the afternoon, it passed a swing test.
The only damage was to my pride and to the singed streamer. The humiliation and pressing RSO duties precluded another flight.
Recovery:
Gravity is very effective at returning this bird to earth. I cannot say how well the steamer works since mine never deployed.
Flight Rating: 2 out of 5
Summary:
I think this one has potential but cannot swear by my one flight. Maybe I had a damaged motor. Maybe the rocket gods were angry with me. I dunno.
It is, however, fairly tough and has survived to humiliate me another day.
Overall Rating: 3 out of 5
 |
 |
Flights
|
|
|
|
J.A.L. (September 27, 2008)