| Construction Rating: | starstarstarstarstar_border |
| Flight Rating: | starstarstarstarstar_border |
| Overall Rating: | starstarstarstarstar_border |
| Diameter: | 0.98 inches |
| Length: | 11.75 inches |
| Manufacturer: | Custom Rockets  |
| Skill Level: | 1 |
| Style: | Sport |
Brief:
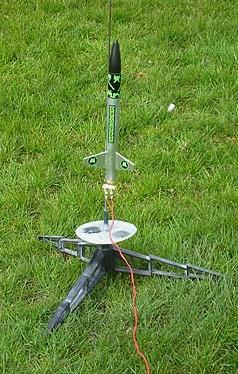
Custom Game Over rocket is a level 1 single stage rocket with a streamer used for recovery.
Construction:
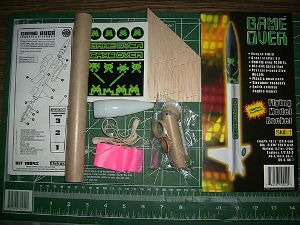
List of parts:
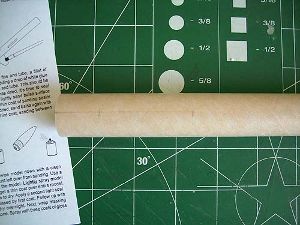
- 1 BT-50, 9" long
- 1 PNC-50 Injected Nose Cone
- 1 PNC-50 Nose Cone Plug
- 1 ET-20, 2.75" long Engine Tube W/Slit
- 1 EC-2 Engine Clip
- 2 CR-2050 Centering Rings
- 3 Balsa Fins
- 1 Streamer, 48" long
- 1 SC-2 Shock Cord (elastic)
- 1 Lug 1.25" Short Launch Lug
- 1 Decal set (Peel and Stick)
- 1 SCM-50 Shock Cord Mount
Supplies: White/wood glue, plastic cement, 320/600 grit sandpaper, sanding sealer, scissors, hobby knife, and gloss black and silver spray paint.
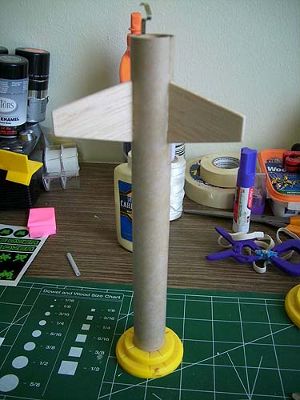
PRO: Engine is the first step in this construction the BT 2.75" already has a slit cut in to add the engine clip, pretty straight forward assembly of the motor mount.
CON: Next step is the fin alignment template, The instructions say make 3 marks from template provided in the instructions that's no problem. Here's the problem says mark the lines 1" from the bottom, for some building there first rocket the are no lines for fin alignment because attach the fins 1" from the bottom.
 PRO: Is gluing the engine mount into the tube. Mine went vary easily didn't have to sand the rings.
PRO: Shock cord mount easy 3 fold mount cut from the instructions and fold and glued. Glued the shock cord 1.5" inside the tube.
PRO: Cutting out the fins, I sanded both sides with 320 grit sandpaper before cutting them out. Then I sanded all the edges smooth.
PRO: There is a small slit cut on the root edge of the fins so you know what side the fin to glue to the rocket. I ran a small bead of wood glue down the root edge a let dry for a few seconds before attaching them.
PRO: Glue the launch lug 3" from the base between 2 of the fins. Then I ran a fillet of glue down each side of the fin.
Finishing:
PRO: I taped off the base of the nosecone and painted it with white primer, let dry, and sanded it smooth using 320
grit sandpaper. Applied 2 coats of Valspar gloss black.
PRO: Rest of rocket was primed with white primer let dry and sanded smooth using 320 grit sandpaper. I used Testors Chrome and applied two coats and let dry for a couple of days.
CON: Peel and stick decals need to be cut individually and applied to the rocket. This will be tough for a kid as the decals that go on the fins are small a need to be cut out carefully. I would suggest using tweezers to apply these small decals.
CON: Streamer gets tied into the eyelet of the nosecone and then the shock cord gets tied into the eyelet. I would tape or tie the streamer on the shock cord 2" down from the nose cone.
Construction Rating: 4 out of 5
Flight:
Preparation of the rocket is 4 sheets of wadding. The first flight was on an Estes A8-3. It was a nice straight
flight and had good altitude.
Second flight was also on a Estes A8-3 for a good straight flight.
Third flight was a Quest A6-4. Another nice straight flight.
Recovery:
CON: First flight the rocket came down too fast on the 1" x 48" streamer.
PRO: Second flight switched out the streamer for a 12" chute, which made for a nice gentle landing.
CON: Third flight was a nice liftoff, but a shroud line wrapped around a fin, came down hard,and cracked a fin that had already been repaired.
Flight Rating: 4 out of 5
Summary:
PRO: Good beginners rocket, nice straight flights, and good small field flier.
CON: Needs a wider streamer or use a 12" chute instead. Marking lines for the fins on the body tube should be marked up from the bottom at least 4".
Overall Rating: 4 out of 5
Other Reviews
- Custom Rockets Game Over By Mark Bischof (July 4, 2010)
Brief: Single stage, LPR, Streamer recovery, high fling all around fun rocket. Parts: 1 body tube - paper 3 fins 2 paper centering rings 1 motor mount and elastic shock cord nosecone The instructions are easy to follow, basic illustrations, good order, template for fin positioning, which is helpful no issues with sturdiness. The engine mount is very loose and needs to ...
 |
 |
Flights
|
|
J.O. (June 9, 2009)
|
|
S.M. (June 6, 2009)