| Manufacturer: | Scratch |
AEON
Tim Breland's Descon-14 Entry
 Talk about last minute, this thing almost had to fly with wet paint. ;)
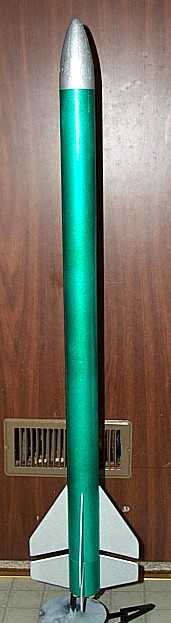
My design is called the AEON.
One definition of Aeon is "an indefinitely long period of time", which is about how long this rocket might stay in the air, indefinitely.
Sticking with the theme, the Aeon burns a total of 6 motors. It is clustered and staged, using 5 motors in the booster and 1 in the sustainer.
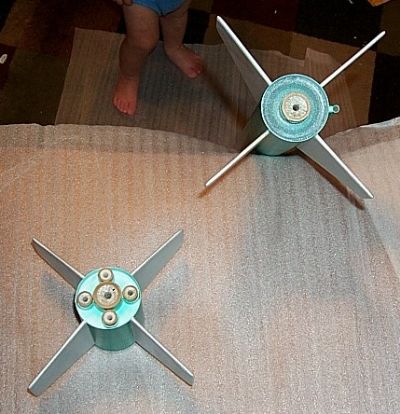
Construction is pretty simple. A parts list and fin patterns are included in the pdf file. Pretty much all of my parts came from Fliskits, the most unique being the 5 motor cluster mount which has a central 24mm mount surrounded by 4 13mm mounts.
Sustainer:
Starting with 2 BT70 tubes standard 17.5" in length, I cut a 70mm long piece from 1 tube to use as the booster. The remainder of that tube was coupled to the other tube to make the sustainer body, with a balsa nose cone on top.
The sustainer got a standard 24mm motor mount, making sure to put the aft centering ring about 1" from the end to allow room for the staging coupler. This motor mount is 4" long with an engine block in place allowing it to hold and Estes E size motor.
The sustainer fin pattern is in the pdf file. 4 fins were cut from some high quality 1/8" balsa. Some may prefer thicker balsa or even plywood, but I wanted to keep the weight down. The fins were mounted with the root end about 10mm up from the end of the body tube. This was done just for the look of a gap between the sustainer and booster fins.
A basic recovery system was installed; 4' piece of 1/4" elastic attached with the tri-fold method and to a screw eye in the nose cone.
An 18" mylar chute from Rockethead Rockets was my choice of recovery.
 Booster:
For the booster I started by assembling the 5 motor cluster mount. The central tube included with the kit was cut down to 70mm long. This kit includes 4 centering rings. I left the forward CR out due to the shorter central tube, and to allow room for the staging coupler. I also left out the central motor block to allow for staging. The motor mount was then glued into the 70mm piece of BT that I cut earlier, flush with the end. I then glued the staging coupler into the forward end. Again, 4 fins were cut from 1/8" balsa and attached to the booster (pdf file has pattern).
 Finishing:
After priming, I applied a basecoat of Krylon Metallic Silver. I then masked off the fins and nose cone, and finished the rest of the rocket with a candy green. Unfortunately, the tape marked the silver, and I may have to repaint one day.
Flight report:
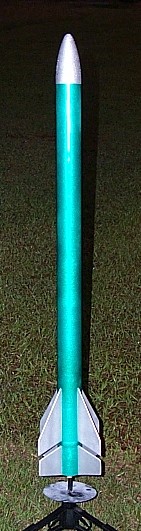
After the paint dried, I prepped her for flight. I knew it would get dark soon, so I opted not to go fully loaded. I went with a D12-0 surrounded by 4 A10-P's in the booster, staged to a C11-7 in the sustainer. This added a good bit of weight and I wasn't comfortable with the Cg location. I then drilled 4 - 3/16" holes in the base of the nose cone, added some BB's and secured with epoxy. This put the Cg at about 17" from the bottom, which is more than enough stability margin. So off to fly. By now it's getting dark, although not as dark as the pics show, but I'm still worried about recovery.
I set her up, push the button, and whoosh, man was that fast. Pics show nothing. I obviously didn't get the rocket in the pics, because they're just black. I would guess it went about 1000', but it was probably lower, and I just couldn't see good. Well, I saw the ejection, and thank goodness for mylar chutes. Without the shimmer from the mylar I probably would have lost it. It came down in the field next to my home about 300 feet away. Luckily the grass was cut over the weekend and I was able to find it pretty easily. I can't wait to launch it with an E9 in the sustainer.
 |
 |