Scratch The Flying Didgeridoo Original Design / Scratch Built
Scratch - The Flying Didgeridoo {Scratch}
Contributed by Karl Kalbaugh
| Manufacturer: | Scratch |
Brief:
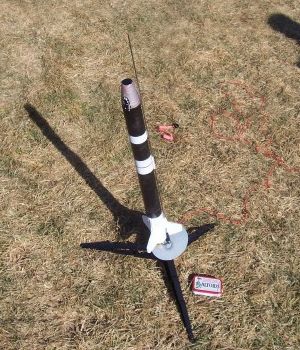
This model was my first scratch build since being a teenager (30+ years ago). It is meant to be LPR using household
or easily obtainable items. Nearly anyone should be able to duplicate this idea with good results.
Construction:
A single body tube was created from two paper towel tubes coupled together with a smaller diameter toilet paper tube.
Fins made from 0.25 inch foamboard. Motor mount made from foamboard, too. Estes motor clip installed in motor mount.
Shock cord from small diameter nylon rope/strap (recycled material). Nose cone made from Styrofoam already in cone
shape from store then shaped to fit body tube. Shock cord mounts made from old business cards.
The single biggest construction issue was making a decent motor mount that would flush mount to the end of the body tube. So that I could custom fit it using a hobby knife, I used foamboard. I was concerned about its flammability but to help with that, I lined the retainer ring with Aves Apoxy Sculpt. I had minor issues with aligning the motor mount bore so that it was congruent with the body tube. Three compound delta fins mounted very easily using Elmer's wood glue. The foamboard for fins and mount was bought at Office Max. I reinforced the entire airframe with tissue and glue (wetting tissue with a glue/water solution while on the body tube). It did increase strength somewhat. I also used same water/glue solution with tissue to cover the nose cone. I'm sure this reduced the drag of otherwise "raw" Styrofoam and also made it easy to paint. Streamer system was a cut plastic bag and nylon rope/strapping. Secured on either end in traditional LPR paper mountings, except using old business cards.
Flight and Recovery:
First flight used a B6-4. A substantial amount of wadding was used owing to the large body tube diameter. I would
recommend using dog barf for a rocket such as this. Motor was retained from an extra clip from an Estes kit. Height of
flight was about 100 to 120 feet. At mid-boost the rocket gave a slight wobble, but smoothed out on the very short
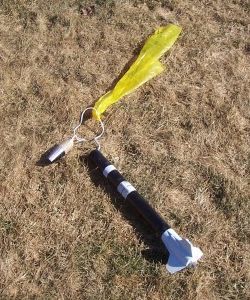
coast period. Rocket had just begun to nose over when ejection charge ignited. Recovery via streamer seemed perfect for
this rocket owing to light construction materials. No visible damage or wear!
During second flight using a C6-5, the rocket went to approximately 50 feet and then traveled horizontal. Wind gusts to about 15 mph may have contributed to this. Since there was less opportunity to coast owing to its inclination, the rocket appeared as if it might lawn dart. In a straight nose down attitude, the rocket ejected its recovery system about 10 to 20 feet off the ground and landed safely. There was a slight crack around one fin root, which will be repaired for third flight.
Perhaps part of the flight attitude issue is that the motor mount may be slightly skewed in the body tube, making the engine cant slightly. I plane to "dissect" the rocket after the third flight to see of the motor mount may have shifted during flight.
Summary:
This was an excellent learning experience and re-introduction into rocketry, which probably would be the main
"pro" for me. Also a pro was using very inexpensive materials and household items.
A "con" is that the engine mount needs to be made with a certain precision that may not be possible with a hobby knife and foamboard. A set of centering rings and engine block (pre-made) may have been a better choice.
 |
 |