Scratch Lump-O-Lead Original Design / Scratch Built
Scratch - Lump-O-Lead {Scratch}
Contributed by Matt Gillard
| Manufacturer: | Scratch |
Brief:
I was full of good ideas for the glider that I was going to make. None of these came to be and instead I made a pop
pod glider. I foolishly went for a large (ish) glider as I did not want to simply replicate a glider that I already
had. The result was a glider that needs at least a D to lift it, but will also shred on a D.
Construction:
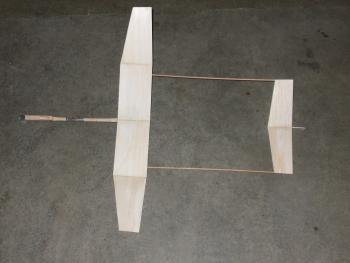
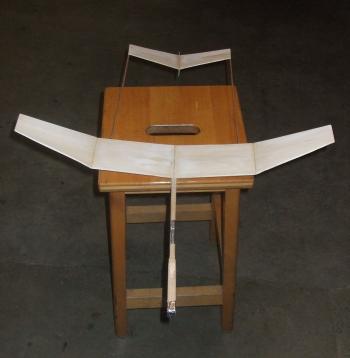
The glider itself consists of a four panel wing with a three panel tail. Two 1mm by 1mm spruces act as side by side booms, with a front fuselage made out of 3/8th inch balsa. The pop pod was the pod from a Quest Flat Cat.
Wing Construction:
2 panels. 3.5 by 6 inch
2 panels, 6 inch long with ends measuring 2 inch and 3.5 inch
The centre panels were glued together with one wing tip 1 inch of the bench.
When the glue had dried, the outer wing panels were added, again with a one inch lift.
 Tail:
Tail:
Two panels of balsa measured 5 inch with the sides being 2 and 2.5 inch, were glued together. The angle formed matched the front wing.
A rudder was attached underneath, this panel measured 4 by 2 inch, and was trimmed down somewhat.
Booms:
These were made from 1mm by 1mm spruce (which turned out to be a big mistake) both rods were 17 inches long.
The booms were glued to the outside edges of the tail, and them the front wing was glued to the front.
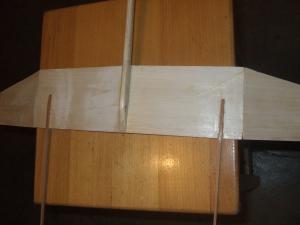
 Fuselage:
A 15 inch piece of 3/8th square balsa formed the fuselage. A 3 inches piece was glued to the top end of the fuselage. When this dried, a front cavity was made to hold balancing mass, and the hook/catch mechanism was cut out. Two thin pieces of balsa were then glued to the out side edges of the front fuselage to complete the cavity box and edge off the catch. This whole front end was very similar to front end of a Quest Flat Cat the fuselage was then glued to the front wing.
Pop Pod:
This was a steal from the Quest Flat Cat.
Finishing:
The whole glider was sanded down, all edges were rounded and a slight aerofoil added to the lifting surfaces. The rocket was then sealed.
The design was that as the rear booms were out of the way of the motor thrust, there was no need to protect the fuselage. I knew the glider would be tail heavy so the cavity at the front would take mass to balance.
 Test Glides:
Several test glides were needed to get the glide right, in the end a big lump of lead was needed to balance the glider –this is where the glider's name comes from.
Flights:
First flight was on a B4-2
Lift was straight but not to high, the lump of lead at the front came out and she fell tail down –my fault.
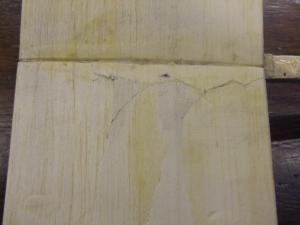
Second flight was on the came motor with a lump of clay acting as the mass at the front. Again the lift was straight, but the pop pod did not pop! The whole thing came in nose first, there was a lot of balsa to glue back together.
Third flight was a few days later, and after repairs. This time a C6-3 was used, the higher thrust made the whole thing shake on lift, so much so that the tail shredded. The glider, now heavy, nosed in again – more gluing.
 Fourth flight. Again a C6-3 was used, the flight was straight again with less wobble, ejection was clean
and the glider glided in on a steep angle. There was damage.
Fourth flight. Again a C6-3 was used, the flight was straight again with less wobble, ejection was clean
and the glider glided in on a steep angle. There was damage.
Summary:
The glider is too heavy for an 18mm motor and a D would rip it apart. I should learn to walk before I can run, I have had my own design smaller gliders perform very well, and I've had large kit gliders work, but I'm not quite ready for the large birds yet.
 |
 |