| Manufacturer: | Yank Enterprises |
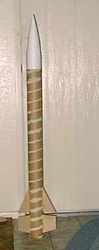
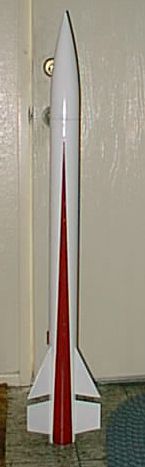
There's a new HPR company in town with some new kits. Don't let the name fool you, these are nice, high quality high power rockets that are designed to take all the power you can give them. I decided to try out their Mystic Buzz kit and see how it would come together. The "Buzz" is a neat slotted fin design which gives it a somewhat military style look.
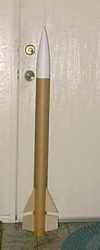
The "Buzz" is a 3" diameter kit that is 48" long
and weighs around 35oz. The model I got came with a 29mm motor mount.
| I tried to stick to the directions as much as
possible and really only made one minor change along the way. The instructions
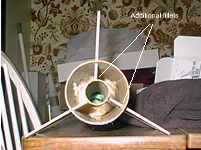
call for only external fin fillets. I chose to add internal fillets as well for
added strength as I plan on flying this on an I200. The included tubular nylon shock cord attaches to the upper centering ring with an included eyebolt. Including the hardware is a welcome touch. |
|
|
|
The instructions call for using lots of wadding to
protect the parachute. I prefer a piece of Nomex® cloth because it will last the
life of the rocket and really saves on prep time. After construction, I filled the seams in the tube using white Squadron putty. After that dried, I sanded it down and got ready to primer. To prep the nosecone, I first washed it with hot soapy water to remove and mold release agent, then scuffed it down with some 220 grit paper. A final tack cloth to get any dust off, a wipe down with acetone real quick and the nose is ready for primer as well. |
| For primer, I use basic sandable auto primer. It does the trick and it pretty cheap. Like normal, after the first coat of primer you usually see little imperfections you want to touch up. At this point, using the white Squadron putty will melt the primer off. The solution is the green Squadron putty. It takes a little longer to dry, but is safe of the primer. A little more sanding and it's time for paint. |
|
|
The buzz got a coat of white gloss with red arrows
along the sides. The paint job turned out pretty good. So, off to the lakebed
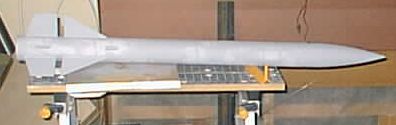
to see how it flies. The first flight was on a G80. I thought it seemed a little underpowered for this size of a rocket, but RockSim said it was ok, and Jason from Yank Enterprises said it was fine. I loaded it up and lit it off and that little motor kicked the rocket up for a perfect flight. Ok, time to see what this thing can really do. I loaded up an I200 and put her back on the pad. This time, something went seriously wrong, about 200 feet off the pad, the nosecone ejected and took the chute and shockcord with it. For a brief moment, a flame could be seen at the top of the airframe. The motor suffered a blow-by but at least the forward closure stayed on saving the rocket from complete destruction. The blow-by burnt right through the tubular nylon and the airframe came down flat. A slightly cracked fin and the burnt shock cord was the only damage to the rocket. The fin is easily repairable and I will have to remount the shock cord. Overall, I highly recommend the Mystic Buzz. It is easy to build, it can fly on G - I power, and it looks really nice on the pad and in the air. |
 |
 |
Flights


|
|