Art Applewhite Rockets Delta Flying Saucer 18mm (6")
Art Applewhite Rockets - Delta Flying Saucer 18mm (6") {Kit}
Contributed by Nick Esselman
| Published: | 2010-11-13 |
| Manufacturer: | Art Applewhite Rockets  |
![[Picture]](/images/archive/images/ratings/rating_aaw_delta_saucer.gif) (07/01/03) I finally got around to
purchasing a couple of Art Applewhite's Flying Saucers. Been meaning to, just
never got around to it. When I did, I was glad he accepted PayPal. Made it very
easy. I purchased the Gold 6" 18mm Delta Flying Saucer and the Gold
4" 13mm Delta Flying Saucers.
(07/01/03) I finally got around to
purchasing a couple of Art Applewhite's Flying Saucers. Been meaning to, just
never got around to it. When I did, I was glad he accepted PayPal. Made it very
easy. I purchased the Gold 6" 18mm Delta Flying Saucer and the Gold
4" 13mm Delta Flying Saucers.
I'm writing the review for the 18mm version because there isn't currently a review on EMRR. But I have to admit the same thing Dick Stafford did, these kits all build just about the same! There was virtually no difference between my build experience on the 13mm version verses the 18mm version. In addition, there are very few parts, four to be exact: 1) Top Cardstock, 2) Bottom Cardstock, 3) 18mm motor mount, and 4) Foam Center.
 CONSTRUCTION:
The instructions are printed on 3 pages of 8½ x 11" paper. They include black and white photos to assist in the building process. The tools and supplies that are needed are outlined: Scissors, #11 Exacto® Knife, Elmer's Glue-All® and 150 girt sandpaper. That's it and you're ready to go.
Assembly is simple. Cut out the Top and Bottom from the cardstock. Cut out the Top and Bottom Seam pieces from the card stock. Glue the Seam (tab) onto one side of the Top. Let dry. Glue the other side of the Top onto the exposed Seam (tab), thereby forming your Top Cone. Repeat for the Bottom Cone.
Using your hobby knife, cut out the Center from the provided 1/4" foam board. Cut out the center of the Center (which is the motor mount hole). Now you are ready for the most difficult part of construction; cutting the 30 degree bevel on the outside edge of the Center. Be sure to use a new blade and take your time. Doing those two things makes this a lot easier than it sounds.
Once the Center is prepared then final assembly is relatively simple. You glue the Center to the Top. You then glue in the motor mount. Lastly, you glue the Bottom to the motor mount and Center. Apply some fillets on all the seams and ta-da... you're done.
Overall, for CONSTRUCTION I would rate this kit 5 points. Not sure how it could be any easier!
 FLIGHT/RECOVERY:
Art Applewhite recommends a C6-0, B6-0 or a RMS 18/20 Reload. The motors are to be friction fit into the motor mount with the warning that no motor should stick out further than ½" from below the motor mount.
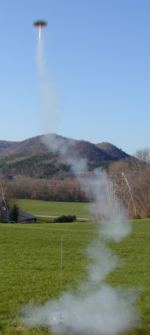
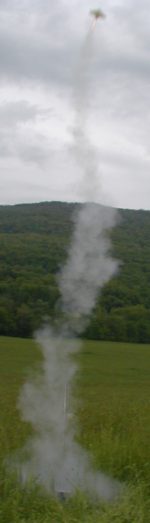
I have flow the 18mm version 3 times, all on B6-0's. I was planning on using this as a demo rocket for my son's kindergarten class, but that never worked out. It would make an excellent demo rocket, and it would even make an excellent school project rocket!
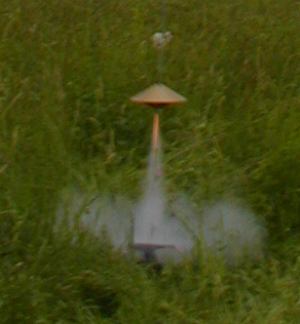
All the flights were the same, straight up, invert and right back to us. Altitude? Hmmmm, maybe 30 feet. Hard to say, but it would make a good backyard flier.
For FLIGHT/RECOVERY, I would rate this rocket 5 points. I don't see any way to knock a rocket that has no recovery system to fail, no need for wadding, no need for motor retention (although that could be the only thing to add), and always comes back to where you are!
I give the rocket an OVERALL rating of 5 points. Yes, it is a "perfect" rocket for its price, instructions, assembly and flight characteristics. Go give one a try!
Other Reviews
- Art Applewhite Rockets Delta Flying Saucer 18mm (6") By Dwayne Surdu-Miller
( Contributed - by Dwayne Surdu-Miller - 07/24/06) Brief: I was fortunate enough to win this kit as a prize for entering my Barbsari B-Prize design into Descon 15. I asked for and received the Spaceship Earth version. I was amazed at how quickly the shipment arrived after I'd specified what version I'd like. Mondo kudos to Art Applewhite for fantastic service. Construction: The ...
 |
 |
|
|
B.B. (July 12, 2003)