| Construction Rating: | starstarstarstarstar_border |
| Flight Rating: | starstarstarstarstar_border |
| Overall Rating: | starstarstarstarstar_border |
| Published: | 2013-05-31 |
| Manufacturer: | Madcow Rocketry  |
Brief
Madcow describes the Discovery as a great first entry into mid & high powered rocketry. I would agree partially as my thoughts are below.
Components
List of Materials
- (1) Molded nose cone
- (1) Pre-slotted body tube
- (1) Forward section body tube
- (2) Centering rings
- (1) Bulkhead
- (1) Eyebolt, nut & washer
- (1) 29mm motor tube
- (3) laser-cut fins
- (1) Kevlar shock cord section
- (1) Nylon shock cord section
- (1) 9”x9” flameproof chute protector
- (1) 24” Nylon chute
- (2) ¼” launch lugs
- (1) Coupler
Construction
PROs
- Easy to assemble. As a first timer into the high power hobby the directions provided by Madcow were extremely easy to follow.
- Components fit with little to no modification. I only had to sand some of the body tube coupler to make the fit easy.
CONs
- No recommendations to paint or finishing.
Finishing
There were no decals to apply. Being this was my first high powered rocket construction I didn't have any experience in finishing something so large. I used the Rocketry Blog to finish the Discovery. Of all the steps I believe the applying of KILZ Sealer-Primer did the trick. After applying several coats and sanding in-between, the surface of the rocket was extremely smooth and it definitely helped with paint application. Below are a couple of photos of the construction including a coat of grey primer and painting. Looking back if I was going to change anything from the steps the blog provided, I would have never applied wood filler to the nose cone and just used the KILZ.
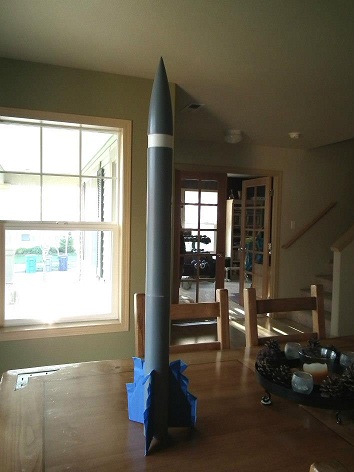
The Discovery in Grey Primer
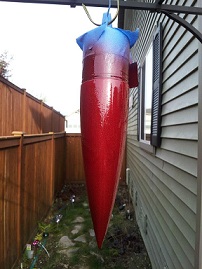
First coat of Red Paint on the nose
Flight
FLIGHT RESULTS
I flew the Discovery twice for my NAR Level 1 certification and didn't earn my certification until the second flight.
On the first flight I attached the shock cord between the forward section body tuby and the plastic armature of the nose cone. After the ejection charge lit on the motor the nose cone detached and the plastic armature failed causing the rocket to land seperated from each other.
After the failure I inserted a large eyebolt and used 5 minute epoxy to attach it to the end of the nose cone. The second flight went off without a hitch and I retrieved the rocket intact earning my certification.
For both flights I utilized Aerotech's new Disposable Motor System H135W-14A. On the last flight I used a Jolly Logic Altimeter Two and recorded a top speed of 491 mph reaching an altitude of 3145 feet.
 |
 |
Flights
|
|