Brief:
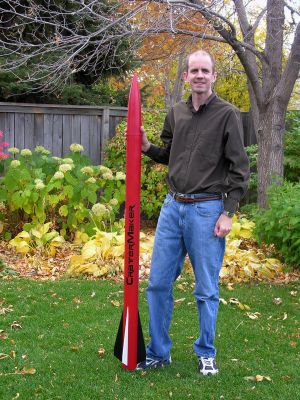
Weighing in at 6lb 10oz, 5ft 4in height, 3in diameter, the CraterMaker is by far the most ambitious scratch project I have ever attempted. It is also my first rocket designed for I and J motors. I planned super-sleek fins, which didn't make the project any easier because it pushed the CP forward.
I also wanted to try a zipperless baffle design. With no electronics, motor ejection was planned, which heavy building techniques since I wanted to limit the maximum altitude.
Construction:
The impetus for this project occurred nearly a year earlier when some guy on The Rocketry Forum mentioned that his workplace was throwing large phenolic tubes in the garbage. He offered to mail one to anyone around the country, and on a lark, I accepted. About the same time, I bought a 3in redwood nosecone offered on TRF for a few bucks.
These items sat in my basement for 9 months until summer came and I figured it was time to begin a design. I chose a 4FNC design with very sleek swept trapezoidal fins. The RockSim file is included here.
I began with the nose cone, using the redwood cone to lay up fiberglass. Unlike many people, I laid the fiberglass over the cone and used this shell directly for the cone rather than as an inverse mold for another layup. Both the inner and outer diameter of the nose cone were slightly too small compared to the body tube, which caused problems later.
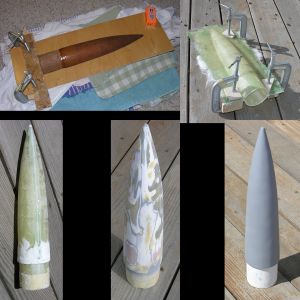 The redwood was placed in a flat cutout and coated with many layers of Partall wax #2 and PVA #10 mold release. Over this, I laid strips of 6oz S-weave fiberglass with one layer of 1.5oz fiberglass matting in the middle. After releasing the half-cone and repeating the process, I clamped the two halves together and filled the interior seam with a filling of chopped fiberglass and epoxy. Then I laid more fiberglass matting in the interior. Cutting away the flashing and sanding it round, I had my rough cone.
Unfortunately, I still had the problem that the cone was slightly too small compared to the airframe. I cut from the airframe a ring about 1/2in long and glued it to the shoulder of the nose to form a round, precise edge. Then I added Bondo to fill the empty space on the bottom half of the nose, scraping it smooth against the ring. With a lot more sanding and filling, the nose was done. Now (and especially with the additional nose weight later), this nose could cleave a pickup truck on impact.
The tube seemed softer than typical phenolic. I used 3 wraps of 6oz S-weave fiberglass to make a bombproof airframe. Then I cut off the bottom 15in to make the fin can.
The fins were cut from 7/32" plywood. The were tabbed for TTW mounting. The best ply sheet at Home Depot was slightly little warped, so I laid one layer of 6oz fiberglass and pressed each fin under very heavy weights, yielding perfectly flat fins. I sanded the leading edge elliptical, but left the other edges square.
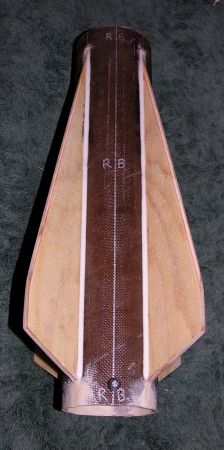 Three T-nuts were inserted in the aft centering ring for motor retention. The rest of the fin can was assembled in the usual way. One unusual feature was that there was only about 1 inch of tube remaining unslotted for the fin can, so I had to be very careful not to bend or torque anything. Interior fillets were created by running down an epoxy/milled fiberglass mixture.
The baffle was in the FlisKits style of partial disks. Three plates were put in a 5.5in length of Giant Leap coupler. The coupler had been heavily fiberglassed because of the need to keep the joint strong here with a very firm fit at the separation point. I used lots of fiberglass: 1 exterior layer of S-weave plus 2 interior layers of 1.5oz matting. I literally could have stood on this without damage. The exterior was sanded Bondo to give a smooth fit. The bottom two baffle plates were covered on their aft side and edge with aluminum pie plate attached with JB Weld, to reduce heat damage.
At this point, I took the rocket to the NCR club for advice. First, they were worried about the length of the baffle/coupler. So I glued it asymmetrically: 1.75in into the fin can and 3.75in for coupling into the airframe. Second, they were worried about successful ejection. The design, from aft to forward, was: motor, baffle/coupler, airframe split, chute in airframe, then bulkhead. They told me to ground test ejection, and I did.
I had placed the a partway down the airframe after careful calculations using online calculators to figure the required pressure for separation and so forth. These calculations proved worthless. The first ground test used 1.5g powder, equal to what is given with an I or J motor. The rocket separated but the chute was not pulled out. With 2.5g, I had the same result. With 3.5g (don't try this at home!) I blew the motor case out the back, split a crack and hole in the fin can, separated the airframe, but still did not pull the chute out. I learned by experience that 3.5g of powder is way too much, and I realized I that had to abandon the zipperless design.
After repairing the fin can, I cut the nose off the airframe and ground it back down to the shoulder. Next I had to remove the bulkhead, which was 11in from the nearest tube end. What a dusty, bloody knuckle, frustrating nightmare! Then I glued the airframe to the coupler so that separation would now be at the nose. The ground test with 2g worked fine.
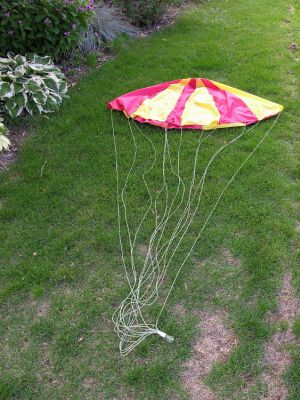 I sewed the chute myself. It was 72in diameter, 12-gore semi-elliptical in the Nakka design. It was finished with 85 feet of 3mm climber's cord for shroud lines and attached with 20ft of half-inch tubular nylon.
The nose cone now needed a shock cord attachment point, despite lacking a bulkhead. I made a block of oak rounded on one side, with an eye bolt through the middle and attached with epoxy and a screw through the shoulder wall. Final calculations showed that 12oz of nose weight was needed a stability margin of 2.2 with the largest possible motor (J350). The 1010 rail buttons went on at some point.
Finishing:
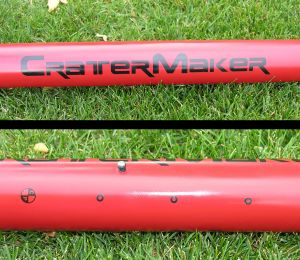
Finishing began with epoxy/microballoon exterior fillets and endless amounts of Kilz, Bondo, and wood filler, interrupted with interminable periods of sanding. You can see the final red, white, and black paint scheme. All the paint was Krylon gloss, many coats, with clear over the top. The CraterMaker sticker was provided by Mike Fisher at Binder Designs. He does first rate work, as I'm sure you can see. Another custom touch was that I put a CP marker and three 1-caliper marks for in-the-field assessment of the stability margin.
Flight and Recovery:
Launch day was the Northern Colorado Rocketry Oktoberfest. Having simmed a variety of motors, it looked like the best choices to keep the rocket low and visible would be I285R, I300T, or I366R, simmed to 1616, 1795, and 2446ft, respectively. I opted for the I300T.
I was very nervous as they called out the launch sequence in a light breeze. Boost was very straight and fairly fast. The rocket was visible all the way up. I was trying unsuccessfully to find it in the binoculars during the coast phase, so others told me what happened. Ejection was right at apogee, but it took a moment for the shock cord to fully extend and for the chute to unfurl. Descent was beautiful on that billowing colorful parachute. As it landed on the soft prairie, I judged that the chute size was about right. The landing was assertive but not too hard.
My son found the rocket about half a mile away. Unfamiliar with the scale of the rocket, I had been searching too close and a bit to the left. He ran ahead, as boys do, and started waving and jumping up and down in the distance when he spotted it. I chased him down. CraterMaker failed to live up to his name; he was totally unblemished on landing.
Summary:
The next flight will probably be on a I600R (3106ft) or, for my L2 certification, a J350W (3584ft) for NCR's Mile High Mayhem. This project has been a ton of work, but well worth it in the end.

