| Manufacturer: | Public Missiles  |

(Contributed - by Greg Briden - 11/01/02)
 Brief:
Minimum diameter, high altitude rocket.
Construction:
Two main phenolic body tubes, piston ejection, solid resin nose cone.
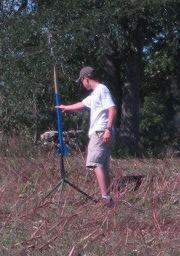
This was my first HP rocket, which I used for my L1 cert. I do not recommend this rocket for any first time HP builders, and it is a less favorable cert. Let me explain; For one, its hard to find motor retaining rings for a minimum diameter rocket, but I did. The site is now disabled when I try to return to it. Anyway, 4100' expected altitude for a L1 cert is not desirable- the cert team didn't much like it. The instructions were pretty clear, though I freaked out a bit when I saw the 'shock' cord wasn't rubber, but a nylon strap. I called up PML, and they said the kit was changed to add this, (well I'm glad someone told me). The solid resin nose cone is NOT as indestructible as it looks, and doesn't hold paint well. The tip broke off when it fell over and managed to hit a rock. I had to whittle it round with my Swiss army knife. Also, there was no explicit way to attach the nose cone! I didn't want to glue it, for then I wouldn't be able to access the payload section.! In the end I put three screws in. Fiberglass: Oh boy, was this fun. I didn't have much trouble with the actual fins as I did with the cloth. The instructions said try not to get any air bubbles... easier said than done. I launched it on a RMS H73J, and put some sand in the payload section to keep it within our 4000' window. All in all, this was an enjoyable rocket. However, unless, your main goal is to achieve a very high altitude, then steer away from this skybuster.
Finishing:
It came with one decal, sporting the rocket name, but no painting
recommendations. I painted the bottom 2/3 blue, and the top 1/3 gold. Sanding
plays a BIG part in this type of rocket.
Construction Rating: 4 out of 5
 Flight:
The motor mounts I used installed as follows: You drilled three hole into the
tubing, then epoxied a grommet that had a hollow threaded center. You then
positioned a latch- type hook over the edge of the motor, an put a screw
through the other end, into the grommet. One grommet, screw, and hook per hole.
These work out very well if you can find the somewhere, they're also cheap.
You don't need a big motor, unless recording the highest altitude is your goal.
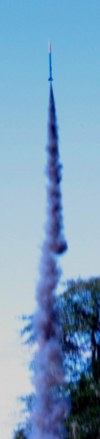
My launch went very well, it came down in the same condition it went up. Although the heavy nose cone spike itself into the ground.
Recovery:
The heavy nose cone spike itself into the ground upon landing. The recovery was
took some time, but still, 4000' is a long way. A larger delay would be more
preferable.
Flight Rating: 4 out of 5
Summary:
Unless achieving the highest altitude is your goal, steer clear of this well-
made skybuster.
Overall Rating: 4 out of 5
Other Reviews
- Public Missiles Cirrus By David Fergus
( Contributed - by David W. Fergus) Brief: This is a rocket designed to fly to extreme altitude if desired. It has a 1.6" diameter and is 44" tall with a payload bay and solid resin nose cone. It can be flown with 38mm motors; or 29mm motors with an adapter. Everything that normally comes with a PML phenolic kit is provided including a piston ejection system, parachute, and ...
 |
 |
Flights
|
|
A.D.W. of PML (October 4, 2001)
Sponsored Ads


 PML 21382")


|
|
B.Q.B. (September 25, 2001)