Scratch Mosquito 301 Original Design / Scratch Built
Scratch - Mosquito 301 {Scratch}
Contributed by Matthew Gillard
| Published: | 2010-03-23 |
| Manufacturer: | Scratch |

Brief:
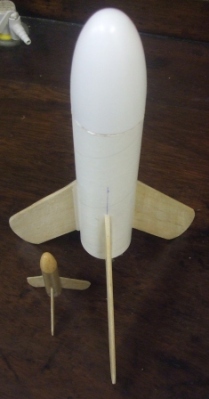
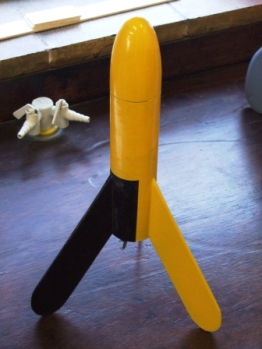
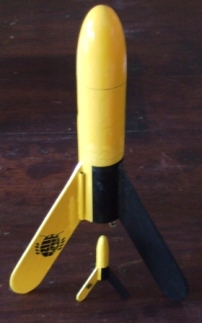
This year’s 2010 challenge included an upscale of 2+ which was very fortunate for me as I
was in the process of doing a series of upscales on the Estes Mosquito. This upscale is a 301% based around a big
bertha nose cone.
Construction:
The components for the kit consist of:
- A Big Bertha nose cone.
- 6.02 inches of Bt60.
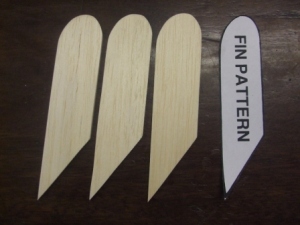
- Three balsa fins.
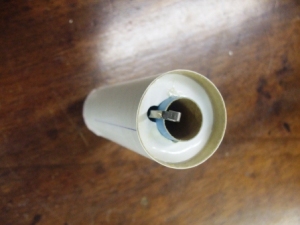
- 18mm motor mount.
- Elastic Shock cord.
- Swivel.
- Swatch of Nomex® cloth.
- 1 meter of 2 inch mylar streamer.
- And later I repaired using
- A BT60 coupler.
- A replacement section of BT60.
- Fishing leader.
Using a photocopier, the fin template was enlarged and the fins cut from balsa. I had thought of going TTW, but the rocket is still quite light. When I get to bigger upscales I will.
The BT is 6.02 inches long.
The motor mount is built in its usual way, for some reason unknown to me I did not add a length of Kevlar® cord as an anchor nor did I add in a fishing leader. Fins were attached in the normal way, with the launch lug added to the BT in between fins. The shock cord is a two foot length of elastic, which was attached via the Estes tri fold method. A swivel was added and a swatch of Nomex® heat shield.
The rocket was given three coats of sanding sealer, and wood glue filleted a few times.
The entire rocket had two coats of gray primer added, with rub downs in between coats.
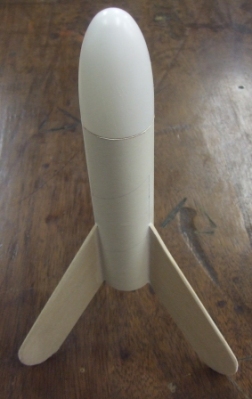
To match my original mosquito color scheme the rocket was given a few coats of yellow spray paint, and then masked and black paint added to one fin.
It was then flown twice, which I’ll cover in the flight section, but first the repairs.
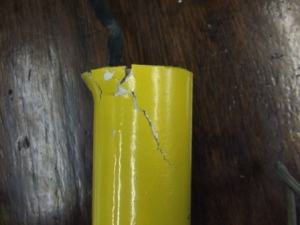
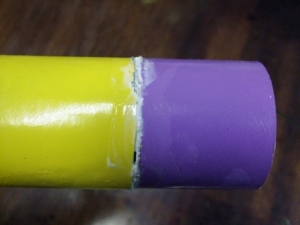
The top section of the body tube was crushed and ripped. Not too difficult to repair. The top section was removed using a dremel, and a replacement section from an old rocket was added using a Bt60 coupler. The one advantage of this was that I was able to ditch the tri fold paper anchor and replace it with a steel fishing leader which I trapped between the coupler and the body tube. The gapping wide seam join was then filled with model filler, and sanded. After that the top of the rocket was sprayed yellow. It’s not a fantastic repair, but it looks okay.
During the repair time, the decals from excelsoirrocketry arrived from the states. They included a 301% upscale which finished the rocket off nicely.
Flight:
First flight was on 18th Jan 2010, using an Estes A8-3
Nice low and straight flight, with ejection past apogee, recovered without damage on the 4 foot streamer
Second flight was on the same day using a Quest B6-4.
Great flight, right up to the point where the ejection should have ejected the nose cone, instead the motor came out, this must have been a bad prep by me, I can only assume that the motor clip was bent back. The mosquito came in hard and fast, just like the original mosquito did (they never tumbled) difference here is that the upscale has more mass and the body tube was damaged, and paint was chipped off the nose cone.
After the repair the rocket went up again at the Midlands Rocketry March launch. used a C6-7, ejection was late,
a C6-5 would have been better, recovered fine on the streamer.
Summary:
I love this upscale, and i like the other 3 I have also made, still got at least two more in
the plan/build stage. If I had thought about this properly I should have done this last year for the family photo
contest.
Other:
The use of a photocopier for increasing fin size is the easiest solution for any up/down scaler.
Sponsored Ads


")
")

![Estes Mini Mosquito Flying Model Rocket Kit (Skill Level 1) [EST1345]](https://i.ebayimg.com/images/g/smIAAOSwfAZhhBJt/s-l225.jpg "Estes Mini Mosquito Flying Model Rocket Kit (Skill Level 1) [EST1345]")


 |
 |