| Construction Rating: | starstarstarstarstar |
| Flight Rating: | starstarstarstarstar |
| Overall Rating: | starstarstarstarstar |
| Manufacturer: | Rocket Pad |
Brief:
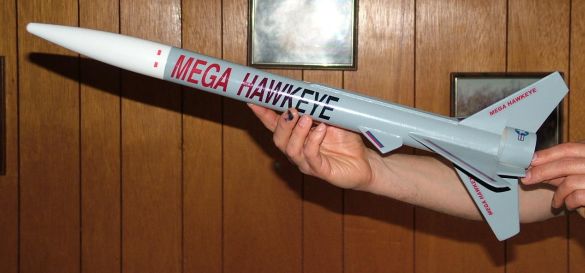
This is an Up-Scale clone of an old Estes kit that used the small 13mm engines.
I have an original Hawkeye kit that I got when I returned to rocketry. The
original one was 8.5" in length and this one is 24.75" in length to
give you an idea how much larger this one is. The Mega Hawkeye is a single
stage rocket using 24mm motors. It uses an 18" mylar parachute for
recovery and a 3/16" launch lug. This is my first Rocketpad kit and I
wanted to check the brand out and I liked the look of this kit.
Construction:
The kit comes with one main body tube (1.6"x17") and has 6
fins/wings. The 1/8" balsa fin stock was nice quality with tight grain.
The nose cone is plastic. Also, there are two 1.6" diameter x 1.5"
tubes. The body tube was nice and smooth--just about no grooves at all. The
motor mount uses a metal hook. The centering rings are laser cut black fiber
and were much nicer than the standard Estes heavy cardboard.
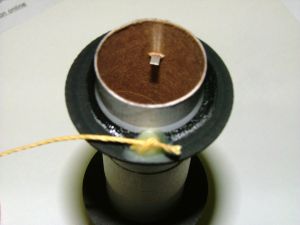
You start construction by assembling the motor mount. They use a unique system for connecting the Kevlar® shock cord mount to the motor mount. You mark the body tube on the marking guide while the motor mount is drying. The marking guide is the type that has you place the body tube over it and make the marks. It is on a heavy cardstock material. You get a fin template on heavy cardstock in the kit that you cut out and then trace the fins onto the balsa stock. They include in the instructions how to lay out the templates on the balsa so you trace the fins correctly. No guessing how to do it. I liked this attention to detail. Most of the kit is standard rocketry assembly and any one who has built some kits should have no problem following the instructions. By the way, the instructions call out for different pictures during assembly and the pictures are clear, large, and numbered. I used heavy CA for most of the construction although I did use Elmer's wood glue for the fillets. The launch lug on this model is 3/16". It was an enjoyable assembly and I like the large amount of pictures they give so every thing is clear. The nose cone weight is clay, was soft, and easy to push into the nose cone. I used a hard wood dowel for this. The clay is a bit messy but it holds. No "gotchas" here.
Finishing:
I went to a local hobby shop to get some Aero Gloss sanding sealer to seal the
balsa parts. It took 3 coats on the balsa to get a nice smooth finish. The
instructions tell you to clean the nose cone with 70% rubbing alcohol to clean
any oils off the plastic nose cone. You are instructed to first paint the nose
cone with gloss white paint. The rest of the rocket is with gray paint. I used
gloss gray Rustoleum spray paint for the kit that I got at Home Depot. The kit
includes colorful water slide decals that worked fine. The decals were similar
to the original but for that big "MEGA HAWKEYE" logo that looks
rather cool I think. It's bold anyway! I think this is one cool looking rocket!
Construction Rating: 5 out of 5
Flight:
Rocketpad recommends a C11 type motor for the first flight but when I went to
launch, all I had was D motors so I used a D12-5 for the first flight. They
said you could use this motor if no C11 was on hand. I used good old Estes
wadding in the tube to protect the parachute. The parachute is a nice Mylar
type that was a kit with its own instructions. The motor is held in with a
metal motor hook. There was just about no wind in the early afternoon when we
got out to the field. I have to test it on windy days! The first launch was
great and the Mega Hawkeye went up dead straight. I don't know how high but is
was high up. The parachute came out with the rocket just after it started to
point down. The rocket came down real close to the pad. That was great. I did
not have the D12-7 they said you can use but got brave and put a D12-3 in it.
This was not a recommended motor but I wanted to see what it would do with a
more powerful motor. I jumped off the pad real fast and went straight up real
high! On a bright blue sky, we just saw the ejection puff and it took some time
to come back down. There was a little wind up there and I had a walk to get the
rocket. It was a good thing that the field is real big! It was on the other
side. This is a great flyer and if you have a large field, the D12-3 can be
used. One of my friend showed up later and he had a C11-3 motor so we shot it
off with that and it was a nice flight. It was not as high as the D12 but not
bad. That motor would be great for smaller fields! I have launched this kit 4
times so far and it is in great shape but for some exhaust residue on the rear
of the rocket.
Recovery:
The shock cord is a Kevlar®
cord mounted to the motor mount and the nose cone. The parachute had a snap
swivel to connect it to the cone. The materials were high quality.
Flight Rating: 5 out of 5
Summary:
This was my first Rocketpad kit and I was impressed with it. I am ordering up a
few more. I really like the look of this kit. It is impressive to look at and
flies great. The guy thought it was a great looking rocket and the size is
right for most fields. I like this as a big companion to my tiny original one!
Overall Rating: 5 out of 5
 |
 |