Rogue Aerospace Deep Surface Probe
Rogue Aerospace - Deep Surface Probe {Plan}
Contributed by Greg Elder
| Construction Rating: | starstarstarstar_borderstar_border |
| Flight Rating: | starstarstarstarstar |
| Overall Rating: | starstarstarstarstar_border |
| Manufacturer: | Rogue Aerospace |
| Style: | Ring/Tube/Cone Fin |

I always try to look for something a little unique in rockets and that is what the Deep Surface Probe by Rogue is. Rogue says it this way, "Modelled upon a real NASA planetary probe, the Deep Surface Probe (DSP) is sure to attract attention at your next launch! The "real" probe is intended to be dropped to a planet from orbit, slamming into the planet's crust at hypersonic speeds, burying itself deep within the planet to obtain rock samples and geologic data. Our model is stabilized solely by a unique set of cone fins. A plastic nose and cardstock fins simplify construction. Flight is dramatic, with the engine exhaust being pulled along behind the rocket as it ascends by the aerodynamic flow around the lips of the cones. This bird doesn't fly high, but it flies dramatically!"
So with that exciting description, I expected to really have something unique and I wasn't disappointed (for the flight part).
The Deep Surface Probe (DSP) comes with a red plastic nose cone and clay nose weight. It also comes with 3 cardstock sheets (red, white, and black) to make the cone-fins. There are two body tubes (17" and 7") and a coupler to put them together. The kit includes an 18mm motor mount with a motor retention clip, two 1/8" launch lugs, a 49" Kevlar shock tether and a 24" elastic shock cord, a piece of Perma-Wadding and a 12" nylon parachute. Lastly the kit included some water transfer decals.
CONSTRUCTION:
I have built a couple of other Rogue kits (Hex Courier and the two-stage Crossfire) and find that the instructions are thorough and easy to follow. They are in a logical order and include photos, 3D renderings, and/or illustrations to assist in the construction steps. The DSP was no different containing 6 pages of instructions. Many times people say, "if you have built one or two Estes kits, this will be no problem", but for Rogue's case, you could start with a Rogue kit (but maybe not this one!).
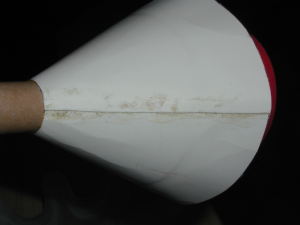 You get to find out what you're up against on the very first construction step, "Construct Cone Stabilizers". This step was the turning point with respect to my excitement about the DSP. First you must cut out the stabilizers from the cardstock and gently curl them using the edge of the table. I didn't have any trouble with this. My trouble started when gluing them together, especially the white one which is a slightly thicker cardstock. Maybe it was the glue I used (Titebond) or maybe my curl was not quite right, but by the time I got the seam to stick I had glue finger marks and roughened paper and aesthetically a mess. Functionally the white cone seemed fine. This discouraged me a little so at this moment I decided to complete assembly but I wasn't going to paint the rocket.
 The bulk of the rocket assembly is straightforward. The motor mount assembles with the motor hook and thrust rings being attached to the motor tube in a typlical fashion. There is a little work in cutting a notch on the centering ring for the motor hook. Also, the Kevlar shock tether is attached to the motor hook and this is done while assembling the motor mount.
The two body tubes are connected to make one 24" tube and the launch lugs are attached to the bottom section of the body tube. Rogue could have used a single 24" body tube, but this two-section approach actually facilities the positioning of the launch lugs and the Cone Stabilizers. It also probably helps in packaging and shipping.
The nose cone is assembled by pressing the clay into the nose and then using CA or plastic cement to glue the nose cone shoulder into place. I used CA.
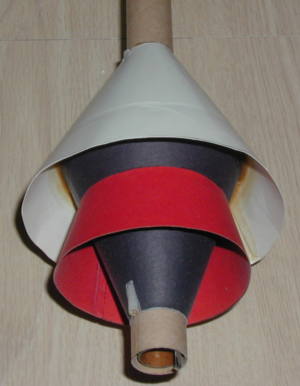
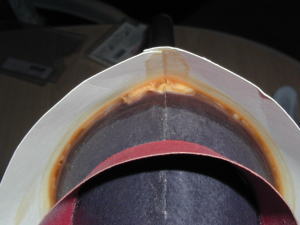 Then back to those Cone Stabilizers. The biggest (white) one is attached first. It is aligned around the upper launch lug and even with the body tube seam. Then you are instructed to reverse the direction of the black one and glue it up into and against the white one. The fit depends on two things, the accuracy of your cutting along the lines and whether you got the cones symmetrical. Mine sealed okay but I used a lot of glue to do it, especially at the cone seams. Last, you attach the red stabilizer to the black stabilizer, again relying on cut and symmetricalness.
Lastly the recovery system is assembled. This includes a nice piece of Perma-Wadding™ and a 12" nylon parachute. These are attached to the Kevlar® tether and shock cord and then the rocket ready to be finished.
The instructions describe finishing and recommend that you do not paint the stabilizers warning that it could cause the rocket to become unstable. There is an insert titled "Tips for Using Decals" included with the decals. As I stated earlier though, I decided not to paint it after all the frustration I had over the stabilizer cones.
Overall, for CONSTRUCTION I would rate this kit 3 ½ points. I feel that the cones are the biggest challenge which should push the skill level from Rogue's "2" to a "3". I also feel that there must to be a better way to instruct and glue the cones together to begin with. The instructions are very well done and the components all fit excellently.
FLIGHT/RECOVERY:
Rogue recommends a B6-2 and a C6-3. I have flown the DSP three times with the first flight on the B6-2 and the next two on the C6-3. This is where I must say the frustrating build pays off. This was neat. Why? Well, a couple of reasons.
First, my DSP weighed in at 3 ounces. A standard 3FNC rocket with the same length, diameter and CP that also weighs 3 ounces would have an optimum delay for a B6 of 3.3 second and for a C6 a delay of 5.3 seconds. This shows you the impact of the cone stabilizers, their drag bring this rocket to a standstill a lot faster, nearly twice as fast. This is observable in the flight. You see the motor thrust stop, and and the rocket doesn't coast . . . it stops. This can actually be a problem as you will see from my 3rd flight.
Second, those same cone stabilizers create a vacuum effect that pulls a cloud of smoke behind the rocket during thrust. You have to see it to fully enjoy it. Just after my first flight, I felt that this is what makes this rocket worth the price . . . truly unique.
So my three flights allowed me to enjoy three different perspectives. The 1st flight on the B6 was picture perfect and made me anticipate more. On the 2nd flight with the C6, it was essentially the same but with greater altitude (still less than 400 feet), but this time once it slow and tipped horizontal the ejection charge went, but the 'chute did not come all the way out. It fell and hit the ground, undamaged. The 3rd flight was also on a C6. This time after another straight flight I noticed that as soon as the thrust stopped the nose cone slid off of the top. With the weight in the nose cone and the quick-stop action the cone stabilizers induce, the momentum of the nose cone was faster than the "fit" could contain. I will need to add a little more tape to the shoulder to prevent this from happening again.
For FLIGHT/RECOVERY, I would rate this kit 5 points. Impressive, unique flights that make the cone stabilizers assembly hassles worth it. In fact, the flight characteristics also demonstrate that even when you make the mistakes I did that the rocket still flies stable. This robustness is good in a kit.
Overall, the Deep Surface Probe is a challenge to an experienced builder (more than a Skill Level 2 in my opinion). The cone stabilizers are the greatest challenge. The rockets features are solid, motor retention, Perma-Wadding™, and nylon parachute are all a cut above most other kits. Flights gives you something to talk about. I'm now going to look for the smokiest 18mm motor out there to enhance the effect of the cones. Anyone have any idea? Oh, yes, and I just might clean up the stabilizers and paint it too! I give the kit an OVERALL rating of 4 points.
 |
 |
Flights
|
|