Scratch AIM-9P Sidewinder Original Design / Scratch Built
Scratch - AIM-9P Sidewinder {Scratch}
Contributed by Michael Nipper
 Brief:
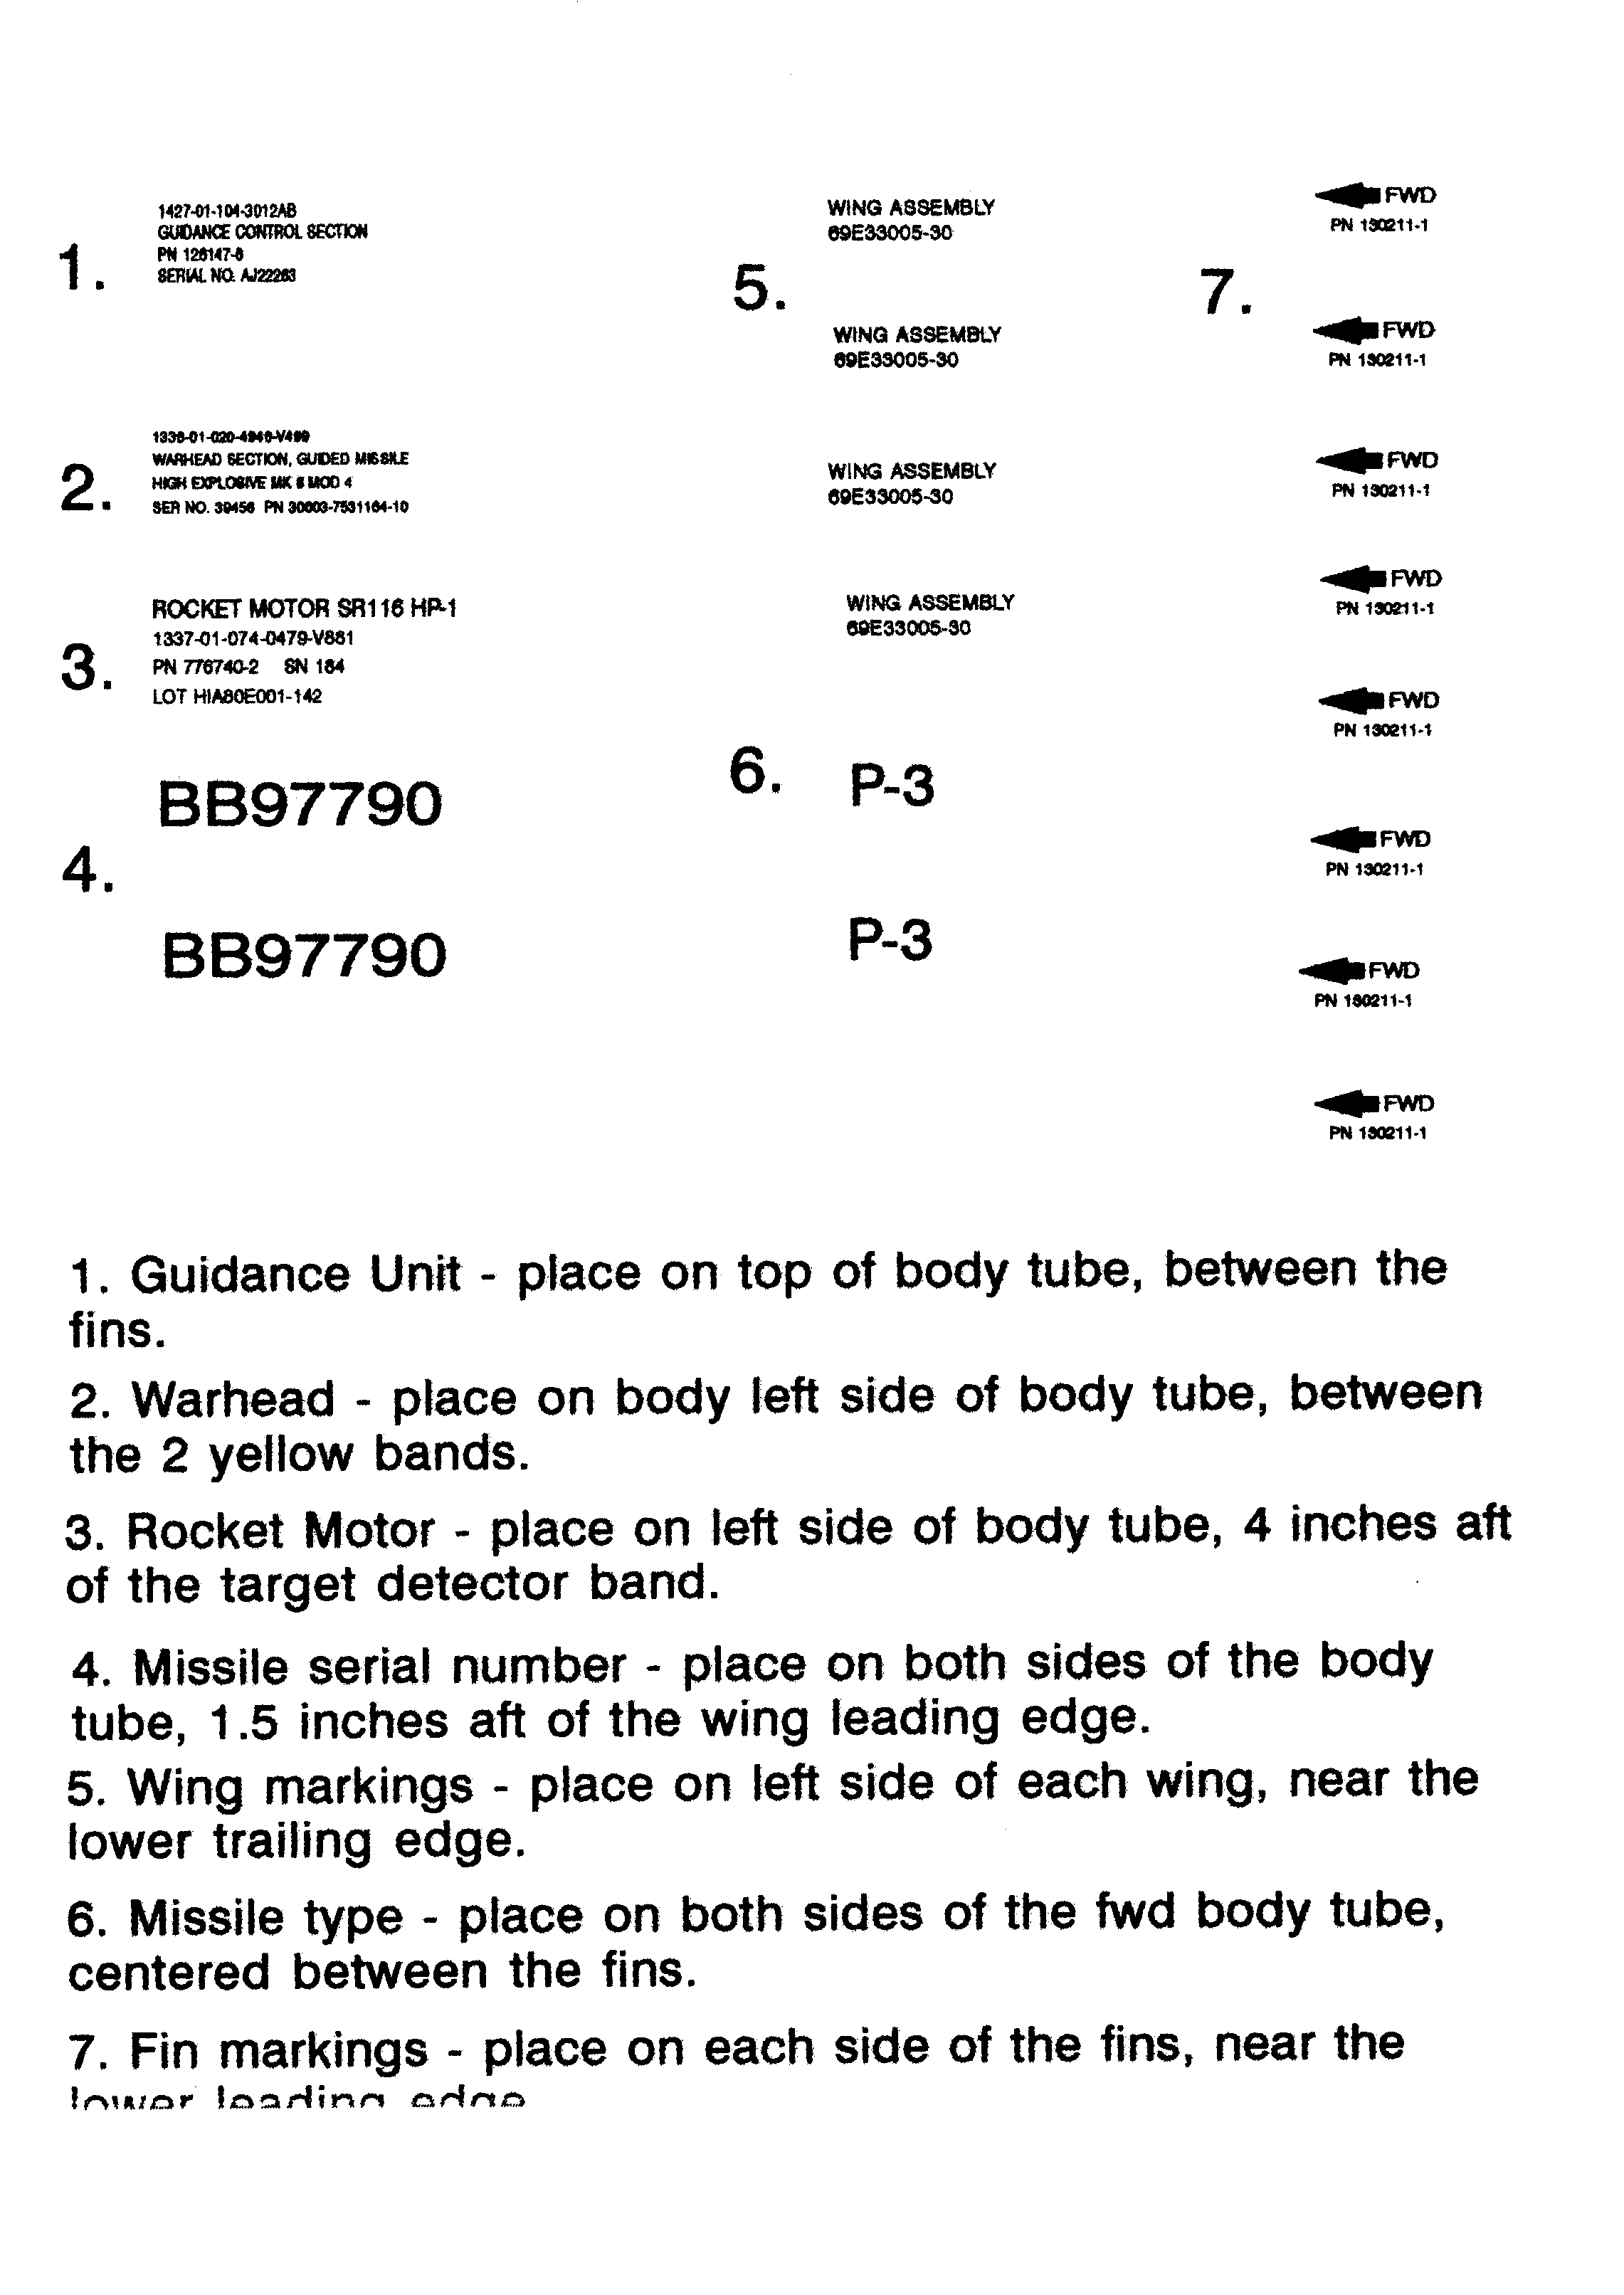
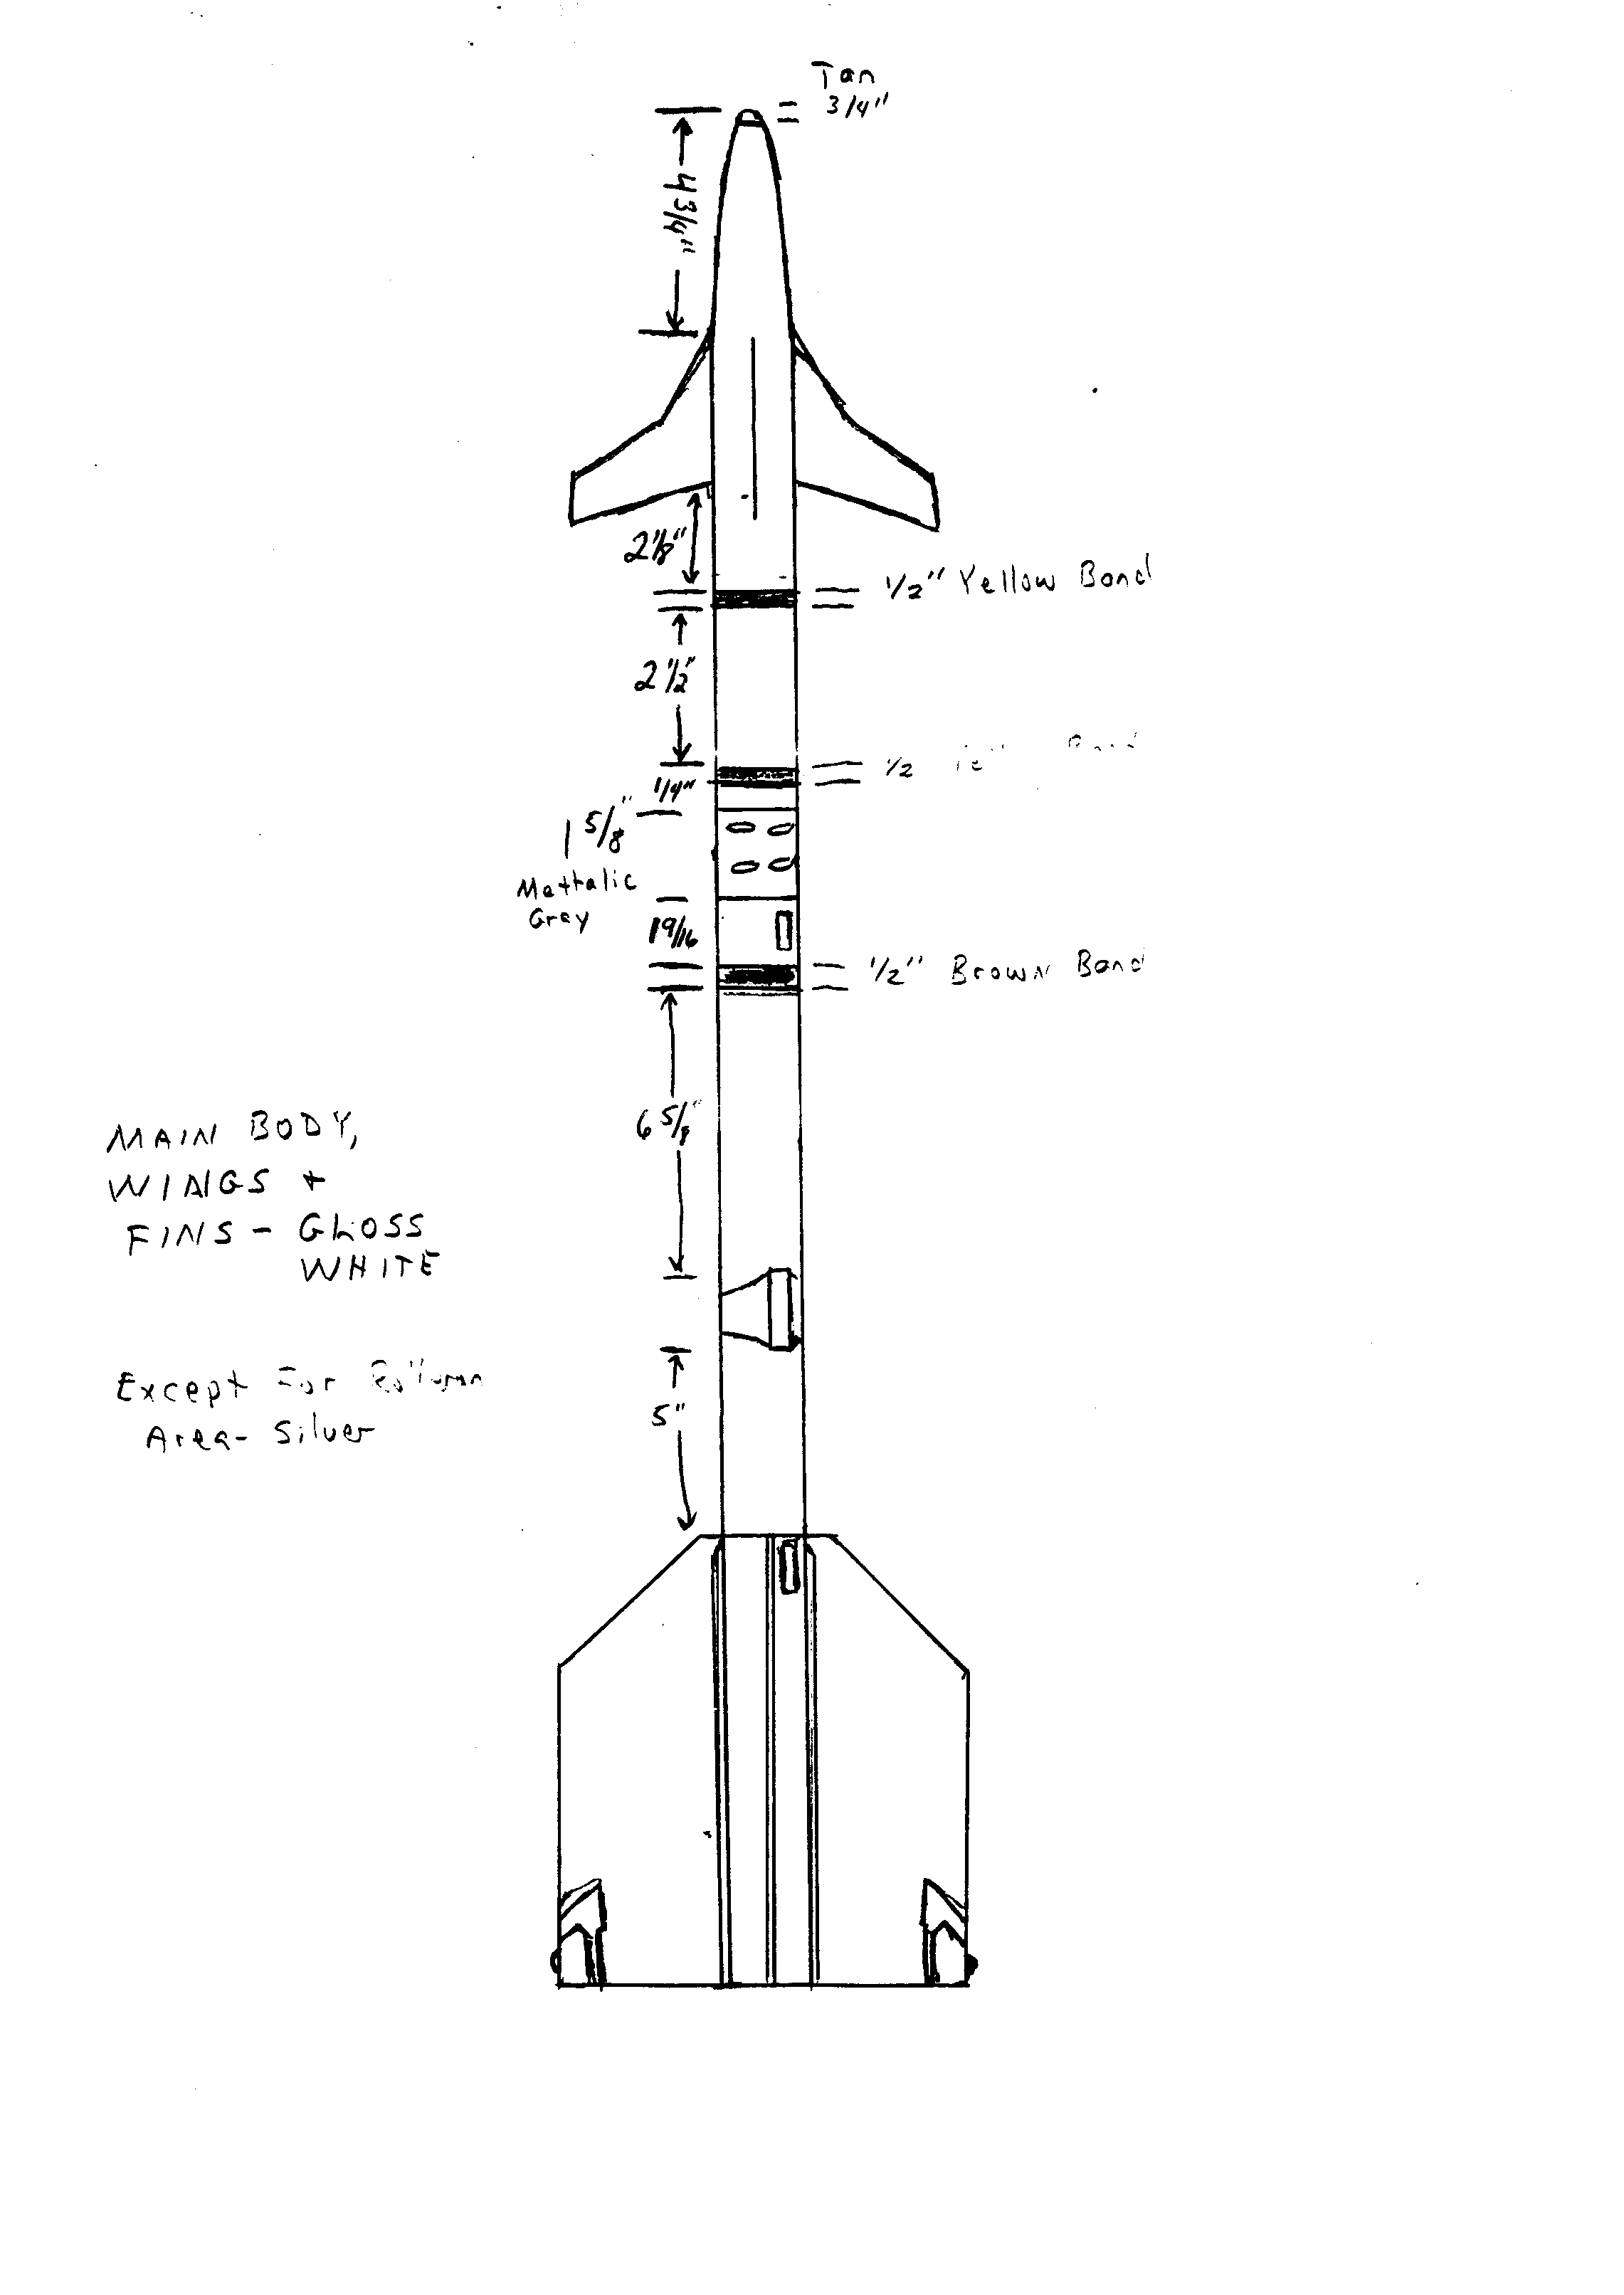
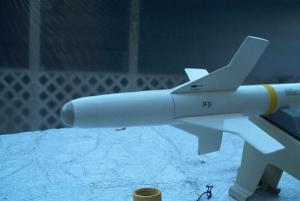
This is a 1/3 scale model of Air Force AIM-9P-3 Sidewinder Air-to-Air missile that uses D or E engines. The AIM-P differed from the current AIM-9L/M in that the P had a longer, more tapered nose and "double-delta" canards. Also, the warhead was directly behind the guidance unit, followed by the target detector and rocket motor. The AIM-9L/M have the warhead and target detector in the opposite order. Also, the aft end of the wings were flush with aft end of the rocket motor. The AIM 9P was painted gloss white overall, and did not have a bare aluminum ring at the base of the seeker window. The wings were one-piece aluminum, unlike the composite wings on the 9L/M.
Construction:
I used 2 BT-60 tubes and 1 BT-60 coupler. All wings, fins, and hangers are constructed from basswood. The rolleron frames on the wings are posterboard with paper overlay. Rollerons are .03 mil aluminum tape over the basswood wing, with the rolleron wheels made with aluminum tape over posterboard. The slightly larger diameter aft end of the rocket motor was created with 2 layers of plain copy paper and white glue. The nose cone is from an Estes Python kit. All markings were created as TIF files and printed on clear labels with an inkjet printer.
I have copies of old Air Force manuals showing the dimensions and markings of the AIM-9P, so assembly was fairly easy once I figured out what I wanted to do.
- Marking - Decals
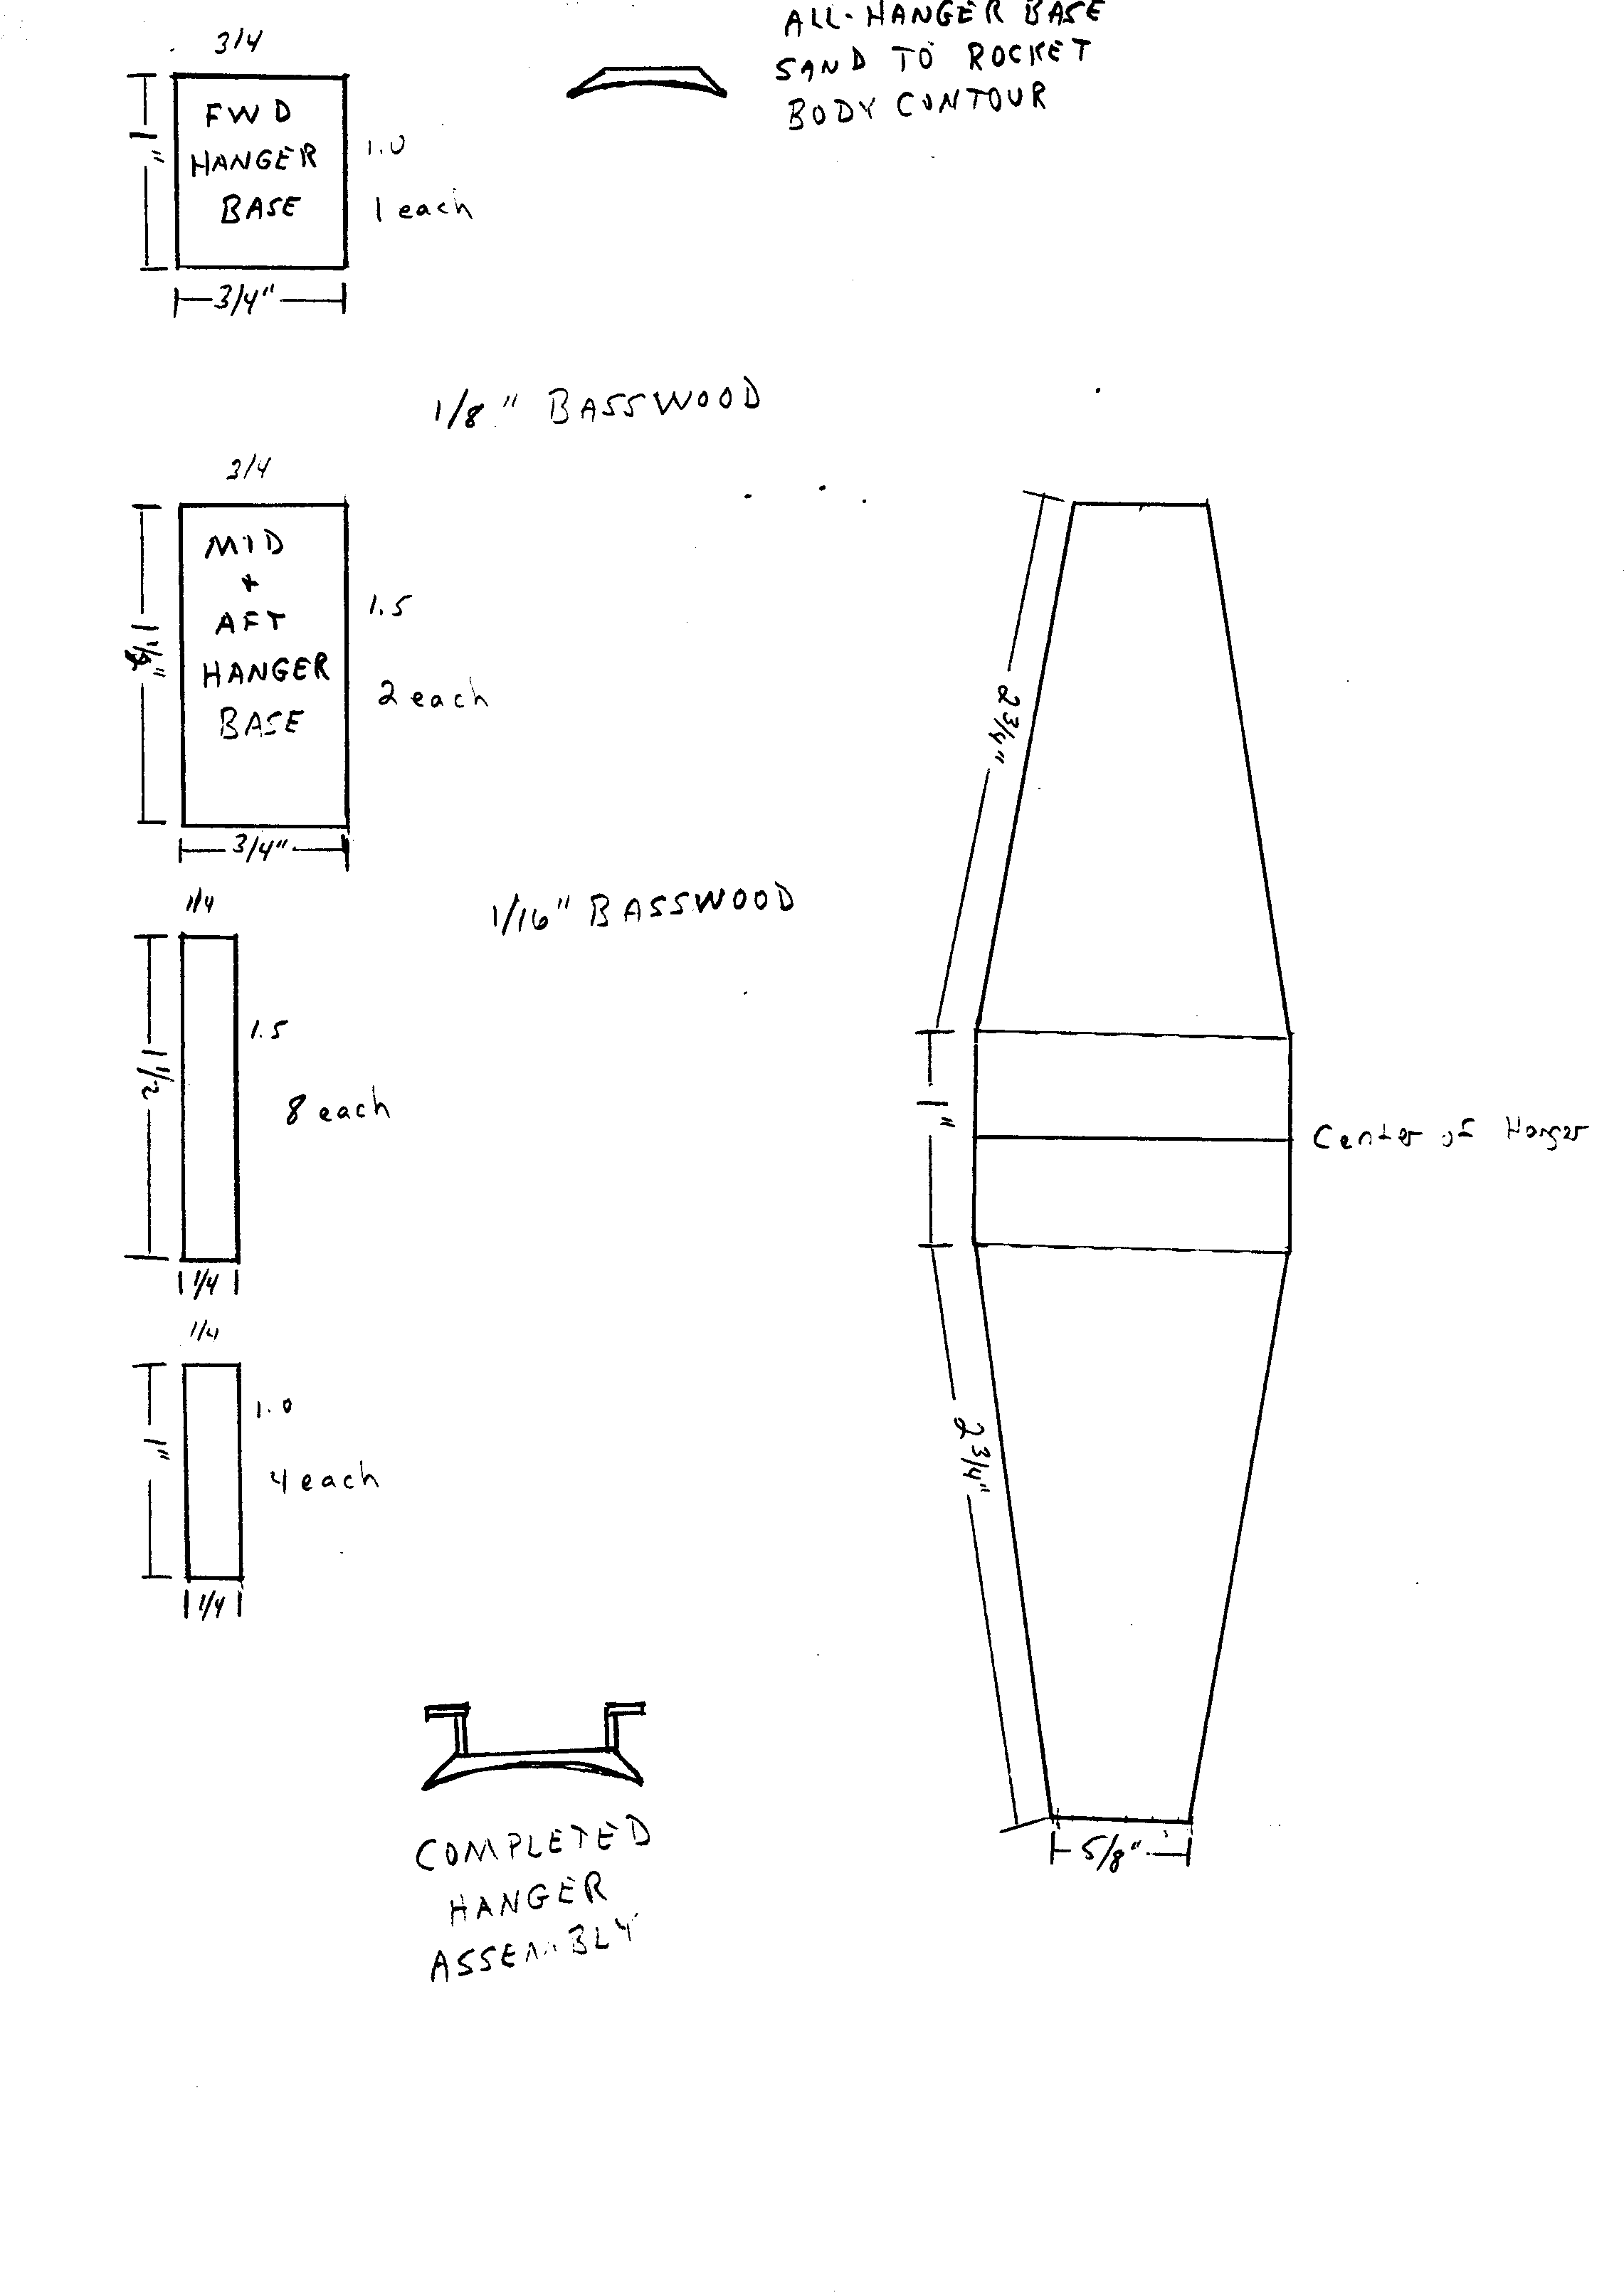
- Hanger Templates
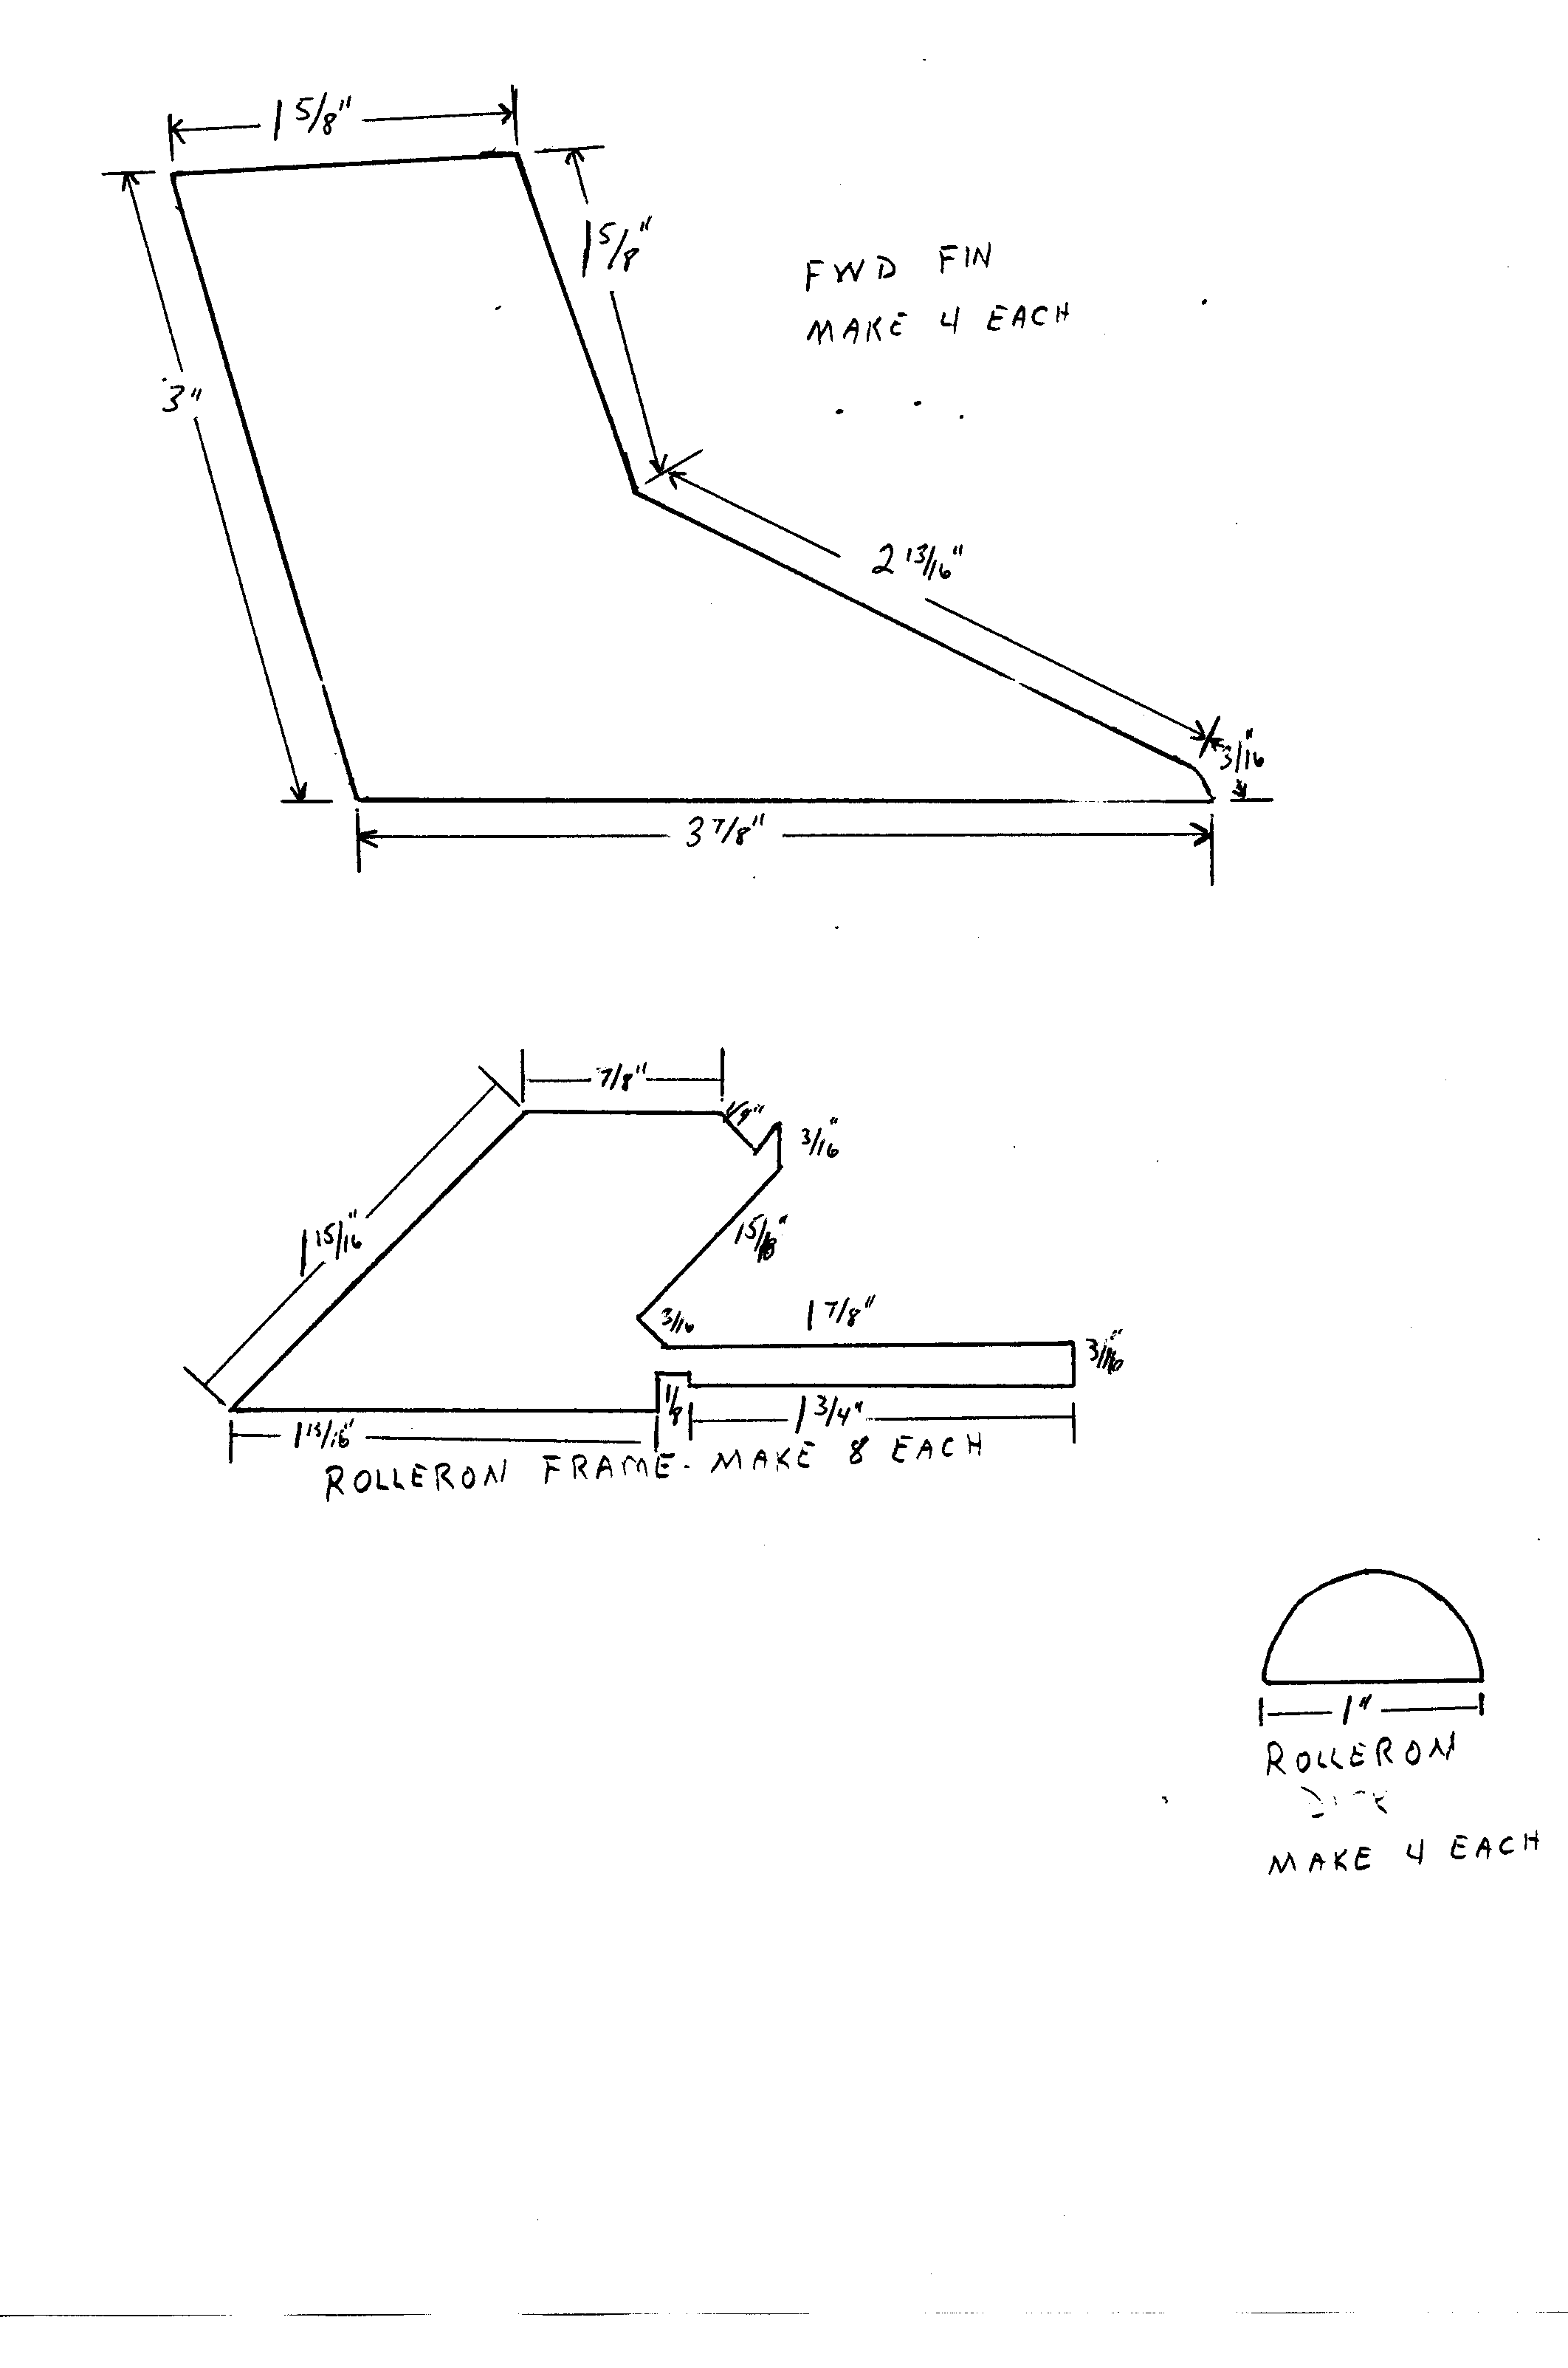
- Forward Fin and Rolleron Templates
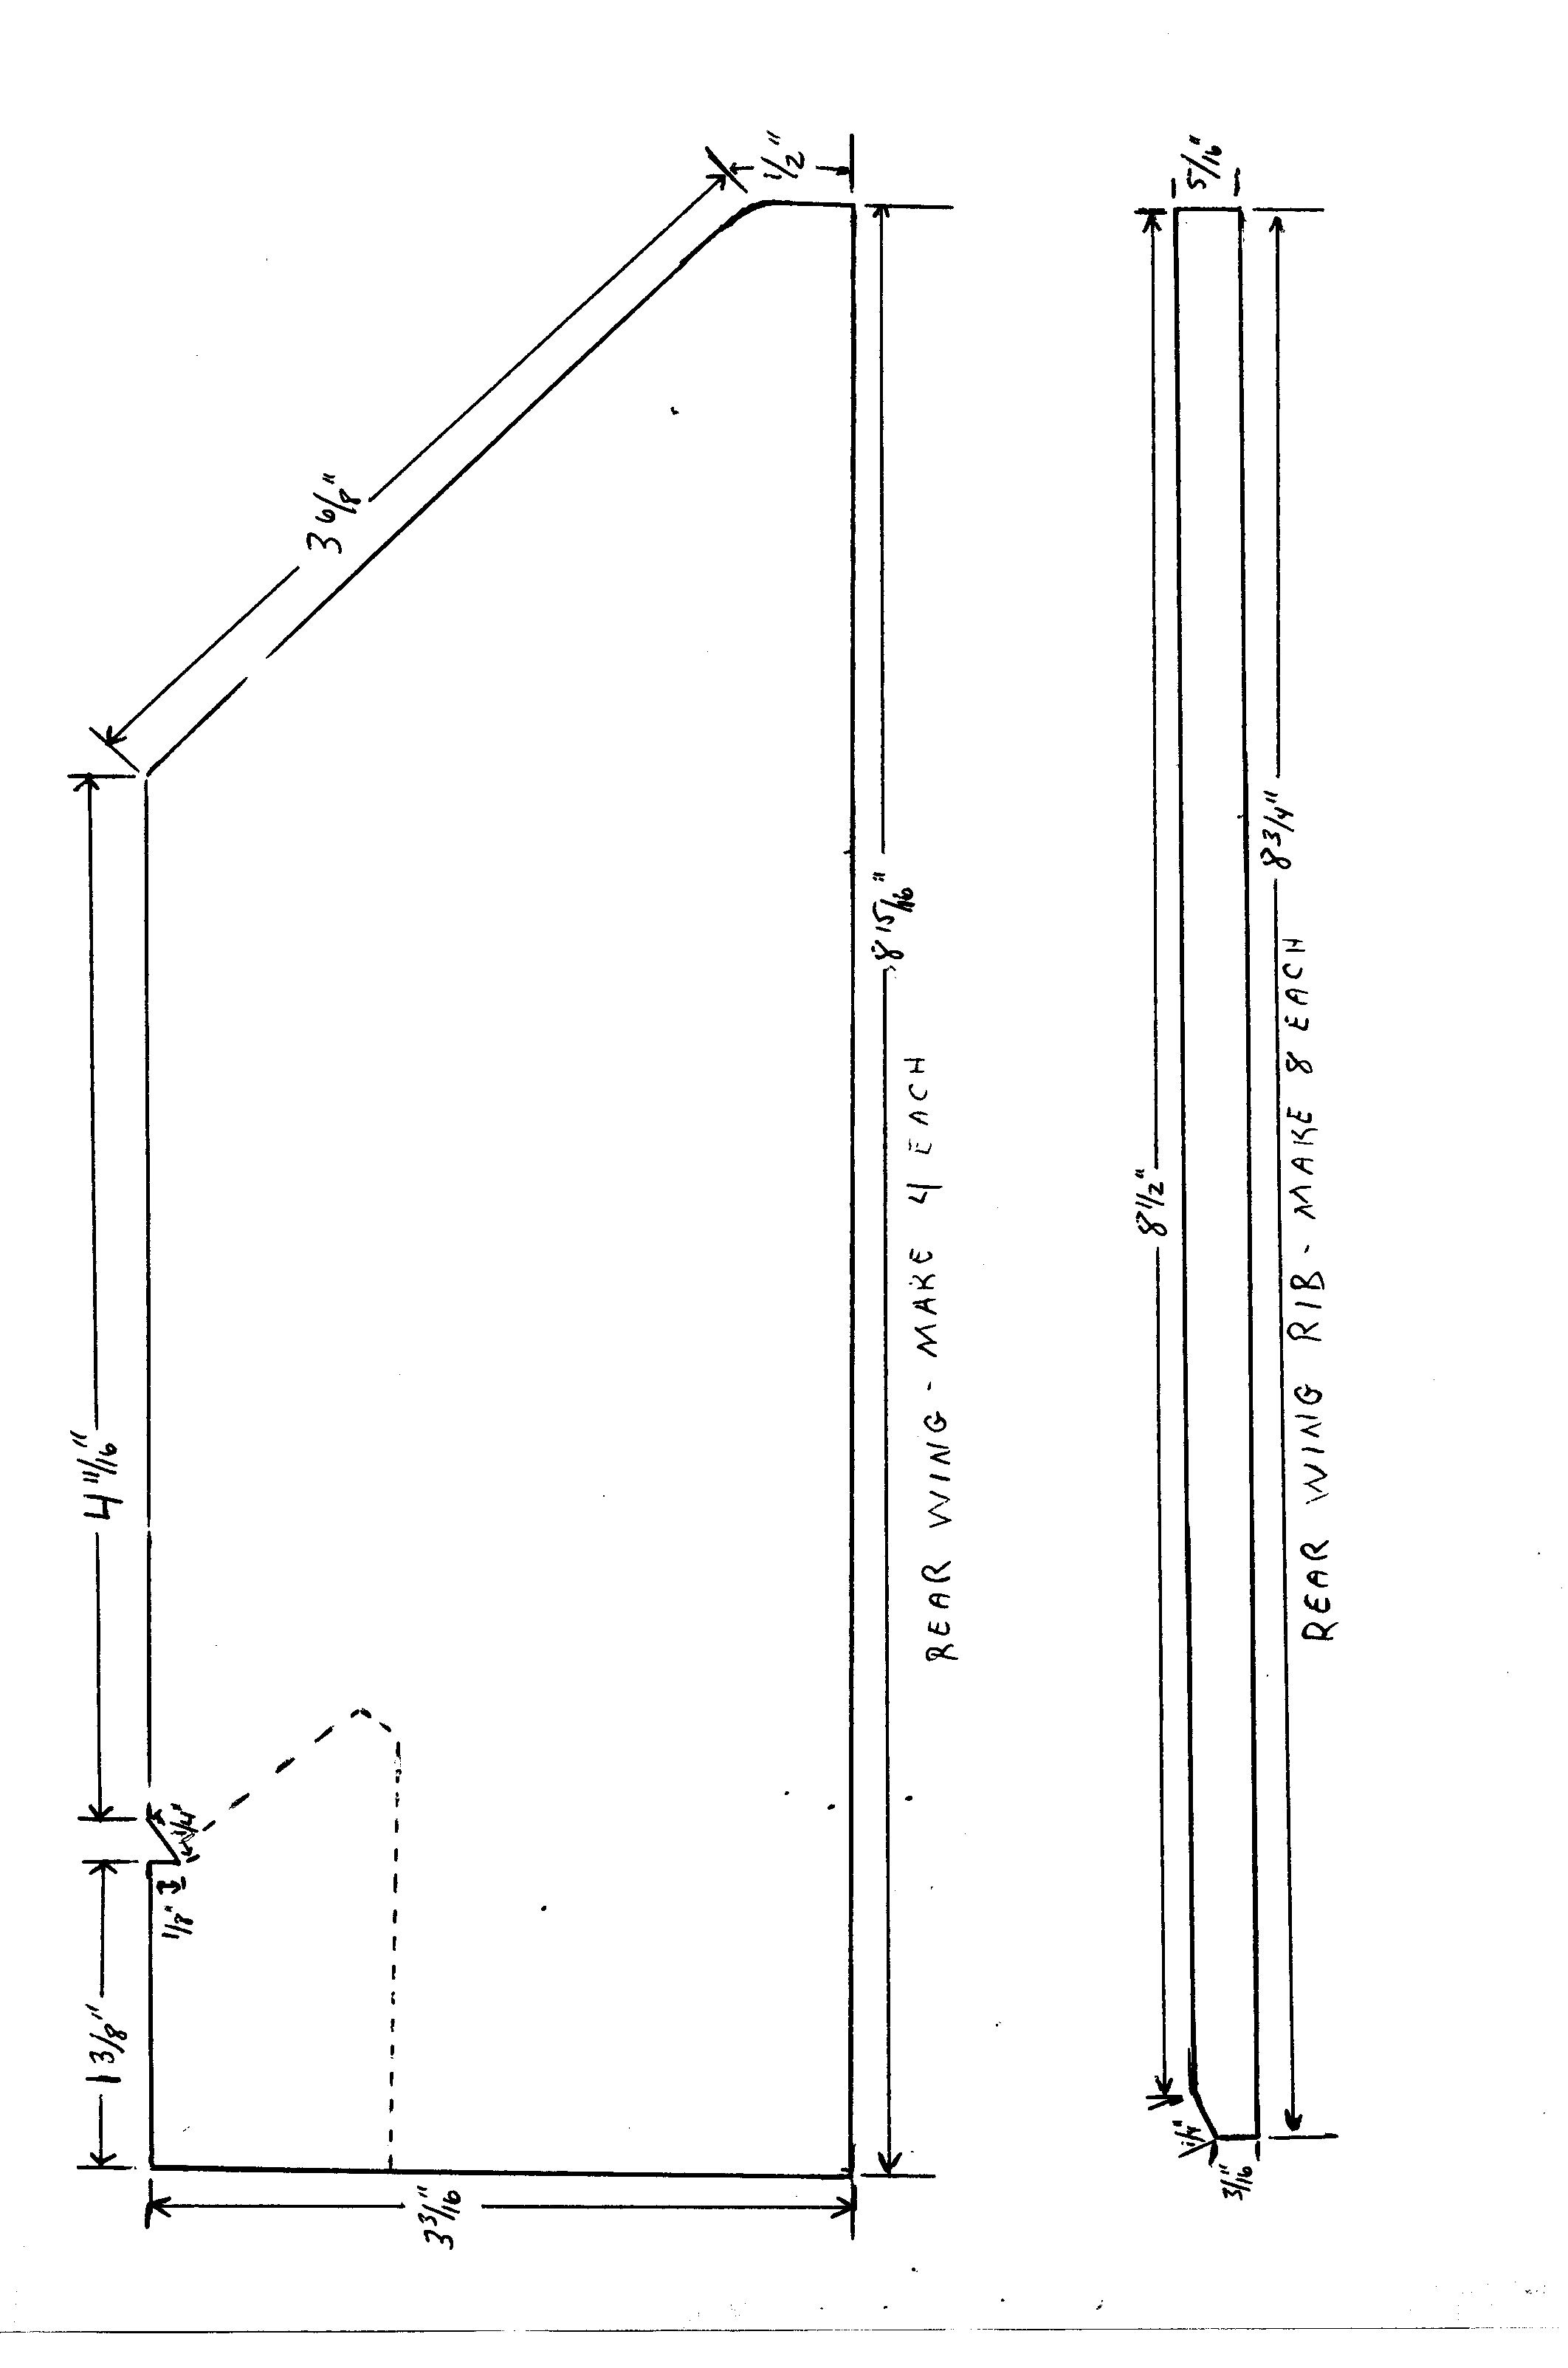
- Rear Fin Template
- Main Body Diagram
Construction was pretty basic, starting with a standard engine mount including a Kevlar shock cord assembly, and the two BT-60 tubes coupled together. At this point, I gave the body a light coat of spray Kilz filler/primer and let it dry. Then I sanded it down, and repeated this until the spiral lines were all filled. Two sheets of copy paper were glued together with white glue and wrapped around the aft end of the tube and then trimmed to meet. That joint served as a base for the fin and wing alignment. Wings, wing ribs, and fins were cut from 1/8" basswood using a Dremel tool. These were then filled and sanded with Kilz. Hanger parts were cut from 3/16" basswood then filled and sanded.
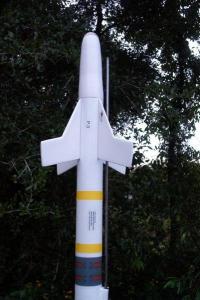
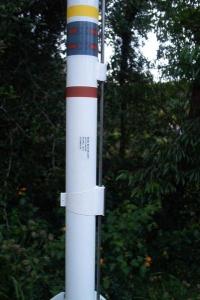

At this point, the body, nose, fins, and wing ribs were painted gloss white. The wings were painted gloss white except for a 1/2" strip along the root edge, which was painted aluminum to simulate bare metal plus the rollerons. The wings were attached one at the time and each was allowed to cure overnight. The wing ribs were then attached to each side of the wing roots. The fins were attached, again each was allowed to cure overnight. The hanger bases were cut from 3/16" basswood and sanded to match the contour of the body tube. The hanger sides and top rails were glued on. The completed rocket was painted with Testors Glosscoat and allowed to dry overnight. The markings and stripes were applied, along with the aluminum tape on the top surfaces of the hanger rails. Then another coat of Glosscoat applied.
Nose Weight: Check your balance! You may need to add 1-2 oz of nose weight. Michael indicates that the CG is 24.5" from the nose cone.
Flight:
First flight was with a D12-3 and flew with no problems. Subsequent flight were made with D12-5s. Florida has a lot of trees and open water. The less canopy time, the shorter the drift.
Recovery:
Standard chute recovery, using a 2ft Kevlar cord attached with a swivel to a 5ft elastic cord. All landings so far have been soft, no damage yet.
Summary:
I like to build scale models of missile systems I've worked on. The PROs are mostly the satisfaction I get when it turns out right. The CONs are trying to locate the correct markings and dimensions for projects like this.
 |
 |