Scratch Caution: Rocket Original Design / Scratch Built
Scratch - Caution: Rocket {Scratch}
Contributed by Jason Toft
| Manufacturer: | Scratch |
 Brief:
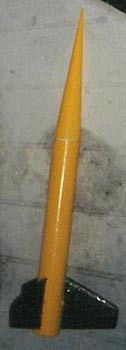
Small two motor cluster rocket with streamer recovery
Construction:
(1) 9.5 inch length of BT-56 tubing (1) 3 inch by 9 inch piece of 1/8 inch
balsa (1) 10 inch length of BT-5 tubing (1) 2 1/2 foot length of 3-inch wide
Caution Tape (1) BT-56 Nose. Cone shape (2) BT-56 to BT-20 centering rings cut
to apporpriate shape Shock Cord of your choice w/attachment method
I decided on this rocket one day when I was messing around with Rocksim 5.0. I had always wanted to build a cluster rocket, but I wanted to start small. So, I went to my local hobby shop, Ralph's Hobbies, and picked up a 18 inch length of BT-56 tubing left over from a kit that had made it into his parts box. I also got the balsa I needed. I picked up a few more parts from another hobby shop and came home to start building.
I cut a 9.5 inch length of the tubing for the body tube and set it aside. Then, I cut 2 5-inch lengths of the BT-5 tube and glued them together and let dry. Then, take the centering rings and drew the shape of the two BT-5's on it. Now, for this part, make sure you have a very sharp blade. Cut around the two centering rings on the lines you drew and then glue them 1 inch from either end of the motor tubes. When dry, insert into body tube w/glue. Make the shock cord mount and set it aside. Now, you can use any kind of warning tape and theme the rocket lik! e the tape, so do whatever you want to it. Cut the balsa into a trapezoidal shape. 3 fins with a length of 2.5 inches, a height of 2.75 inches and a tip length of 1 inch. Put a sharp airfoil on the fins and seal and sand them your preferred way. Mark the body tube for three fins and attach the fins 1/4 of an inch from the bottom of the tube. Cut a 1 1/2 inch length of 1/8 inch launch lug and put it in the fin-body joint of a fin. Attach the shock cord to the nose cone and then attach the warning tape to it about 2 inches down the shock cord. This little thing here was probably the only gotcha it has. Take a small amount of putty a place it on the sides of the top centering ring so that when you look from the bottom of the rocket without the nose cone on, you cannot see daylight. This is to disallow the ejection charge gasses to leak out the bottom. Attach the shock cord to the inside of the body tube and friction-fit the nose on. Paint the rocket with the colors of the tape, making the body the main color, and the fins the color of the letters. Use a pair of A3-4T motors for the first flight Fit them in with masking tape.
 Flight:
Recommended motors- A3-4T and A10-3T. Use two with a clip-whip. The first
flight, it was really cool. I had a few rockets out to fly and flew this one
3rd. I did not know about clip-whips, so I just twisted the igniter leads
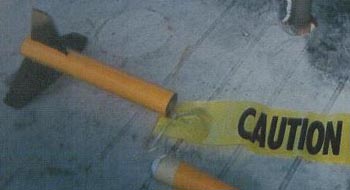
together. Make sure you use wadding. It flew OK, although the flight was weird.
What happened is that the motors did not fire at the same time, so it was kind
of like a two-stage flight. It coasted to apogee and I heard the ejection. This
is when everything went wrong. The rocket came down like a little missile a
slammed into the ground. It dug a little hole and BENT the nose cone. It also
smashed about an inch and a half of the body tube. I took it home and cut the
body tube down to 9.5 inches and I hope to fly it again soon.
Summary:
PRO's: Cute little cluster rocket. CON's: Slightly difficult to build so I
would rate this rocket a Skill level 2.
Other:
Just make sure you add that putty around the centering rings. IT IS EXTREMELY
IMPORTANT.
 |
 |