Scratch ElCheapoCerto Original Design / Scratch Built
Scratch - ElCheapoCerto {Scratch}
Contributed by Larry Brand
| Manufacturer: | Scratch |
Brief:
I designed this odd, little 5-tube tubefin with one purpose in mind: as an ultra low-cost, quick-building L1
certification for 14 year old rocketeers under the new NAR junior cert program. After spending so much effort figuring
out how to make tubefin rockets more efficient, I "retro-engineered" this one (I think that's the right term)
to have very high drag, the better to use H-power in a small, inexpensive rocket. I call it "ElCheapoCerto",
but it is basically a double size version (2.33x scale, actually) of the neat new 5-tube tubefin "TOOBOH" now
avaiiable from Discount Rocketry.
Construction:
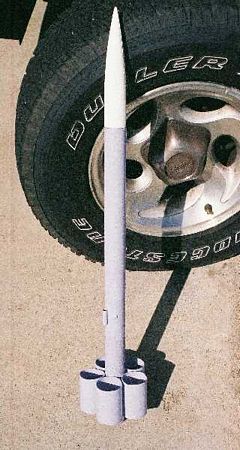
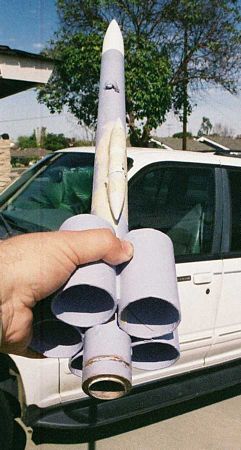
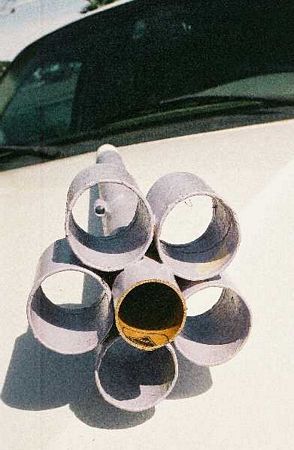
ElCheapoCerto ("ECC") is constructed from 38mm motor tube with 2" postal mailing tubing for the tube
fins. Parts count is seven (body tube, tube fins, nose cone). There is no internal structure and it flies on 38mm
motors or 29mm motors using a standard adapter. It can be scratch built in an hour for about 20 bucks including cutting
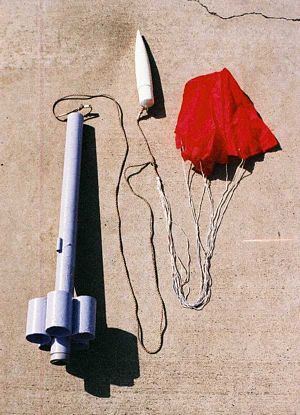
out parts and painting. The parts list:
- 38mm LOC nose cone
- 3" piece of LOC motor tube
- 5 x 3" tube fins cut from 2" heavy mailing tube (white-paper faced)
- Also required: a 1" fiber 1/4" launch lug, a 24" Top-Flite nylon chute (use 28"-30" size to assure descent below 6m/s per L1 cert rules and Safety Code), 8' of quality para cord, and 5 popsicle sticks. For 29mm motors, I used a LOC 29-38mm adapter kit. 5-minute epoxy was used throughout.
Assembly sequence:
- Cut the popsicle sticks in half and glue halves together to make four double thick, leaving the rest single thick halves.
- Cut up the 2" x 24" mailing tube into 3" sections for the tube fins. Use a razor saw or a very fine hack saw to do this.
- Seal the cut surfaces of the tube fins with a strip of 3/4" masking tape, top and bottom. If you partially snip it at intervals, it won't bunch on the inside of the tube.
- Glue the doubled Popsicle stick halves to four of the 5 tube fins, leaving one plain. These will be the spacers between the tube fins.
- Working on a large flat surface, which had better not be the good dining room table, to assure perfect alignment, glue the plain (not popsicle stick) tube fin to the body tube 1.25 inches up from the bottom. Don't skimp on the epoxy.
- When dry/hard, glue one of the tube fins with the Popsicle stick spacer next to the first, having the point of contact with the neighbor being the spacer stick, which should fit flat/flush. Use plenty of epoxy but don't slop it into the triangular space between tube fins and the body.
- Repeat this process until you get to the last one. There will remain a gap of as much as 1/4" between the last and the first tube fins. Just fill it in with half-Popsicle stick spacers (I needed 3 of them). The slight asymmetry won't be noticed by the rocket or anybody else.
- The 1/4" launch lug is glued in place 5" above the tube fin can and exactly inline with one of the triangular spaces between tube fins which you remembered not to slop glue into. The 1/4" launch rod passes through here.
- The shock cord is installed by drilling a 1/8" hole into the body tube 6" from the top and on the opposite side from where the launch lug is. Pass para cord through the hole and use a knot as a stop. The knot is covered by a reasonably streamlined piece of plastic cut from a plastic cigar tube or from a split Sharpie pen cap or the like, using plenty of epoxy to anchor it.
- You are now done. I finished mine with rattle-can spray paint. Instead of using a manly color like red, orange, camo or blue, I chose a pleasant shade of lavender-lilac I had laying around (and as Jerry Seinfeld would say, "And there's not a thing wrong with that!").
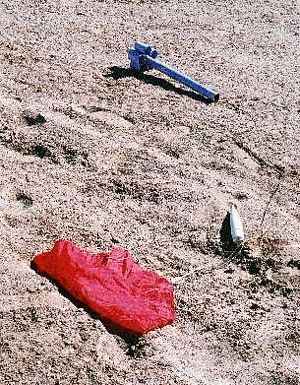
- Parachute is attached to the shock cord and the LOC cone in the usual way (i.e., by drilling my own holes instead of using the fragile hoop on the base).
Flight:
To date, I have rarely found it necessary to add nose ballast with any tube fin design. But to insure safety with the
310 gram H73 motor and casing on a rocket weighing only 425 grams, I did put 50 grams of copper BBs into the nose cone.
Plus, it lowers the maximum speed by about 10% or so, and I try not to fly non-glassed tube fins at more than 500 mph.
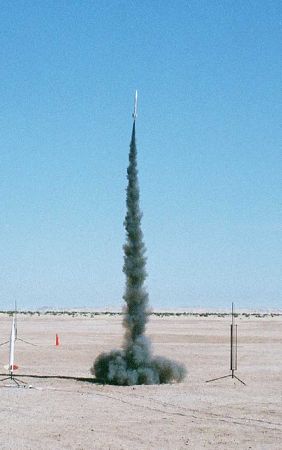
This is not needed with F and G motors. First flight was on an AeroTech F42-4 using a 29-38 adapter and was perfect and
vertical despite a 10-12 mph breeze. It went to about 600-700'. For all later flights, I taped an 18mm parasite pod
with PerfectFlite altimeter to the side so I could calculate Cd from the altitude achieved (this increases the
effective diameter from 42mm to 46mm but otherwise doesn't affect flight dynamics. Next flight on an H73-10 went to
1981', giving calculated Cd=1.90 at 295 mph, which was about what I expected based on 6-tube tube fins. Next flight on
an elderly G38-7 I had in my box was a disaster--the EconoJet CATO'd like a cherry bomb, shattering the LOC adapter
into pieces and splitting open the aft 12" of the rocket between two of the tube fins. I decided I could salvage
the thing by just permanently gluing a new 29-38mm adapter into ECC. The idea worked great but meant that all future
flights would have to be 29mm motors. Not a problem. Next came two perfect flights on H97J-10 motors with average
height of 1992' and Cd=1.74 at 444mph. I think this is probably the preferred motor for L1 in this design, along with
the 38mm H73J-10 as a second choice (slower climb and less wind resistance). No other H-motors are recommended although
I did (on a dare) make one successful flight on an H180-10, which the Perfectflite recorded as 2136' and Cd=1.76 at 509
mph (faster than is prudent unless the tube fins are glassed). That said, I blew a tube fin off ECC both times I tried
flying it on H128-10 motors. Not good. So H power in ECC should be limited to the H73 and H97 Blackjack motors. The
minimum Cd value obtained in flight testing of ECC is about 1.75, which compares reasonably with the calculated value
of minimum Cd = 1.63, based on its dimensions above the tube fin can and the regression equation for 6-tube tube fins.
So 5-tube tube fins and the usual 6-tube tube fins perform similarly. Huge Drag Coefficients are needed here to avoid
overspeeding the airframe of this small, light rocket. Flight testing of ECC with additional F-G motors gave even
higher Cd values at speeds of 200 mph and lower as expected--about 2.30 to 2.80. Details of these test flights:
- F23-4 682' at 159 mph
- F27-4R 589' at 150 mph
- F50-6 868' at 224 mph
- G40-7 1314 at 237 mph

Summary:
I would say the goal of a unique, simple, and cheap L1 certification rocket for 14 and above rocketeers seeking to
certify under the new NAR rules has been achieved. For fun flying, it will go to 1300' or more on G-power, which is as
high as you want to fly at our island launch site anyway.
CONs: Hard to see at 2000'. Limited H power choices (H73J-10 or H97-10). Tube fins can be dented by handing on hard surface.


 |
 |