Scratch Estes Condor 1.38X Original Design / Scratch Built
Scratch - Condor 1.38X {Scratch}
Contributed by Bill Eichelberger
| Manufacturer: | Scratch |
Brief:
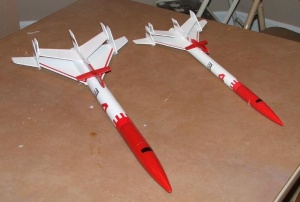
The first rocket that I cloned after finding JimZ's site was an Estes Condor, a
rocket that I had a ton of fond memories of in its original 13mm guise. After
completing construction of the Condor, I was struck by the difference in the
size of the rocket relative to how I remembered it. I was shocked to find that
it's finished length was only 18.25". In 1977 that seemed like a
huge rocket. I had been sure it was two feet long or more. After
finishing my clone and having it ruined due to the short shock cord I used
(from a then current Estes kit), I decided to try my hand at an upscale using
some of the BT-56 tubes and PNC-56 that I had bought from Hobbylinc. The
resulting rocket has been one of my most frequent fliers on all sizes of
fields.
Construction:
The parts list:
- Instruction sheet, patterns and decal scan
- 17.5" BT-56 main body tube
- BT-20J engine tube
- PNC-56A nose cone
- 1/8" balsa sheet
- 3/32" balsa sheet
- 3 x 1/2" launch lug sections
- 18" Estes parachute
- 18" sewing elastic shock cord
- 3 x CR-5520 centering rings
- CR-2050 engine block
- 18mm engine hook
- medium snap swivel
Since the BT-56 is 138% larger in diameter than a BT-50, I blew all of the patterns up by 138% using a copier equipped to perform such a function. The original Condor's BT-50L was 12.7" in length, which made the BT-56 version 17.526". (Which I rounded down to an even 17.5".) I used 1/8" balsa for the booster wings and cut the whole glider from 3/32" balsa, taking care to also scale the dihedral guides up (which is hugely important!) After ritualistically sealing the body tube with Elmer's Fill 'n' Finish and sanding away any traces of tube spirals, I began sanding the balsa parts for the wings, vertical stabilizers and wing tips, rounding the leading and trailing edges on the wings and all surfaces except the attachment point on the wing tips. All construction was done with Elmer's Wood Glue and progressed like any other project. When the glue and fillets had dried sufficiently, I coated the balsa surfaces with several coats of thinned Fill 'n' Finish and sanding between each coat.
The nice thing about the glider is that the design is so simple that it was almost foolproof. Unlike the 1:1 glider, which was constructed with a mix of 1/16" and 3/32" balsa pieces, I built the entire upscale using 3/32" balsa. Care must be taken to ensure that proper dihedral is built into the glider's rear wings, something that the two braces, properly upscaled handle nicely. I found that the best way to guarantee the proper angle was to glue the two wing halves together on top of a piece of waxed paper, then prop the ends up using the dihedral braces. When allowed to dry in this position the wings will hold the necessary angle and the main body can then be glued on top of the wings without the wings losing their shape. From this point, care must be taken so that the canard and wing tips are glued straight in their respective positions. No filler is recommended for the glider to keep added weight to a minimum, but the balsa can be made to look decent with enough sanding. I've found that a large paper clip is perfect for adding the proper amount of nose weight. I even managed to find a clip covered in red plastic that matches the paint I chose almost exactly, which helped it blend into the paint scheme.
Finishing:
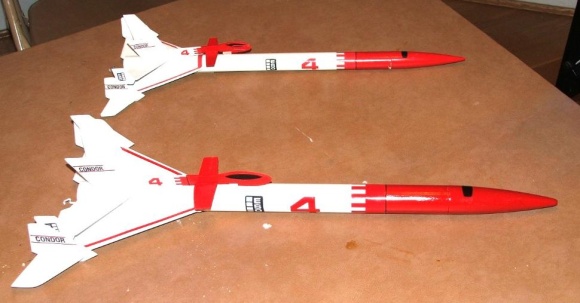
The paint scheme for the booster and glider are identical, and I used Valspar
Cherry Red Satin paint over Valspar gloss white. The paint scheme is very
simple, but the results are impressive with the decals. The entire booster can
be painted with gloss white to start. When this dries, measure 2.75" back
from the front end of the body tube and mask everything from that point back,
then spray the front of the body tube and the nose cone with a bright red. For
the glider the white paint should be just enough to give decent coverage in the
interest of less weight. The directions for the 1:1 model call for everything
1/32" behind the canard to be painted white, and everything forward of
that mark to be bright red. The decals for the big Condor were made by upsizing
the scan from JimZ's site using Dell Studio and while they weren't exactly to
scale, the difference is minute enough that it would pass all but the most
detail oriented inspection. In the end, the upscale isn't aggressive enough to
make the slight size difference shocking. It just looks like a normal Condor on
Creatine instead of steroids.
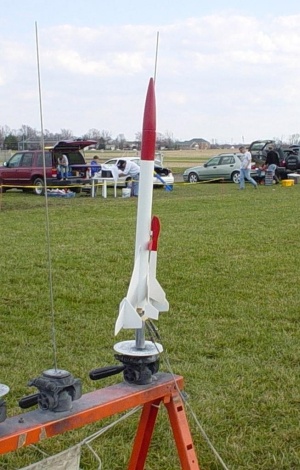
Flight:
Flights with the big Condor have rarely been boring, and true to 1977 form, my
gliders seemed to have inherited the ability to find immovable objects at the
end of the glide. Because of this, I have occasionally substituted one of the
gliders I built as a part of a failed Space Twins upscale. These glide
beautifully but wreak havoc on the Condor's ability to fly straight.
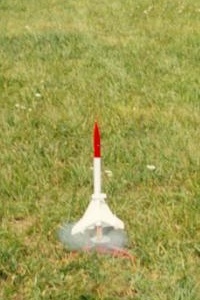
After figuring out that basswood was a less than good idea for the first glider (at my first ever club launch), I built a string of several that produced great, sweeping glides and dramatic deaths. To date I'm on number four. Version one was the basswood paperweight that fell like a tree branch, version two was last seen crossing Rt. 8 toward the old CSX railyard and looking like its namesake soaring on a thermal, and version three got stepped on by a guy walking out of a Port-A-Potty, who then swore "the fence did it". Flights have at times been truly inspiring, like the one that drifted off into the old railyard and another that arced gently in profile the entire flight then recovered with the glider flying circles around the booster as they descended. At other times they've been harrowing, like one of the more recent flights that windcocked badly, ejected a mere twenty feet off the ground, and broke the shock cord! (I got all the parts back though.) Gliders come and gliders go, but I always seem to build another. This rocket is that kind of performer. I've flown it on B6-4s, C5-3s and C6-5s with the C's producing the most satisfying flights.
Recovery:
Since I built this rocket in May of 2001, it pre-dates my personal use of
Kevlar®
in the recovery system and my habit of using way too much shock cord. As a
result, it has a gash in the top of the tube, an elastic cord in two sections
and an old Estes folded paper shock cord mount. (This was one of the last
rockets I built like this and it was this system that failed on the last
flight. To be fair, this was after quite a few flights and the elastic looked
to have dry-rotted/burned.) While it uses a stock 18" Estes chute, it has
been heavily reefed because this is a rocket I seem to choose for small field
flights. Were I to do it over, I'd use my standard six feet of Kevlar®
and elastic because they're both cheap and readily available these days.
Summary:
PROs: Beefed up size, classic looks, and great performance out of the 18mm
engines.
CONs: Lack of Kevlar® shock cord, but I was a mere babe in 2001.
 |
 |
Flights


|
|