Scratch Goblin-MMX Original Design / Scratch Built
Scratch - Goblin-MMX {Scratch}
Contributed by Gene Wolski
 Brief:
This rocket is my tribute to the Goblin which is one of my all time favorite rockets. I was inspired to build this rocket after stumbling over plans for a diminutive paper Goblin on the internet and realizing that I had a Quark nose cone and BT-5 tube in my supplies box. How convenient!
Construction:
From my supplies box:
- PNC-5A nose cone (from Estes Quark)
- BT-5 body tube, 3.75"
- 1/16" balsa fin stock
- Mylar streamer, 1/2" x 6"
From FlisKits:
- 0.010" launch lugs, 1/4" long
- EB-2.5 MicroMaxx engine block
- CRF-2.5-5 centering rings, qty 2
- BT-2.5-0112 motor tube
- 16 lb Kevlar thread, 10"
Construction was straightforward. I printed out the paper Goblin plans and measured the body tube length (3.75" inches). I then cut the BT-5 to length and starting fitting the Quark nose cone. It took some minor sanding of the nose cone shoulder to get the proper fit. I had ordered parts from FlisKits which arrived promptly as always. I started assembling the motor mount by installing the engine block in the motor tube using an expended MicroMaxx motor. I placed a small drop of glue in the motor tube, swirled it with a toothpick, then inserted the expended motor until about 1/8" was sticking out of the tube. I removed the motor casing and set the tube aside to dry.
Once the engine block had dried, I glued the forward centering ring flush with the forward end of the motor tube. I then glued the aft centering ring 1/8" from the end of the motor tube. I tied a slip knot on one end of the Kevlar thread and placed it over the motor tube, pulled the knot tight, then ran the loose end through the notch in the forward centering ring. I secured the Kevlar with a couple drops of glue.
In preparation for installing the motor mount in the body tube, I ran the loose end of the Kevlar back through the motor tube. I placed a couple drops of glue in the body tube, swirled it with my trusty toothpick, then installed the motor mount with the aft centering ring flush with the end of the body tube.
I printed out a fin marking guide using VCP and marked the fin locations and launch lug line on the body tube. I then used a sharp hobby knife and metal straight edge to cut the fin pattern out from the paper plans. I cut out four fins from the 1/16" balsa and rounded the leading and trailing edges with sandpaper. I glued the fins on the body tube and applied several thin coats of glue for fillets, sanding smooth after each. I then glued the launch lugs flush with the top and bottom of the body tube.
Finishing:
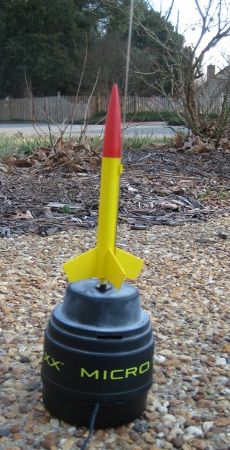
I didn't spend a lot of time sealing the balsa fins, so finishing was pretty straightforward. I applied one coat of gray primer, sanded smooth, then painted the final color coats. I painted the body yellow and the nose cone red to match the non-standard paint scheme on my full size Goblin. After painting, I used CA to attach a small block of plastic inside the nose cone to anchor the top end of the Kevlar shock cord. I attached the mylar streamer to the shock cord using a small piece of mylar tape. My micro Goblin was ready to fly!
Flight and Recovery:
To prepare the micro Goblin for its maiden flight, I put a small ball (1/4" deep) of wadding in the body tube, folded the streamer, and packed everything loosely in the body tube before putting on the nose cone. I installed an MMX motor in the motor tube and secured it with a short piece of 1/4" masking tape. After walking out the front door to my local micro test range (front yard), I put a fresh igniter in the silo launch and put the Goblin on the launch rod. After a quick (I mean quick) countdown by my 3 year old son, the Goblin ripped into the air for a near perfect flight. It landed in the street with no damage.
Success! The micro Goblin was now ready for its debut at our next club launch on 2/15/09. Launch at the club was picture perfect! Third and fourth launches from the front yard were excellent as well. The Goblin is a great flying rocket!
Summary:
Building the micro Goblin was a great experience. I found the building and launching as rewarding as any of my other low/mid/high power rockets. You really can't beat rockets that fit in a shoebox which can be launched in the front yard!
 |
 |