Modification Hermes A-1 Modification
Modification - Hermes A-1 {Modification}
Contributed by Dick Stafford
| Construction Rating: | starstarstarstarstar |
| Flight Rating: | starstarstarstarstar |
| Overall Rating: | starstarstarstarstar |
| Published: | 2011-03-24 |
| Manufacturer: | Modification |
 Brief
Brief
This review explains how I converted a sport scale Semroc V-2 xKit to a Hermes A-1.
Components
The following parts are required:
- One Semroc V-2 xKit, using the scale fin option
- 3/32” balsa stock
- Thin Kevlar twine
- Motor hook
- Mylar sheath to hold the motor hook (optional)
- Lead shot
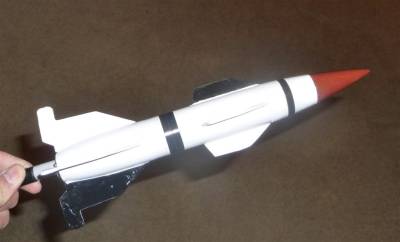
I’ll start by saying that the quality of the cone and tail cone was great, like on the first V-2 xKit that I built. On my second, these were a little rougher than expected so I was happy to see the quality was again excellent. As usual, Semroc’s laser cut fins were well appreciated.
Construction
I started the build with the motor mount. This is your typical mount that incorporates a motor block and spring motor hook. I used a mylar sheath to hold the hook in place. I have no idea where it came from and a couple of wraps of tape would work just at well. I also tied and epoxied a short piece of Kevlar twine to the tube. Because of the hook and twine, I had to sand the pre-drilled tail cone a bit. After the motor mount was installed in the tail cone, I had to notch it so the hook would flex. This is not optimal for a scale build, but I wanted the hook.
This is a very sport scale model as I worked with a photo of the Hermes on my computer screen. I entered the measurements into, and manipulated them with, a spread sheet. I found the fin tabs would be 0.5” square and the The dimensions of the upper fins, once rounded to even ruler dimensions, are: root - 2.125"; tip - 1.25"; sweep - 0.75"; and, span - 0.5".
Because the fin tabs were just glued to the end of the stock fins, I laminated them with self adhesive label stock. The edges were then sanded and sealed with thin CA.
When I ran the RockSim, I found the CP was about the same as the stock xKit with the scale fin option. I bored the nose out and added enough lead shot to set the CG. The hook-eye provided with the kit was embedded in the lead/epoxy slurry. It weighs 3 oz without motor and RockSim says a C6-5 will work, a B6-4 would be OK with a long rod. 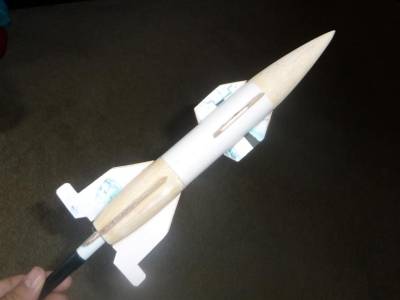 I used the stock rubber cord, tied to the Kevlar leader. I didn't use the stock 'chute, opting to use a nylon one instead.
Finishing
Here are the steps I followed:
- I primed it then painted the white base coat.
- I masked the fins and over painted the edges to seal the tape.
- When dry, I painted the fins.
- I marked the nose cone tip by positioning a clear plastic tube and slightly scoring the white base coat.
- I sprayed Rustoleum red primer into a plastic container and, using a micro brush, followed the score mark.
- The bulk of the tip was painted with a regular brush.
- The lower stripe is 2 pieces of vinyl pin striping.
- The stripe on the cone is also vinyl tape. I carefully scored one edge (every 1/16"-1/8") to allow it to conform to cone. This is the first time I've done this and it seemed to work well. There were 2 - 3 places where I touched it up with a Sharpie.
Flight
Because I had retrofitted a motor hook, all I had to do was slide the Quest B6-4 in. I used a square of Quest wadding wrapped around a wad of dog barf and attached a 12" nylon 'chute. The flight was nice with ejection a couple of seconds after apogee.
Recovery
The 12" nylon 'chute did its job perfectly. I found the ball of wadding a few feet away and recycled it (stuffed it back into the rocket).
Summary
This is a semi-scale version of the Hermes, but it is close enough for me!

Related Products
.jpg)
.jpg)
.jpg)
 |
 |