Scratch Last Point Original Design / Scratch Built
Scratch - Last Point {Scratch}
Contributed by Duane Boldt
| Manufacturer: | Scratch |
Brief:
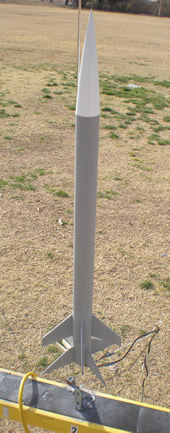
The "Last Point" is my last rocket for the 2009 EMRR Challenge. It is a scratch built, staged rocket using
13mm motors.
Construction:
Parts List:
- 1 - 15 3/4" BT55 Body Tube (Sustainer)
- 1 - 2 3/16" BT55 Body Tube (Booster)
- 1 - 2" BT5 tube for Motor Mount (Sustainer)
- 1 - 2 3/16" BT5 tube for Motor Mount (Booster)
- 2 - 1/8" launch lugs
- 4 - Homemade BT55 - BT5 cardboard centering rings
- 2 - Thrust rings made from 13mm motor casing
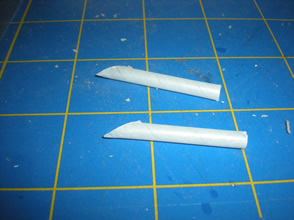
- 1 - plastic nose cone
- 1 - elastic shock cord
- 1 - 12" parachute
- 4 - Balsa wood fins for Sustainer 4 - Balsa wood fins for Booster
This was a fast build. Basically done in one day. Build, primer and fly. (Finishing will be another day...)
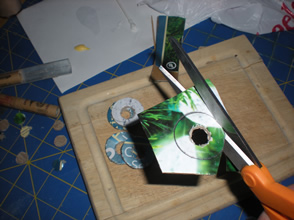
First two pieces of cardboard from a Christmas lights box were glued together to make a 2-ply cardboard sheet.
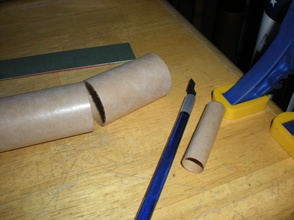
Then BT55 and BT5 tubes for the booster were cut to length. These were each 2 3/16" long.
After that a 2" BT5 piece was cut and the sustainer body tube was cut to 15 3/4" from the BT55 tube.
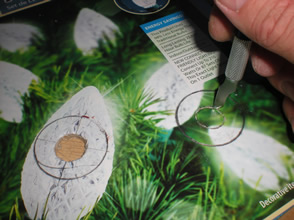
Once the cardboard was dry, five centering rings were drawn. First the centers were cut out with a hobby knife and
then sharp scissors were used to cut the rings out of the cardboard. The edges of all the rings were sealed with
CA.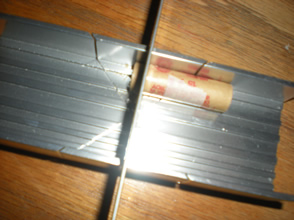
Thrust Rings were then cut from spent 13mm motors. Using a razor saw with a miter box tool makes this process much easier. You can pick these up at Michael's or local hobby shops.
Two 13mm motors were taped together to get the correct spacing for the thrust rings being glued inside. They were spaced so that the sustainers motor would extend 3/16" inside the booster motor mount. The thrust rings were then clued in and set using the motors.
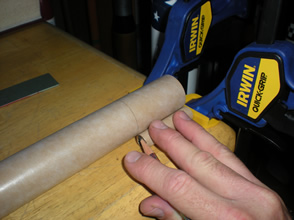
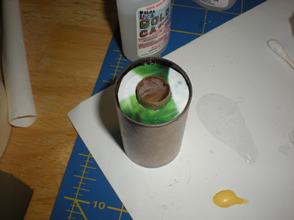
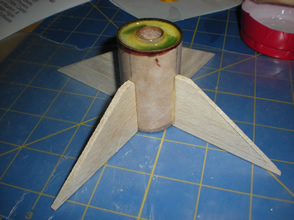
The centering Rings were then tacked onto the BT5 motor mount tubes with CA. Once they were set up, epoxy fillets were applies. Epoxy was also spread over the cardboard rings to strengthen them.
The two body tubes were marked for the fins and launch lugs using an Estes tube marking guide.
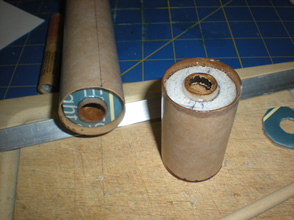
Once the motor mounts had set up for a while, they were glued into the booster and sustainer BT55 tubes.
The eight fins were cut from scrap balsa. The edges were just sanded square to save time. The fins were then tacked onto the tubes with a thin layer of wood glue and allowed to dry.

The launch lugs were then glued on and allowed to dry.
An elastic shock cord was mounted using the traditional tri-fold paper mount. the other end was tied to the nose cone and the parachute was also attached to the nose cone. Hot glue was used to attach the tri-fold shock cord mount to the inside of the main body tube.
The "Last Point" was now complete and ready for the test flights..
Finishing:
The rocket was not finished past basic primer gray because of time constraints for the contest as it had to be
flown 3 times today.
Flight:
Recommended motors are A10-0T for booster and A10-3T for sustainer.
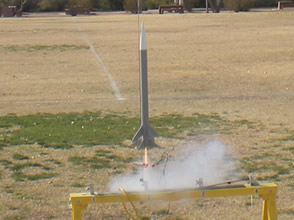
First Flight: A10-0T Booster, 1/2A3-4T Sustainer
The wind was gusting pretty strong but we had to get the flights off on the last day of the contest so we went ahead and launched the rocket. I made the mistake of launching into the wind on the first flight. The booster went straight up, but the sustainer weather cocked badly and ended up as a lawn dart with ejection happening after the nose cone was stuck in the ground.

Second Flight: A10-0T Booster, 1/2A3-4T Sustainer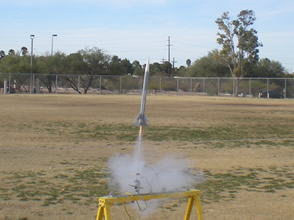
For this flight I wisened up and launched with the wind. This time the flight straightened out and the sustainer had a nice straight flight up. However, the flight was just not high enough and then the parachute didn't completely deploy, so the rocket fell and lawn darted again.
Again there was no damage to the sustainer, but a fin broke off the sustainer. We glued it back on with CA glue in the field.
For the third flight we decided we needed a little more power on the 2nd stage to get the rocket up higher for parachute deployment.
Third Flight: A10-0T Booster, A10-3T Sustainer
The third and final flight of the day was by far the best flight. Since launching with the wind worked out so well on the second flight, we again launched that direction. The flight was excellent. During the booster phase, the rocket straightened out and the sustainer shot straight up on the more powerful A10-3T. This was exactly what we were looking for, however, the chute did not deploy completely and now the rocket was screaming down toward the field nose cone first which was not what we were looking for.. Another lawn dart.


Turns out, the biggest mistake of the day was grabbing an 18" nylon chute instead of a 12" plastic or nylon chute, either of which would have fit much better in the BT55 cone and made for easier chute deployments.
Summary:
Use a 12" chute on the sustainer! This is an easy to build, great flying 2-stage rocket on these 13mm motors.
I look forward to flying it many more times. I may build a second booster and try for some three stage flights.
Other:
Not sure how we will paint this one, but it has been very fun and enjoyable building the various rockets for the 2009 EMRR Challenge. this was my first year and I look forward to many more. Next year I will make sure to get started right away so that I am not so rushed at the end of the year.
Thanks for a great challenge Nick!
Duane
 |
 |