Scratch Micro Sputnik Original Design / Scratch Built
Scratch - Micro Sputnik {Scratch}
Contributed by Ken Johnson
| Manufacturer: | Scratch |
 Brief:
A lilliputian scale-down of one of my favorite rockets, the Spudnik. Or, in other words, I've too much time on my hands.
Construction:
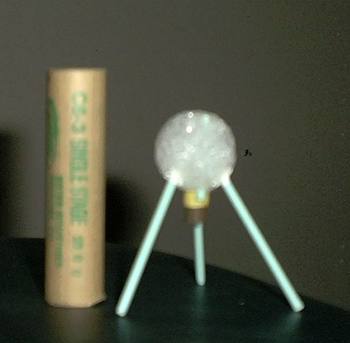
The materials were all scrap, destined for the dustbin. So, one rainy Saturday night with nothing to do, I decided to build a replacement for my son's crippled space traveller, the Spudnik. All I used was a 1 inch styrofoam ball left over from a Christmas decoration project, 4 Q-tips, a length of junk mail and some white glue.
Actually, this is the easiest rocket I've ever scaled up or down, and all measurements were more-or-less SWAG'd. I just hollowed out a styrofoam ball with a 6mm drill bit. After that, I cut the cotton off each end of a plastic handled Q-tip, then pushed them about 3mm into the styrofoam, evenly spaced around the hole. Next I rolled some "junk mail" around a 6mm drill bit, applying glue as I wound it around twice. Once the glue dried, I cut a circle out of a Post-it note with the hole puncher, and stuck this over one of the ends of the rolled junk mail (after removing the drill bit). I coated this whole assembly with a liberal dose of CA, and once it dried thoroughly, inserted it into the styrofoam ball. A short snippet of Q-tip tube also serves as the launch lug, and was unceremoniously shoved through the styrofoam, parallel to the motor tube and was trimmed flush. Simple, but effective. But here's the gotcha- as an oversight, I didn't think about the legs extending too far to allow the ignitor to reach anywhere NEAR the motor on the Quest launcher. Time for Plan B. Build a new launcher. This was accomplished by taking one of my patio lights (that the kid next door had destroyed), removing the light bulb, trimming some plastic, and melting a hole in the top for a launch rod. The Quest ignitor fits into the socket designed for the light bulb like it was originally designed for this purpose! This makes it a true "back yard rocket" in every sense of the word! And since the light was 12 volts, there's plenty of power. Just turn on the light switch inside the doorway, and away she goes! The other patio lights make a nice runway effect. Just can't forget to replace the light bulb afterward!

Flight:
There is only one motor for this rocket, the Quest Micromax. Prep couldn't be easier- just install the motor, like its big brother the Spudnik. Flight characteristics are almost the same as for the Spudnik on an A10-3T: Slow ascent, decent altitude but not really high, and a total cessation of movement when the thrust stops. It sort of "wobbles" to the ground, unharmed. Ejection shoves the motor out the back. But, it seems to me that proportionally, a Micromax motor has a better thrust-to-size factor than a 13mm motor. Seems these little motors pack a good wallop for their minuscule size.
Summary:
Pros: ease of construction, cheap flights, great conversation starter at barbecues, and you won't lose it in the clouds. Cons: overall lack of a plan from the start led to a design challenge in building the launcher, and the styrofoam can't take too much abuse.
Other:
When building a Micromax rocket, using a hollow Q-tip for a launch lug works great. Just cut off the cotton.
Sponsored Ads
 |
 |


