Scratch Power Play Original Design / Scratch Built
Scratch - Power Play {Scratch}
Contributed by Moira Jean Whitlock
| Manufacturer: | Scratch |
 Brief:
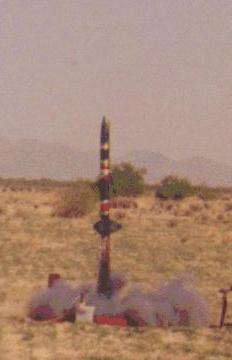
This rocket is named for the local hockey team and is decorated in Coyotes
colors. It is single staged, but can fly on 1, 3, 4, 6, or 7 29mm motors. It
has 3 fins, but if 6 were used, then flights on 2 and 5 motors are
theoretically possible. This is based on the notion of symmetrically placing
motors and fins. Thus far it has been flown with G motors, but I am looking
into the possibility of using a central H motor or clustering 3 or 4 Kosdon H
motors. I have used motors with low average thrust and long delays. The rocket
recovers on a homemade purple 60-inch parachute.
Construction:
The nose cone is an LOC 4-inch by 12 inch hollow plastic model. Thus far I have
not placed any mass objects within, but have used 2-part polyurethane-epoxy
foam to mount a long piece of wire that used to be a metal shroud line from a
military parachute, inside the nose cone. This serves as the attachment point
for my parachute and the shock cord. Experience has shown that high speed
deployments break the plastic loop on the nose cone meant to attach cords. The
nose cone was obtained from Atomic Rockets in Phoenix. Magnum also carries
them. The 2-part foam can be found at Hobby Bench. Also, Space Modeling
Solutions, which has an ROL site, also carries it.
The main body tube is also LOC, and is a 34-inch long, 4-inch diameter paper body tube. This was also gotten at Atomic Rockets. The seven motor tubes are all 17-inch lengths of LOC paper 29mm motor tubes. Since these tubes come in 34-inch lengths, halving them served well. These tubes are affixed with 12-minute epoxy in a 6 around 1 pattern often called the star cluster. I used masking tape to keep them together while the epoxy dried. Another viable way to do this and get straight results is to epoxy three pairs separately first, then apply the pairs around the central tube. This structure is then placed inside the main body tube with 12-minute epoxy and gaps filled in with the 2-part foam. If the main body tube chosen allows the 7 motor tubes to fit loosely, a 6-inch section of 4-inch paper coupler tubing from LOC can be used to tighten that fit. Anyway, push in these tubes until 12 inches still protrudes out the end of the main body.
The fins are 3/8 inch thick Baltic birch and measure 7 3/4 inches in span, 8 1/4 inch root edge, and 1 1/4 inch tip. They were cut with a bandsaw. The fins are epoxied with first 12 minute, then filleted with 30 minute epoxy into every second groove between the motor tubes. This is called wedge fin attachment by LOC, who, with their 4-29SS, inspired me to create this bird. The leading edges and tips are all sanded to a rounded edge. The wood was found at a local hardwood store called, New Beginnings in Wood, and can also be found at Home Depot.
There are 2 launch lugs, and they are brass pipe fittings 1 inch long by 3/4 inch diameter. The inside diameter has taken lightning rods to 5/8 inch diameter with slack. These lugs were found at Home Depot. They were applied at 20 and 30 inches from the top of the main body with 12-minute epoxy and the connection was later reinforced with 30-minute fillets.
The homemade parachute is 60 inches in diameter and is made up of 8 sloped triangular gores of rip stop nylon. The gores are sewn together with a 4-thread serger and the spill hole and shroud lines are sewn and finished with a straight stitch. The shroud lines are 1/8 inch polypropylene cording. The shock cord is 10 feet of wire wrapped bungee cord found at American Science and Surplus, which has mail catalogs and an ROL site. The bungee is anchored via a u-bolt through a 1/4 inch thick 4-inch diameter birch centering ring 20 inches down inside the main body tube from the top of the rocket. The centering ring was bought from Space Modeling Solutions and the hardware from Home Depot. Fred Meyer grocery store also carries u-bolts. The assembly was affixed in place with 2 coatings of 12-minute epoxy, and the underside of the ring where the u-bolt was bolted was also reinforced with 12-minute epoxy.
About the trickiest part of the assembly process is making sure that the fins are straight and not angled. Be patient and do one at a time. I sighted down the body tube to check alignment often, with each fin. The result is a sturdy rocket even without fiberglassing. It also looks strong. In fact, another modeler said that it "looked like trouble asking to happen". I added three vent holes in the main body tube 20 inches from the bottom of the main tube to prevent premature separation of the nose cone. I did this with an awl.
Metallic green spray paint provided the main color, and a sports shop provided me with Coyotes puck stickers for the fins. A Monokote Coyote was also affixed to the body. When I decorated the bird, I applied sparkling diffraction grating paper that is self adhesive. This is great for looks and visibility. It can be bought from American Science and Surplus. The ones in Coyotes colors was found at Craft Mart and Michaels, two craft chains. I also ran a loop of this decor over the launch lugs to reinforce their connection.
 Flight:
I ran this design through Rocksim 4 with the prediction that it would not
require mass added to the nose, even with 7 G motors. Final preps included
placing 29mm wood bulkheads into all 6 of the outboard tubes so that only the
central motor would do the ejection of the chute. This was decided when I
wanted to eliminate the chance of pressure loss when the outboards aren't used
or if I'm using single use motors with short delays. They can simply eject
themselves. The bulkheads came from Space Modeling Solutions, whose owner had
just made centering rings for 29mm motors and had these left over! I happily
epoxied them in at the length of an Aerotech G40.
Since this design was going to be my special pride, I decided to put it to a punishing test to be sure that it would be worthy to show off. First, 4 G80's. Rocksim predicted 10 seconds as a good delay for the central motor, so a G80-10T was in the center. I had 3 other G80T's but they were delays of 7. No problem, since the outer tubes had the bulkheads. And for neatness and style, I added streamers to the motors for their fall. I used worm bed wadding, enough to fill the body tube's diameter. I got this from Space Modeling Solutions. I placed a thin ring of masking tape around the nose cone shoulder to tighten the fit, but not make it too tight to pop. I used 4 low current igniters from AAA Model Aviation Fuels and a car battery and relay system to be sure all 4 lit.
The rocket screamed to easily 2000 feet and deployed the chute perfectly. The rocket was arcing down a little, so maybe 9 seconds would have been okay, with an altimeter. The rocket landed intact right at rangehead!
Next, I decided that it was time to do the true test, Seven motors. I had 7 G40's, and one had a 10-second delay. The others were 7's. Like with the first flight, I meticulously friction fitted the central motor with masking tape so that it wouldn't eject, because it was its job to deploy my chute. Looking back, if I would change anything, it would be to add a loop of piano wire between tubes so that it could be bent over the central motor as a retainer. Then I found 7 Igniterman igniters and wired them in parallel. The liftoff was even louder and more fiery than the first time and it soared out of sight. I listened for the popopopop sound to know that the motors fired and proudly beheld my large purple chute. This time I had to walk a mile to get the rocket back, but it was glorious. This time, 10 seconds seemed right.
Summary:
Easy to find parts, daring and fun to fly, with spectators loving it. Can be
flown on just 1 motor, or as many as 7. Unless you airstart any of the outboard
motors, do use motors with the same thrust characteristics and same propellant
to be sure that all light at the same time. I also suggest using a battery with
enough current capability to light all the igniters at once as well. I suggest
that the igniters all be the same type too, so that you don't get some motors
lighting and others not, resulting in a lateral flight.
Other:
Go for it, you clusterguys! If we never take chances, we'll never know how much
fun clusters are.
 |
 |