Scratch Sardo XXL Original Design / Scratch Built
Scratch - Sardo XXL {Scratch}
Contributed by Larry Brand
| Manufacturer: | Scratch |
Brief:
This is a simple research rocket used as a reference "typical" tubefin design in an upcoming article on
tubefin aerodynamics. The body is just a 3" postal mailing tube. Because its very easy and inexpensive to build
and Level One capable, a nicer version will also be launched as a kit by a local manufacturer--and with a snappier
name.
Construction:
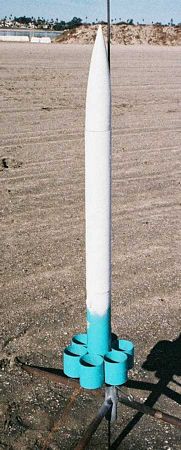
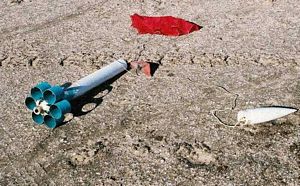
Sardo XXL is a simplified and scaled-up version of the "AURACLE 54" I presented earlier on the EMRR
website. Components include a 32" heavy-walled 3" postal mailing tube (LOC tubing would be fine), six
2.75" tube fins cut from 3" phenolic tube (straight cut, no bevel), a 3" LOC cone, 14" of 38mm LOC
motor tube, and two 1/4" ply centering rings (3" OD and 38mm hole) from What's Up Hobbies. 9' of good grade
para cord for the shock cord and a 30" Top-Flite chute make up the recovery system. 5-minute epoxy was used
throughout.
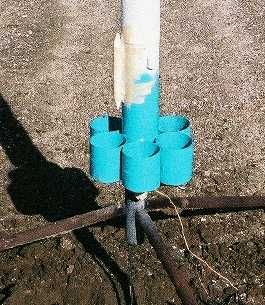
Construction exactly follows the assembly procedure for the AURACLE 54 article, only with bigger parts. Leave an inch above and below the centering rings when attaching them to the motor tube. For strength and durability, I reinforced the lower outside surface of each Phenolic tube fin with a piece of 1-1/2" glass tape and epoxy. You have to do this with Phenolic or it shatters like fine china when it hits the ground. The glassed tape makes it bulletproof. The shock cord was attached to the upper centering ring by drilling a 3/16" hole through it, passing the para cord through, and tying it with a tight knot to the motor tube and epoxy smeared on the knot to keep it there. It's not pretty, but it works great. An eye-bolt (about 1/8") here would be the more accepted method, but I was out of them at the time, and I like to experiment. A 1" long 1/4" LOC fiber launch lug was glued on flush with the top of the tubefin can and aligned with a triangular hole between 2 tube fins. A second one was glued on 9" above it and exactly aligned using a launch rod threaded through both of them. As always, the other end of the shock cord was attached to the LOC cone through two 3/8" holes I drilled in the base (insert cord into one hole, and use a tweezers to grab the free end and pull it through, then tie off with a bowline). The 30" chute was attached 18" from the top end, and a medium Nomex® heat shield was attached below it with one of those cheap micro-sized aluminum carabiners that says "WARNING: Not Load-Bearing" on the side (it's from a key chain, I think).
Finishing:
Finish was rattle-can Tamiya spray. Aqua on the bottom and white on the top, which looked better than I expected and
was just as hard to spot in the sky as you would predict.
 Flight and Recovery:
Because there's so much room for the recovery system, I like to first roll up the shock cord inside the Nomex®,
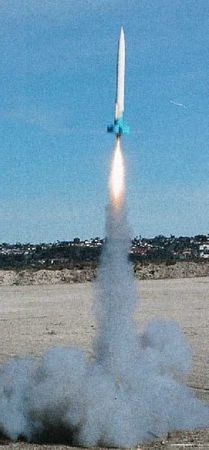
and stuff it in first as a kind of wadding with the folded chute pushed down on top. First flight was on a CTI G69-5.
Perfect and straight to 976' with measured drag coefficient (Cd) of 1.31, which was better than I expected. Flights on
CTI H143SS-6 and I212SS-7 motors gave 1548' and 1960', the latter giving Cd=1.23 at 437 mph. This is really good since
the calculated "best Cd" for the Sardo XXL design in 1.41 at maximum speed. I didn't try larger motors
because simulations predicted speeds well over 500 mph, which I like to avoid with tubefins that are not specially
hardened against dreaded tube fin flutter. Using a 29mm-38mm adapter, I got a beautiful boost to 1048' on a AT H128-S.
Calculated Cd = 1.28 at a mild 247 mph. This would make a wonderful, easy L1 cert flight, especially for smaller HPR
fields, and that is one reason the design will be kitted. Low cost and fast building, especially good for 14-year olds
under the new L1 rules or for anybody wanting to just get his ticket punched and move on to bigger things right away.
The minimum recommended motor is the F50-4 for a slow climb to 565'. By the way, I made all these altitude measurements
with a Perfectflite Alt15k in an external, taped-on pod. Landings were perfect in every case, although I did chip one
tube fin a little bit when it managed to descend onto the only rock in the Fiesta Island sand pit.
Summary:
PROs: Easy, low cost, and very fast to build (and will be even faster when it is a kit--less than an hour). Good,
stable flier on G-H motors and I power up to 212 Newtons or so. Like all tubefins, it is very stable in wind so a good
fun-fly rocket when your other stuff is grounded by a breeze.
CONs: OK, Some people do not consider the unique looks of a tubefin to be an asset. It doesn't go that high due to twice the drag of a "normal" 4FNC rocket, but this maybe isn't a disadvantage if that's what you want. The tube fins take the landing impact, so they should be glassed on the bottom edge, especially if you fabricate them from ordinary cardstock tube.
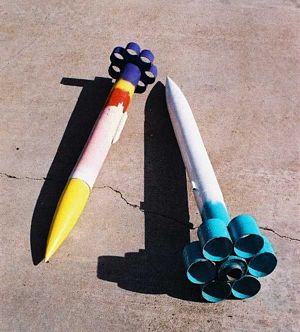
The Sardo XXL can also be built with 7 tube fins instead of 6. To do this, just consult the construction article titled "H-Pod" in EMRR; the rocket you get will then be an "H-Pod XXL" (see photo). I'll have more to say about these two in an upcoming SPORT ROCKETRY article appearing in a few months.
 |
 |