Scratch Sunday Morning Press Original Design / Scratch Built
Scratch - Sunday Morning Press {Scratch}
Contributed by Ray King
| Manufacturer: | Scratch |
 Brief:
What better use of the Sunday newspaper? When I started this project I thought it would be very easy to roll a tube from newspaper, after all it is really easy to do at the kitchen table. I found as with many things it is never as easy as I thought.
Construction:
Parts list:
- 3-5 full pages of Sunday newspaper (Actually any day will do)
- Old “D” Engine casing
- Soda 12 pack carton
- Toilet paper roll
- Kevlar string, recycled from an old rocket that had previously lawndarted
- McDonald’s straw
- Old birthday card (cardstock)
Tools and Supplies:
- 3M Spray adhesive (Super 77)
- White glue
- BT-50 tube
- Masking tape
- Clamps
- Aluminum angle iron
- And other standard rocket build items
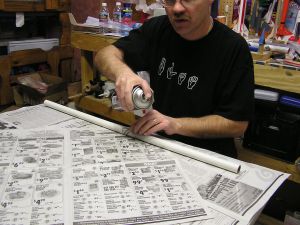
As mentioned above, the most challenging part of this build was making the newspaper tube. First, I struggled finding a suitable mandrel for a “D” size engine. I went to the local hardware store checked every PVC, copper, and galvanized pipe I could find without success. Then, I moved to wood dowels which turned out to be very warped. I finally gave up and decided to use a BT-50 tube.
First, start by laying the newspaper flat on the table with tube out on top it. At the very end of the paper, apply paper glue at the tip to secure it to the opposite side of the paper ensuring the inside of the tube does not unravel. Once the end is firmly attached to the paper, begin slowly rolling up the newspaper over the tube, spraying 3M adhesive every roll. As you approach the center of the first sheet, add the second overlapping roughly half the sheet. I found that spraying the adhesive liberally produces a tighter tube. I rolled 4 tubes this way refining my technique each time and changing the number of sheets per tube. I like the 3 sheet tubes the best.
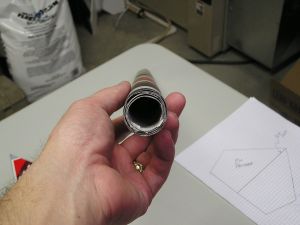
As you can see from the end view of the tube it is OK, but still is not as tight as I had originally hoped. Next, I cut the tube to the final length of 18 inches.
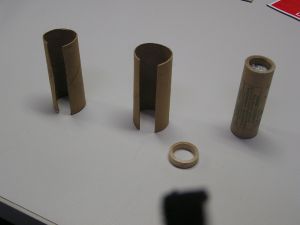
As you recall I used a BT-50 tube as the mandrel so the tube was slightly large for a D engine so I needed to add a spacer to ensure a tight fit of the engine. I cut toilet paper tubes in half and then lengthwise. I made sure the tube was about .5” longer than a D engine. I then trimmed it so it would fit into the body tube without overlapping. Finally, I glued one of these into the body tube making sure it was even with the end of the newspaper. This insert tightened the tube a bit and provided for a nice tight fit for the engine. I planned to use the other half at the top of the tube but it really wasn’t required and I was worried about the chute hanging up on ejection.
Next, I cut roughly a ¼inch of the end of the old motor tube for the motor stop. I notched this slightly for Kevlar string shock cord. I tied the string to the ring and glued the ring into the tube liner previously inserted into the body tube.
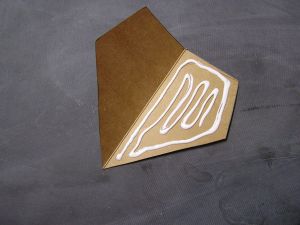
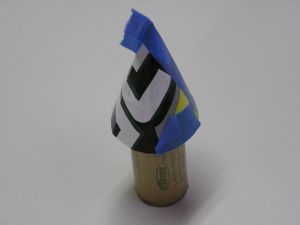
Now that the body tube was complete, I moved on to the nose cone. I used a “Vault” 12 pack box to cut out a disk the size I wanted. Then I cut roughly 120 degrees out of the disk. Next, I formed it into a nose cone and glued it together, overlapping it about a ¼inch. I used tape to hold it together until the glue was set. I then used the rest of the old engine casing to form the bottom of the nose cone. The nose cone overhangs the body tube to ensure the end of the tube would not shred during launch. After this was complete I used a 1/8” drill and added a hole to the bottom of the engine casing for shock cord attachment.
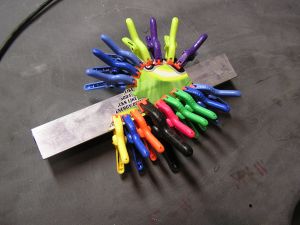
I used the same “Vault” box to make the fins, cutting so the fold of the box would form the leading edge of the fin. I made a number of different shapes finally settling on the one shown. I used up the entire “Vault” box experimenting so I had to move to a “Diet Coke” box I had on reserve. Once they were cut out, I folded and I glued them together clamping them to an angle iron to ensure they did not warp.
While the fins were drying I decided that attaching the fins directly to newspaper tube may work for one flight, but it would be very likely that the newspaper would tear and one or more fins could come off during launch. I decided to make card stock reinforcements for each wing so I proceeded to cut out 6 from an old birthday card.
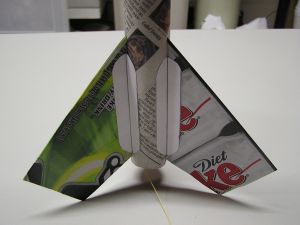
I marked the body tube and glued the fins to the tube. I then glued the 6 cardstock reinforcements to the fins and the tube. Once the fins dried they felt stiff and secure.
Next I added the launch lug. I had to add a spacer to the launch lug because of the nose cone overhang. Back to the birthday card, I cut out a section of the card about 2” long and 1.0-1.5” wide, first folding it in half then in half again. I glued this to the body tube in a teepee fashion about 6” from the bottom of the tube. I found my McDonald’s straw. Cut 2” off the straw and glued it to the card stock teepee.
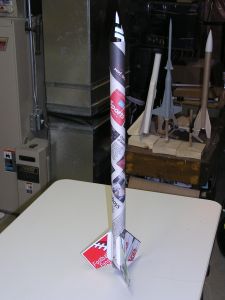
I attached the shock cord to the nose cone and admired my master piece.
  |
  |
  |
  |
  |
  |
Flight and Recovery:
As luck would have it, the next weekend we had a nice surprise of 12 inches of snow and then a week later another 15 inches of snow. I was concerned about what would happen when the rocket landed in the snow and got wet so I waited about 6-7 weeks. The snow is almost gone and I couldn’t wait any longer so I enlisted my kids and as many kids in the neighborhood as I could for “catch recovery”. Although the snow had melted the ground was wet.
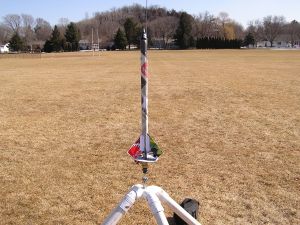
We prepped a D12-3 adding tape to hold the engine in place and ensure proper ejection. It was a calm day with a slight wind toward some houses and trees. I angled the launch rod slightly into the wind. With last minute instructions to the “catch recovery” ground crew we began the count down 5,4,3,2,1. BLAST OFF!
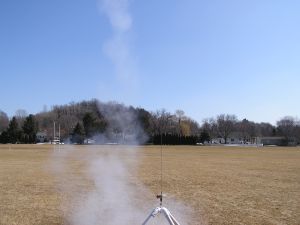
The rocket jumped of the pad and was at 100 feet before I even realized it. The photo crew was as surprised as I was. The rocket corked screwed slightly but basically launched straight up and much higher then I expected. I would guess 1,800 feet and maybe higher. Ejection occurred just after apogee with full deployment of the chute.
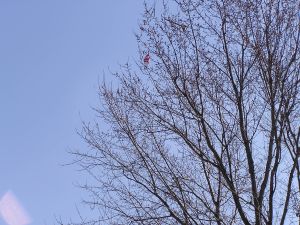
The ground crew took off as they normally do in all directions to ensure they could get to the rocket as quickly as possible or even catch it. The rocket drifted nicely toward the center of landing area and then the wind picked up carrying it into a tree just beyond the landing area. We expected it to land in a month or so. What a bummer!
Summary:
This rocket was great fun to build. Using recycled materials presented challenges in a design and construction, but I enjoyed the challenge that EMRR presented and plan to rebuild this rocket again.
I would make one change after doing some research on tube construction: The next time I make a newspaper tube, I will use a solid mandrel mounted in a fixture supporting both ends. By spinning the mandrel I think you can achieve a tighter tube.
 |
 |