Scratch Swiss Army Original Design / Scratch Built
Scratch - Swiss Army {Scratch}
Contributed by Chan Stevens
| Manufacturer: | Scratch |
Box of Parts Contest Entry
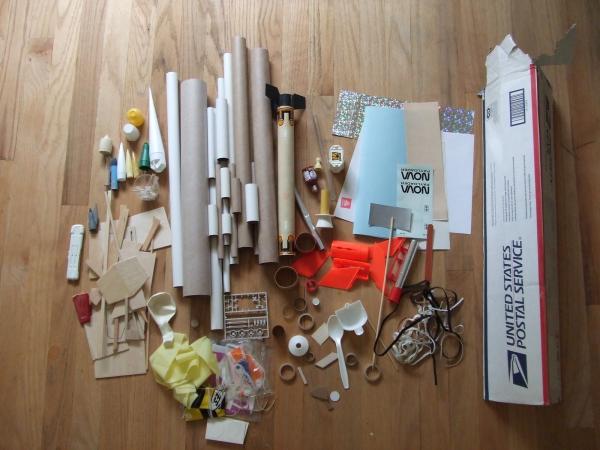
 My first thought when looking over the box of parts was "Wow! I could build 10 rockets out of this stuff." Then, reality started to settle in- I was fat dumb and happy on body tubes, but not so endowed with balsa and nose cones were also limited in variety. I had already decided before getting the box that I was going to go for broke and try to make an insanely complex rocket, and picking through the parts a few ideas started to emerge.
I'll walk you through the basic steps and offer up the attached Rocksim as a general guideline, though why anyone would want to attempt to reproduce this is beyond me, and you'd almost have to start with a similar set of discarded bits o' stuff like I did to pull it off.
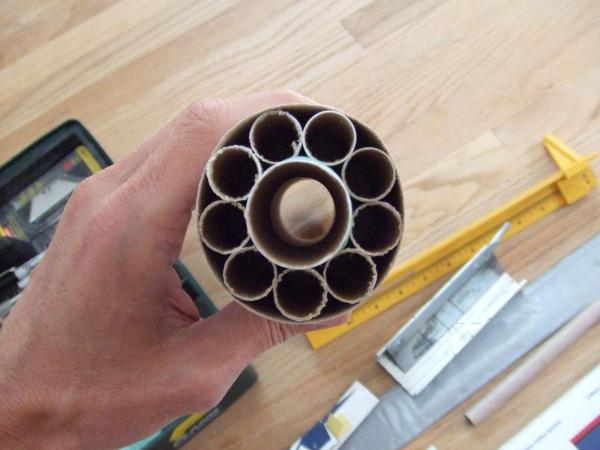
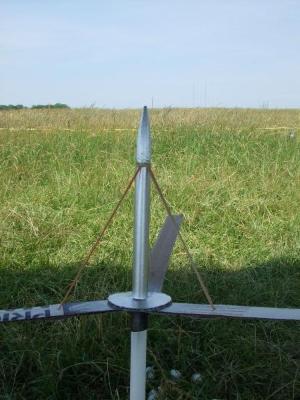
Let me preface the build plan by laying out the concept for the overall rocket. I was torn between boost glide and helicopter recovery, but eventually decided I could pull off both. The final design includes a boosted dart with internal rotor blades that pop up upon ejection, a main rocket body that descends under streamer and chute, and a parasite glider that pops off at ejection. I also decided to make use of the ample length of BT-5 tubing by cutting a number of motor tubes-nine of them happened to fit nicely surrounding the central 24mm motor tube, inside the BT-70 main body tube. As long as I'm going off the deep end, why not go under a full cluster?
The general game plan for flight profile would work like this-clustered A10-PT's and a central C11-5 fire the main body. At the end of the BT-50, I used a 50/5 transition that was glued to an inner BT-5 "shaft" for the copter. The copter was essentially a Rota-Roc style design, but without any fins since it was a boosted dart and the blades were constrained by the BT-70. The C11-5 would push the copter/dart out, and the glider would slide off the external piggyback mounts. A burn string type of thin thread would attach to the transition and the main body's parachute and streamer, pulling them out before breaking away. Sounds simple. What could possibly go wrong?
OK, for the build…I made every effort to not only use the parts in the box, but also use them as provided, with as few modifications as possible. This meant some very funky fins and glider pieces.
I started out by working on the motor mount, cutting a BT-50 to 5-inch length, then cutting (9) 3-inch lengths of BT-5 for the clusters. Glue the 13's in pairs on a flat surface for best alignment, then glue each pair to the BT-50. The odd 9th tube should fit nicely in the gap left by the other 8, as this works out to a perfect cluster fitting inside a BT-70. There was not enough room for a centering ring, so I filled the gaps with Gorilla glue kicked with a spritz of water mist to cause it to expand and fill the gaps.
For stability, it was clear that I would not have enough balsa for both fins and a glider, so I had to resort to tube fins for primary stability. The tube fins consist of (8) pieces of BT-55 cut to half an inch long, mounted in a ring around the outside of the BT-70. I did have enough balsa left over to cut four small fins, wedged between the BT-55 tube fins. Patterns for these fins can be printed from the Rocksim file. There were also two scrap wedges of odd-sized balsa left over from the glider build, so I tucked them into two more gaps in the BT-55 tubes. The Rocksim file does not reflect these scrap fins.

As a finishing touch, I looked through the box for anything else I could toss in, and decided to decorate the balsa fins with BT-5 outboard tubes. I also found some plastic detail parts that appear to have been from a plastic model kit which conveniently fit into the BT-5 outboard tubes and served as ramjets.
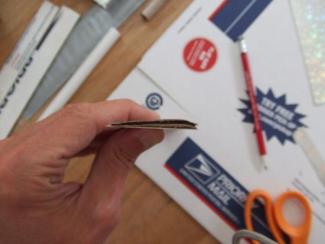 For the helicopter, I had asked Todd to make sure he included some elastic, which would be critical to blade deployment. While he did include some rubber bands, he didn't include any significant length of balsa to use for blades. Fortunately, we were allowed to use the box itself, so following the standard plans for the Rotaroc at http://www.nar.org/competition/plans/pdf/Rota-13m.PDF, I cut 1x12 strips of corrugated from the box. Believe it or not, it is possible to airfoil corrugated. To pull this off, use the edge of the handle from a pair of scissors, and rub down on the edge of the cardboard. You'll want a sharp leading edge, and a much more tapered trailing edge.
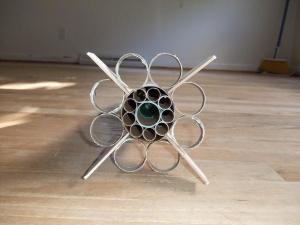
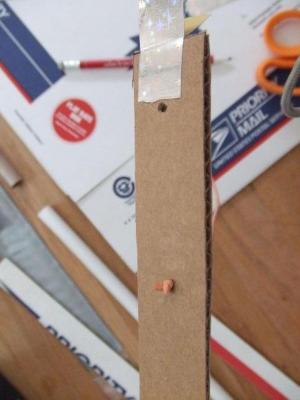
The blades are normally attached to the shaft with Klett hinges, but I didn't exactly have anything like that to work with, so had to resort to using peel & stick decal paper to serve this purpose. I cut small strips, stuck one end to the underside of the blade, and the other to the shaft. Since the adhesive was weak, I had to help it out with a little CA. Instead of blade stops, I decided to use a centering ring, which was necessary to keep the BT-5 in place within the BT-70. The centering ring wound up also coming from the box itself. Lacking actual elastic for pulling the blades up, I wound up cutting open the rubber bands, and poking one end through the blade and tucking the other end inside the BT-5 shaft wedged in by the nose cone.
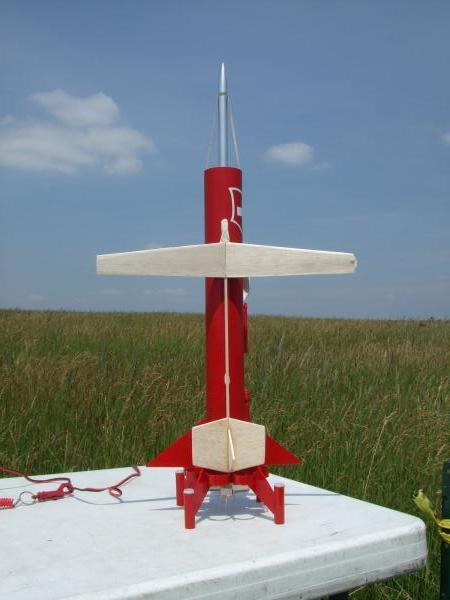
The last main construction is the glider. I didn't put together plans or templates for this, as I tried to simply cobble something slightly aerodynamic out of the scraps of parts unmodified. I did have a decent 1/8" thick piece to work with as a boom, one long/skinny piece of 3/32 balsa to use as a wing (cut in half and re-bonded for a 10 degree dihedral). The really clunky aspect came at the tail, where I have grossly oversized and overweight rudder and stabilizer from 1/8" scraps. As a result, the wing is mounted extremely far forward, resulting in very little lift, a slow glide, and tendency to stall. The glider has a small pin cut from a wood dowel that conveniently slips into an 1/8" launch lug mounted to the rocket body.
At this point, I started looking over the leftover parts, and tried to think of how I could use even a fraction of the remaining pile rather than store/keep them. I decided to work in the plastic spoon and nail file, externally mounted using pieces of fin can and plastic details.
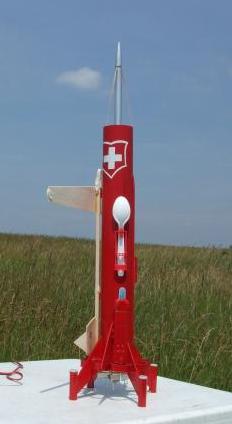
 Now that I was ready to paint, I mulled over the options. Considering all the variety of recovery methods, clusters, and the oddball parts stuck to the outside, I decided this was starting to look like a Swiss Army knife. To pull off this effect, I painted the whole rocket a base white. I then masked off a Swiss Army emblem. I then hit the rocket body with a red topcoat, and painted the BT-5 exposed 'copter tube and nose a bright silver metallic.
For the flights, I loaded up 8 of the 9 13mm tubes with A10-P's. Why not go for all 9? They come in 4-packs, and I rarely have use for them, so didn't want an odd/opened pack laying around for years. I then loaded up a C11-5, and spent a good half hour twisting igniter leads together so that my 5-lead clip-whip could cover everything.
The first flight was a bit underwhelming. Only 3 of the A10's lit, the C11 didn't light, and the rocket barely cleared the rod before flopping over right by the range head.
I replaced the spent motors, rewired everything but this time making sure the C11 was not paired with any other motor's leads, checked for best igniters I could find, and gave it another shot. This time the C11 lit, as did 4 A10's but the A10's were all on one side, and the asymmetrical thrust led to a pretty unstable flight. The glider pilot must have sensed the impending doom, as the glider popped off after the first loop under thrust, and the glider actually came down in a glide-like profile, albeit fast and hard. The main rocket, though, continued its bat-on-crack flight path and crashed into a tent along the prep line. The copter deployed while the rocket was grounded, so there was no chance of an actual 'copter recovery.
The damage was not irreparable, and with a tiny amount of nose weight (and ideally a spider ignition system to drive the cluster), I suspect this could eventually be salvaged into a better performer, but for now this project has to take a back seat to prepping for my NARAM run. It was amusing, inspiring, fun, but in the end, the challenge of trying to parallel wire a 9-motor cluster just proved to be too much complexity, and this never had enough thrust to pull off a decent flight.
 |
 |
|
|
Bill Eichelberger (February 16, 2013)
Wait, you're not kitting this?