Scratch Upscale Blue Bird Zero Original Design / Scratch Built
Scratch - Upscale Blue Bird Zero {Scratch}
Contributed by Geoffrey Kerbel

Brief:
This Blue Bird Zero is a 125% upscale of the original which makes the main body
tube a BT-60. I have wanted this rocket since I became a BAR but the Ebay
prices were too high. I then found Fred at Excelsior and while ordering some
Goony decals, I added the upscale Zero decals as well. After building various
other rockets, I liked the extra room the BT-60 had for recovery items and
since I would never have an original this was the way for me to enjoy the
building and flying of this classic. It also allowed me to add some
"modern" refinements to make it better.
Construction:
The upscale is basically a Mean Machine kit minus one tube and with different
fins. I was very surprised when I received the decals from Fred and found
included with the Zero decal sheet was basically a partial instruction sheet
with the larger fin patterns included! The only extra you need is the
instructions for the motor mount. Since I have done a few of these already, I
just put the mount together like the others I had done. The mount follows the
Mean Machine one so that's the only extra instructions you need. This can be
downloaded from JimZ's site. The parts list then is as follows:
- 3 BT-60 tubes 18" long
- 2 BT60 couplers (one if using the baffle kit)
- 1 PNC-60AH nose cone (same as the Screamin Mimi)
- 1 24mm motor mount (use the Estes D/E mount and build it for the E motor size)
- 1/8 balsa or basswood for the six fins
- 1 BAF-60 from FlisKits (BT-60 baffle kit with Kevlar® shock cord)
- 5' of 1/4 elastic for shock cord
- 1 24" stock Estes chute with 36" shroud lines
- 2 launch lugs, 3/16 x 1"
I am not going into all the details of the build since this is a scratch build and you should have some skills already for doing this. If not, all you have to do is follow Fred's excellent steps and a Blue Bird of your own will be ready to fly in no time at all.
 I will give the details of my build that deviated from standards.
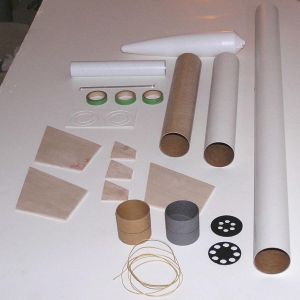
The first one was the fact that I already had tubes available and you can see from the parts picture that I used some smaller sections with a full size 34" one for the build. But there was a method to my madness! The next is the baffle kit. This is a great "modern" item from FlisKits and includes one coupler, the baffles and the Kevlar® shock cord for the "new" style cord mount. It also allows you to not have to use wadding for chute protection. The money you save from that alone more than pays for the kit!
My build started with the baffle kit. After assembling it per the included instructions and allowing it to dry, I added a layer of epoxy to the side that would face the ejection charge to keep the charring down and make it last longer. It didn't help on the first flight (more on that later) but should be great on the rest! The kit becomes the upper tube coupler which is why I have the two smaller sections! There is one full size tube (34" from Totally Tubular), one tube cut to 8.5" per Fred's instructions and another piece cut to 10" for the chute compartment to make up the full length.
Next was the motor mount assembly. I use the BT-50mf tube from Totally Tubular which is foil lined, for my scratch 24mm motor mounts and made it a bit extra long to take some of the ejection heat before entering the main body tube. Because of the extra length, I added one extra CR to the mount. It was sized for the "E" engine with the long motor hook and can be used with "D" engines with an adaptor. If using the stock Estes mount, file the short, bent end down about halfway if you want to use the AT RMS motors. After it was complete and dry, it was installed in the 8.5" section per Fred's plans.
The 34" tube was then added to the motor section with a standard coupler. The baffle kit was added to the 34" tube next with the Kevlar® cord facing out. The upper tube was also glued in at this time with the Kevlar® pulled out the top. All the tubes were done at the same time. This was rolled on the tile floor to make sure it was perfectly straight and allowed to dry there. Although this makes the body a bit hard to handle when adding fins and such, it is the best way to ensure the entire body is straight.
The fins were cut and sanded, then glued to the body one by one using the double glue joint method. Make really sure the upper fins are dead straight aligned with the lower ones! Just before the glue sets up, I use a straight edge over the both of them to make sure that they are. Adjust as necessary.
Add the launch lugs, fillet everything sticking out from the body tube and finish to taste
Finishing:
I use Elmer's Fill 'n' Finish all over for filling and Krylon paints for the
color. Fred's decals are fabulous and really bring out the character of this
bird! After everything was dry, I added two thin coats of Future Floor Polish
and it did shine!
Flight:
The upscale will take any one of the 24mm motors on the market quite well
depending on your thirst for power and height! Personally, I like to see the
entire flight from liftoff to chute pop although the three foot flames from the
AeroTech RMS Blue Thunder reloads are beautiful as well!
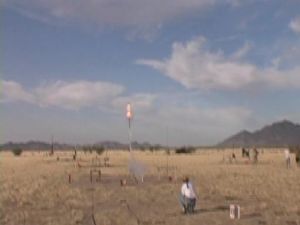
First flight for this one was on an Estes D12-5 to check for any flight problems. Even though I had the baffle, I added about 1" of barf and packed the chute. Nice to have all that room for a change! Ignition was normal and that was about it. A split second later the entire motor blew itself out the nose of the rocket with a liftoff height of about twenty feet from the initial thrust. The rocket landed with a thud, flat on its side about ten feet from the pad as the motor guts did a great rendition of a roman candle. I was shocked, upset, and dejected as I went to collect the remains. Of all the rockets to suffer my first CATO in, it had to be this one! The CATO managed to blow the entire guts out of the rocket but after looking over it carefully, I realized that was the extent of the damage! The chute and lines were perfect as was the nose cone! I found what was left of the motor mount by the rocket. It had one CR busted but that was it also! Within a few hours, I had it all cleaned up and ready to fly again. The hardest part was cutting into that beautiful paint job to redo the baffle. It's not so perfect now but not that easy to see the damage either. Oh well, it's the first of many battle scars to come!
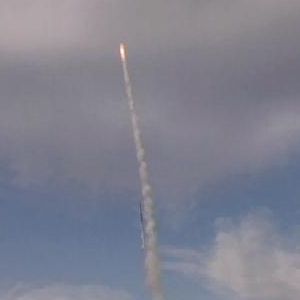 Second flight was on an Estes E9-6 and easily made up for the
first one. Nice slow liftoff with lots of smoke and then flying way up there!
Almost out of eyesight (at least for me) and I was told the chute came out
right at apogee. Slow float down to a perfect landing about 300' away from the
pad. Just beautiful!
Second flight was on an Estes E9-6 and easily made up for the
first one. Nice slow liftoff with lots of smoke and then flying way up there!
Almost out of eyesight (at least for me) and I was told the chute came out
right at apogee. Slow float down to a perfect landing about 300' away from the
pad. Just beautiful!
Summary:
This was a great project for me since most of my other rockets were only half
the size of this one. Because of the fantastic amount of tips and suggestions
from everyone here at EMRR, I was able to complete this bird from scratch and
make it as sharp and strong as possible. After the first flight the help was
obviously well given. The use of the larger body tube really makes flying this
one easy and fun to watch. Thanks to Fred at Excelsior, anyone can have this
classic bird for the right price and because of EMRR, they can make it and fly
it for many years to come.
 |
 |