Scratch Wild Goose Original Design / Scratch Built
Scratch - Wild Goose {Scratch}
Contributed by Jewel B. Butler Jr.
| Manufacturer: | Scratch |
Brief:
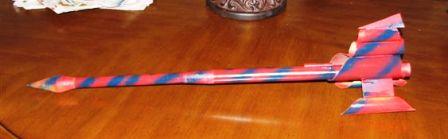
I call this rocket The Wild Goose because it kind of looks like a Goose.I got the idea after looking at one of Jim
Flis rocket the US TOG. I love ring and tube fin designs so I came up with the Wild Goose it is a single stage 24mm
with a transition and parachute recovery.The nose came from a Fliskit rocket betcha can't tell me which one.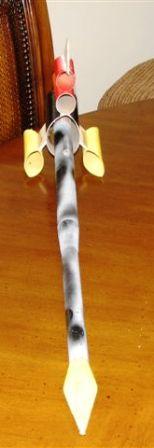 Actually I
built this rocket out of a cannbalized Sunward Sabre and some scrap pieces just laying around in my scrap drawer.I try
not to throw away pieces of balsa or tube ends
Actually I
built this rocket out of a cannbalized Sunward Sabre and some scrap pieces just laying around in my scrap drawer.I try
not to throw away pieces of balsa or tube ends
Construction:
- 1 Nose cone from a Herc-5.........Head
- 2 Bt 20 body tube 7.5 inches long.........Neck
- 3 A balsa transiton 20to50......Upper body
- 4 Bt 50 13 inches long..........Lower body and motor mount
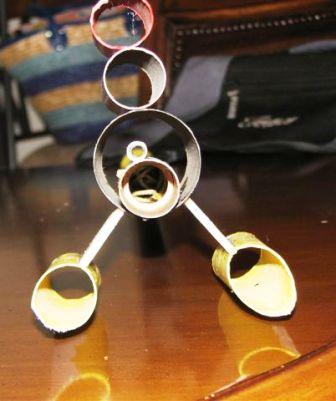
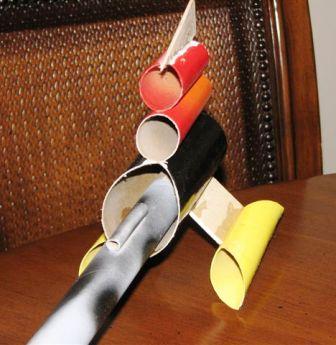
- 5 Bt 60 with a angle cut on one end about 45 degree and marked for a three fin configertion......The Gooses Bottom
- 6 Bt 50 3.5 inches long with a 45 dgree angle cut.......Part of Gooses back
- 7 Bt 50 2.5 inches long with a 45 dgree agle cut.....another part of the Gooses back
- 8 2 scrap Basswood 1/8 1x2....legs of the Goose
- 9 2 Bt50 5.0 inches long...Gooses feet and additional stability
- 10 2 1/4 inch Launch Lugs 1 inch long......Gizard
- 11 2ft of Kevlar® .0900 and 2ft of Para cord
- 12 engine block for Bt50
- 13 1.5 oz of clay for nose balast
- 14 Med screw eye
- 15 parachute

Let's start with the nose cone section. Glue the 7.5 inch Bt-20 to the transition. Then roll the clay into
sections small enough to fit in the Bt-20. I then glued the nose cone onand attached the screw eye. Next we assemble
the main tube and engine mount. Grab the eb-50 engine block cut a small v on the side to allow a recess for the
Kevlar®
shock cord. Then using a Q-tip with a little glue on the end rub this on the inside of the body tube. Tie the Kevlar®
around the engine block and push it in the main
 body
tube about 3 inches. Next mark the body tube top and bottom centered. On the top line add two launch lugs spaced one
inch appart. Then we slide the Bt50 into the Bt60 with the longest part at the bottom lined up with the botton line.
After all this dries start mixing the 5minute epoxy for the fin feet. Attach the two scrap pieces to the Bt-60 on the
marked fin lines. Then we glue the feet onto the Basswood. Now for the back glue the 2.5 piece on top of the 3.5 let
dry. Then mix up dab more of the epoxy and attach the tail section to the top of Bt-60. Cut a small trianglar piece of
balsa and glue to to the top of the 2.5 inch piece. Attach chute and fly. I got most of my supplies from Semroc except
the nose cone. I acctually made this rocket from two rockets that I recycled and some extra parts laying around.
body
tube about 3 inches. Next mark the body tube top and bottom centered. On the top line add two launch lugs spaced one
inch appart. Then we slide the Bt50 into the Bt60 with the longest part at the bottom lined up with the botton line.
After all this dries start mixing the 5minute epoxy for the fin feet. Attach the two scrap pieces to the Bt-60 on the
marked fin lines. Then we glue the feet onto the Basswood. Now for the back glue the 2.5 piece on top of the 3.5 let
dry. Then mix up dab more of the epoxy and attach the tail section to the top of Bt-60. Cut a small trianglar piece of
balsa and glue to to the top of the 2.5 inch piece. Attach chute and fly. I got most of my supplies from Semroc except
the nose cone. I acctually made this rocket from two rockets that I recycled and some extra parts laying around.
Put the launch lugs they go on top of the Bt-50.
 Finishing:
Painted with Walmart red and blue.
Flight:
Flew on Cll-3 and 2 D12-5 all straight and true.
 Recovery:
Kevlar®
Nylon cord combo.
Summary:
The rocket came out really great. I have to give out thanks to Jim Flis for giving us so many different ways to look
at the hobby.
 |
 |