| Construction Rating: | starstarstarstarstar |
| Flight Rating: | starstarstarstarstar |
| Overall Rating: | starstarstarstarstar |
| Length: | 19.00 inches |
| Manufacturer: | Semroc  |
| Skill Level: | 2 |
| Style: | Multi-Stage, Payload |
Brief:
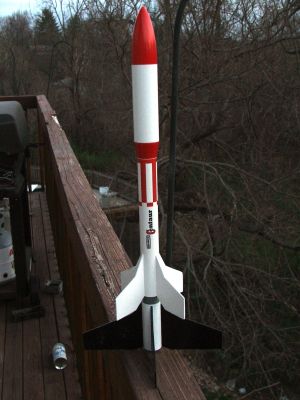
The Centaur is a Retro-Repro kit from Semroc, a reproduction of an original Centuri kit from 1965 updated to 21st
century standards with laser cut fins and Kevlar®
shock cord. The Centaur is a two-stage rocket that uses dual lock stage coupling and has dual swept fins, both of which
were Centuri trademarks. It can also be flown as a single stage kit.
Construction:
The parts list:
- BC-1329 balsa nose cone
- BC-1013 balsa reducer
- ST-1080 sustainer body tube
- ST-1030 booster body tube
- ST-1340 payload body tube
- 2 ST-730 engine tubes
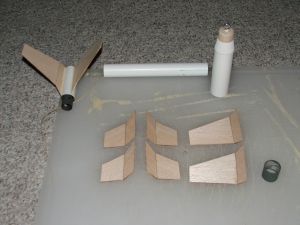
- FV-12 laser cut fin stock
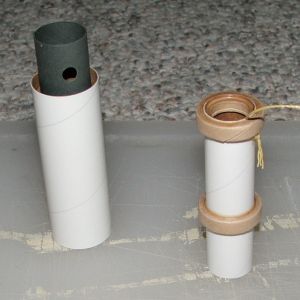
- HTC-10 tube coupler
- HTC-7B tube coupler
- 4 CR-710 centering rings
- 2 TB-7 thrust rings
- LL-122 launch lug
- SE-12 screw eye
- EC-118 elastic shock cord
- SCK-18 Kevlar® shock cord
- RC-12 parachute
- TD-6 tape discs
- SLT-6 shroud line
- MC-727 engine casing
- DKV-12 decal

This isn't really a kit that you can throw together just drawing on your years of building experience. It reminded me of another two stager that I put together back in 2001, the Estes Astron Avenger. Both were fairly simple builds, but both had details in the instructions that had to be attended to so that every thing fit together correctly in the two-stage configuration. The instructions for the Centaur were great in that regard, and I had most of the construction finished, and finished correctly within several hours of opening the package. I found nothing that I'd rate as a "gotcha". All kits should build this smoothly.
Finishing:
I wasn't sure how to go about finishing the Centaur. I pretty much stick with the kit art when painting kits, but the
booster and sustainer had two piece fins and I was worried about their durability under fire. I considered several
options, including label paper and regular paper secured with 3M spray glue. The label paper looked like it was going
to work until I tried to sand away the excess along the edges. The label paper peeled away like it had just been laying
unsecured on the fin all along. I bought the 3M adhesive, but by then the launch date I had in mind had crept too close
to give it a try. In the end I just went with two coats of Elmer's Fill 'n' Finish and a lot of sanding. Painting was
done the night before, the morning of, and the afternoon at the launch. I went with the kit card art and used red,
white, and black Valspar paints. (Something that I've done for years, but something that may be changing due to quality
questions that popped up during a paint session on another kit.)
Construction Rating: 5 out of 5
Flight:
Only one flight to date but that will change quickly after repairs are made. We finally got a decent weekend to fly
in the Cincinnati area after a spring full of one deluge after another. The field was wet, but with the proper
footwear, it wasn't a problem or so I thought. I had hoped to get three flights in with the Centaur on this day and had
bought a variety of Estes booster and sustainer motors just for it. However, circumstances limited me to one low level
flight. I waited until the end of the day, hoping that the winds that had carried two of my rockets into the Kite Fest
would die down some but it wasn't to happen. I was also somewhat concerned because the booster seemed to be quite
difficult to separate from the sustainer, and I wasn't sure the engines would be able to stage correctly.
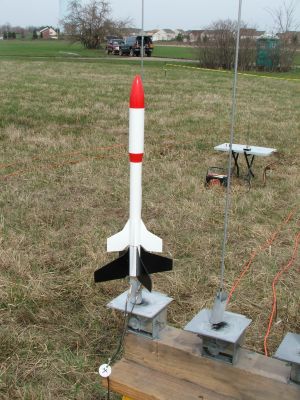
Realizing that the winds were going to carry the rocket a long way and that I could be sacrificing the rocket if the stages didn't separate, I decided to go with a low level first flight on a B6-0/A8-5 motor combo. I thought that if worse came to worse, at least the rocket wouldn't have far to fall and I might actually salvage something for the rebuild. I taped the motors together with cellophane tape--twice because the first time I had the A8-5 on the bottom--and as gently as possible pushed the two pieces together. Even with all of the sanding I'd done over the course of the day, the fit was tight. I was committed though and took the rocket to the pad. The low-level motor combo drew some catcalls from the late afternoon crowd when I announced it, but I think everyone realized that it was what conditions called for.
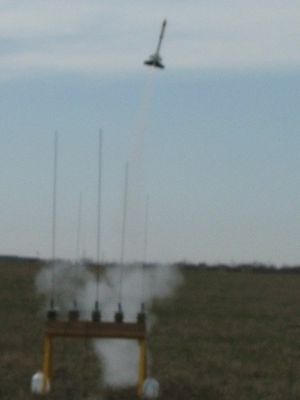 The flight was as I figured it would be, quick and low. It seemed to barely clear the rod when it staged
perfectly, and by the time I lowered the camera to watch some of the flight, it was over. At ejection the sound of a
balsa and cardboard collision was clearly audible, and something fell from the rocket. "Fin", I thought.
Nope. Motor casing. The rocket came down on the chute and landed in the soft grass. I noticed a bit of balsa on the
side of the payload tube and upon inspection one of the fins was splintered somewhat but still in one piece. (So much
for my label paper worries.)
The flight was as I figured it would be, quick and low. It seemed to barely clear the rod when it staged
perfectly, and by the time I lowered the camera to watch some of the flight, it was over. At ejection the sound of a
balsa and cardboard collision was clearly audible, and something fell from the rocket. "Fin", I thought.
Nope. Motor casing. The rocket came down on the chute and landed in the soft grass. I noticed a bit of balsa on the
side of the payload tube and upon inspection one of the fins was splintered somewhat but still in one piece. (So much
for my label paper worries.)
Recovery:
Recovery would have been fine if not for two problems, one of which was field related. The sustainer came down in a
somewhat odd manner, probably due to the post ejection charge contact. Somehow the rocket passed through the large reef
hole in the chute, but aside from turning the chute inside-out and being a true oddity, this was barely worth
mentioning. The booster managed to land in one of the fairly sizable puddles that littered the field. Dave Russell
picked it up and got it dried off quickly, but when I got home and tried to take the "glamour shots" with the
decals on, I couldn't get the booster section and the sustainer to mate up. No amount of sanding made a difference,
leading me to believe that the tube couplers had both swelled when they hit the water. It will have to be replaced, but
that gives me a reason to get another component order together for Semroc.
Flight Rating: 5 out of 5
Summary:
PROs: It's a two-stager, something that's always cool when done right. Tougher than I gave it credit for being.
CONs: I'd add some more elastic to the shock cord, but I don't think this would be an issue if we had a more standardized ejection charge.
Overall Rating: 5 out of 5
 |
 |
Flights
|
|