Modification Triton MicroMaxx Cluster
Scratch - Triton MicroMaxx Cluster {Modification}
Contributed by Clive Davis
| Construction Rating: | starstarstarstarstar |
| Flight Rating: | starstarstarstarstar_border |
| Overall Rating: | starstarstarstarstar |
Brief:
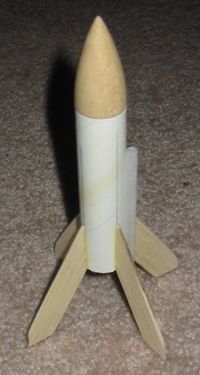
This rocket combines the Fliskits 3 Micromaxx motor cluster and the Semroc Triton rocket. The cluster component fits the BT-20 body tube of the Triton perfectly. The Triton was built so that it could recover with the use of a streamer.
Construction:
In order to build this rocket, you need the FlisKits EMK3-6-30 Engine Mount Kit and a Semroc Triton kit.
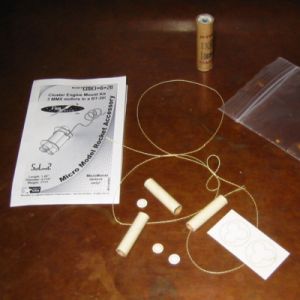
The Fliskits cluster mount comes with:
- 3 T2+ body tubes cut to size
- 3 motor blocks
- 2 centering rings
- Kevlar
The Semroc Triton comes with:
- Balsa nose cone
- BT-20 body tube
- Launch lug
- 4 laser cut fins
The only other addition I added to the rocket was a screw eye, shock cord and mylar streamer material. The original Triton is tumble recovery since the nose cone is glued in place. My version has the nose cone blow off like your typical 3FNC rocket.
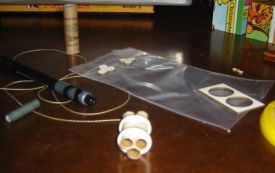
I first began with building the motor cluster. As with all FlisKits products, the quality of parts was superb and the instructions were exceptional. I removed the laser cut centering rings and the thrust rings from the card stock. I then glued the three body tubes together as indicated. I added the tiny thrust rings, which are great quality by the way! This is just like building a regular motor mount, only on a tiny scale. Before placing the centering rings on, I tied the Kevlar® around the motor mount. Then I added the fore and aft centering rings and glued them into place at the appropriate locations on the cluster mount. I set this aside to dry and began working on the Triton.

The Triton is an extremely simple rocket. I removed the laser cut fins from the sheet, sanded them down, and shaped the fins. I marked the body tube (4 sides) then added the fins one by one, making sure that they were on straight. I covered the nose cone with a few coats of yellow glue and sanded it down for a smooth finish. I then added the launch lug to the rocket. Normally, I would have glued the nose cone in (for an "authentic" Triton build), but since this rocket was being converted into a cluster rocket, I kept the nose cone separate. I screwed in a screw eye, removed it, and then added a little CA glue. Then I screwed the screw eye back into the nose cone for a nice fit.
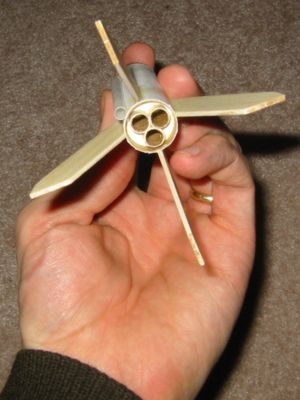 Next step was to add the cluster mount to the Triton. This was very easy. All I had to do was slide the Kevlar® up through the rocket, add some glue to the bottom of the BT-20, and then push the cluster mount in so that the bottom of the cluster mount was flush with the bottom of the Triton body tube. I tied a short piece of shock cord to the Kevlar® and then tied the shock cord to the screw eye on the nose cone. I cut a piece of streamer from mylar and fold/taped it onto the shock cord.
Finishing:
Finishing the rocket is very easy. The balsa fins are straightforward to prime, sand and paint. The body tube is good quality and the nose cone, although balsa, is of very high quality. It needed very little filling compared to balsa nose cone from other companies. The Triton is featured on the cover art with an all yellow paint scheme. I airbrushed the rocket a few times and gave it a somewhat glowing yellow color. I am not totally satisfied with the plain yellow and will probably add a little black later.
Construction Rating: 5 out of 5
Flight:
There is really only one motor choice available: The Quest Micromaxx motors. The Micromaxx I motors are hard to come by. I used the more prevalent Micromaxx II motors. I also used the new Quest Q2 igniters. They fit easily inside the nozzle of the Micromaxx motors. I held them in place with slivers of balsa as plugs. I twisted the igniter wires into two bundles. The rocket is prepped with a bit of wadding to protect the streamer.
 First flight was terrific with a quick boost. Since the rocket is very sizable for a Micromaxx rocket, I was able to watch the entire flight profile. Due to the motors' short delays, the rocket was still in the "nose up" position when the streamer deployed. Still it was a very cool flight.
The second flight was prepped identically to the first. On this flight, only 2 motors ignited. The rocket still had a nice boost, although definitely not as high as the original flight. The rocket was in the nose up position when the streamer deployed. The flight was still quite straight and certainly not underpowered.
Recovery:
Both recoveries with the streamer were flawless. The rocket shows no real signs of wear. The shock cord materials and streamer work fine.
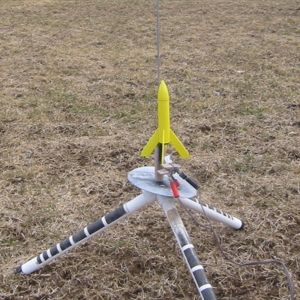
The only real con to this rocket is prepping Micromaxx motors for clusters. It is certainly a greater challenge than prepping 13mm or 18mm clusters. You need steady hands and everything has to be done gently. There is a certain art to it. Igniters can be a problem. What I like about Micromaxx motors is that the builder/flyer has to improvise and develop his own supplies and techniques to make it work. I often create my own igniters and igniter plugs. I had to build my own Micromaxx launch pad, as the Quest Silo Launcher is entirely incapable of allowing for cluster launches.
The pros are the rewards to get from making a Triton cluster-capable.
Flight Rating: 4 out of 5
Summary:
If you are looking for a real challenge without having to spend a lot of dough, try the Triton/Fliskits cluster conversion. I am sure you will enjoy it as much as I have.
Overall Rating: 5 out of 5
Related Products
 |
 |