| Construction Rating: | starstarstarstarstar_border |
| Flight Rating: | starstarstarstarstar |
| Overall Rating: | starstarstarstarstar_border |
| Manufacturer: | Semroc  |
Brief:
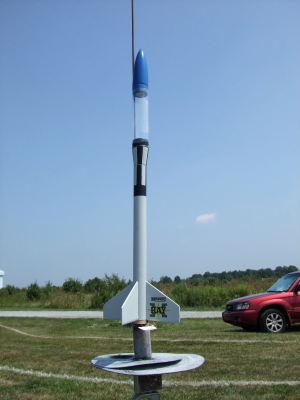
Another one of the X-kits (parts-only) introduced at NARAM-50, this one is a reproduction of the 1964 kit by Estes,
and features a clear plastic payload tube. Semroc even goes old-school on this one, introducing actual rubber shock
cords instead of their more modern elastic/Kevlar®
combination.
Construction:
Parts are typical Semroc and top quality, including:
- Balsa nose cone
- Balsa transition (BT-24 to BT-20)
- Clear payload tube (24mm dia)
- BT-20 body tube
- Laser-cut balsa fins
- plastic chute
- waterslide decals
Instructions are not provided for X-kits, however, they are available online in through the kindness of archivists such as Jim Zalewski. In this case, an experienced modeler probably doesn't even need instructions, but they are online at www.dars.org/jimz/k-18.htm.
This was a very quick and easy build, and I had mine together and ready for paint in under an hour, including surface prep.
Starting from the aft end and moving forward, I inserted a motor block in the BT-20 then marked it for 4-fin alignment. The laser-cut fins took a light sanding and Elmer's Fill 'n' Finish, then were tacked on with CA before white glue fillets. The payload bay is comprised of a balsa transition (with screw eye for shock cord), clear tube, and balsa nose. The payload components fit very snugly and took a little sanding to allow for painting and still fit.
Shock cord anchor is via cardstock tri-fold, and as mentioned, uses what appears to be decent grade Sig rubber.
The launch lug standoff consists of two pieces of balsa. It's not that complex, but you'll want to dry fit before gluing as it's possible to put them together in such a way as to be slightly shorter than needed to clear the payload tube. No, I didn't blow it (on this project)...
Finishing:
Finishing is slightly more effort than a typical Semroc LPR kit if you want to match the cover art as the payload bay
is not supposed to be painted, but the shoulders of the transition and cone are. I wound up using a piece of scrap
BT-50 to hold everything together while painting and went back afterwards to paint just the transition and cone
shoulders after removing them and masking appropriately.
There are also a couple vertical and horizontal stripes to mask off and deal with, which I think could have been made a good deal simpler via decals.
In any case, after priming I went with a base coat of Krylon light gray (sort of looks like white would, if white were sitting in the shade), followed by blue nose, and yellow and black striping on the body tube and transition sections.
Once all paint had cured out, I applied the waterslide decal for the fins.
Construction Rating: 4 out of 5
Flight:
First flight was in moderate winds (5-8 mph) on such a gorgeous day that I felt like sneaking out and getting in some
solo flights between our regular club launches.
I packed the C6-5 in it, fired away, and watched as it climbed straight and true. The delay was almost perfectly at apogee, maybe a hair early, but this is definitely the right motor/delay.
Recovery:
Ordinarily, the 12" chute would be fine for this, but somehow I caught a pretty strong thermal, and even under
the 12" chute, it wasn't coming down. I tracked it for about 3/4 mile before it finally drifted out of my
eyesight. I've lost many a competition model to thermals on purpose, but this was one of the very few times I'd ever
sent a sport model into the heavens like this.
Flight Rating: 5 out of 5
Summary:
Very nice rocket--clear payload tube, flies great, excellent value. I'll be picking up another one soon.
Overall Rating: 4 out of 5
 |
 |
Flights
|
|