| Construction Rating: | starstarstarstar_borderstar_border |
| Flight Rating: | starstarstarstarstar |
| Overall Rating: | starstarstarstarstar_border |
| Manufacturer: | Sunward Aerospace  |
Brief:
The Sunward Penguin is a unique, short stubby kit that flies on C-D 24mm motors. It comes with an 18" parachute.
It also has nice plywood centering rings.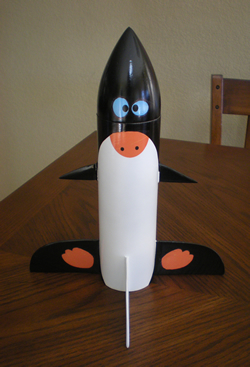
Modifications:
Kevlar was used for shock cord attached to motor mount. Modified paint scheme.
Construction:
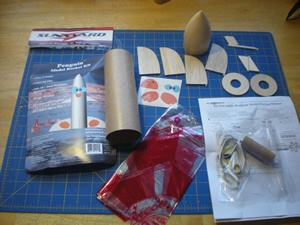
- 1 - BT80 x 8" Body Tube
- 1 - Balsa BT80 nose cone
- 1 - Small Screw-eye
- 2 - Engine Plywood Centering Rings
- 1 - Decal Sheet
- 1 - 24mm Engine Tube
- 4 - Laser Cut Main Fins
- 2 - Laser Cut Upper Fins
- 1 - Launch Lug
- 1 - 24mm Engine Thrust Ring
- 6 - Parachute Reinforcement Rings
- 1 - Set of Parachute Assembly String
- 1 - Parachute Sheet
- 1 - Rubber Band Shock Cord
Instructions: The Penguin kit is pretty simple construction. The instructions are fairly straight forward, especially for experienced modelers. As with other Sunward kit instructions I have seen, the markings on the drawing are not really to scale. But as long as you pay attention to the measurements given, you should have no trouble with these simple kits.

Ease of Build: This kit is very straigt forward and therefore a very easy build following the given instructions.
The parts as arrived were all in good shape except the main BT80 body tube was somewhat crushed.
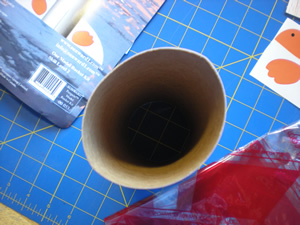
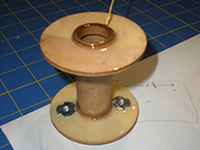
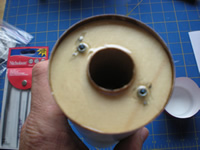
I mounted the motor mount in the misshaped end to shape that end back to a perfect circle, so it was not an issue. I would have rather seen the 24mm motor mount tube and the main BT80 body tube made of sturdier materials. The nosecone was pretty good quality, though fairly rough and recquired quite a bit of wood filler to smooth out the deep grains.
The fins material was much softer than I would have liked and the grains run straight out from the body instead of at an angle down away from the body tube when mounted. Having the grains angle down would have provided for stronger fins.
Tools and Supplies: No special tools or supplies are needed to building this rocket kit quite fine. I however plan on flying the model with anywhere from the recomended C11 series motors up through 24mm reloads. With this in mind I changed out some of the included parts for sturdier ones. I built almost the entire rocket with 30 minute epoxy for added strength.

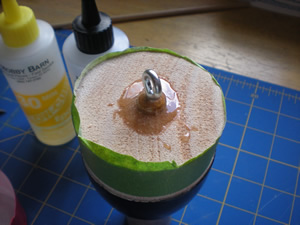
I also replaced the Screw-eye with a much sturdier one. The screw eye was epoxied into a short piece of wooden
dowel. this was then epoxied into the balsa nose cone. This made for a much stronger mount than just screwing it into
the soft balsa nose cone.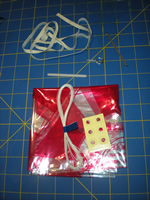
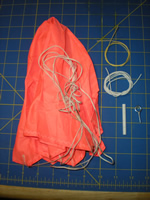
I used 24 inches of Kevlar® cord attached to 36 inches of elastic band to replace the included 38 inch rubber band shock cord. I mounted the Kevlar® cord to the front of the motor mount.
I am using an 18 inch rip-stop nylon parachute in place of the included 18 inch plastic parachute. The pictures show the included recover devices on the left and what I used on the right.
I left out the engine hook and installed two blind nuts in the rear centering ring for attaching positive retention clips by bolts for the RMS motors and recommended black powder motors.

Finishing:
The drawings on the card included with the kit showed throcket painted entirely white and the decals applied. There
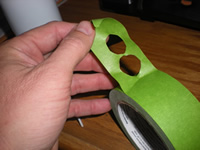
are two eye decals, a beak decal and two feet decals. The decals are of very good vinyl material.
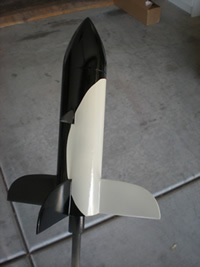
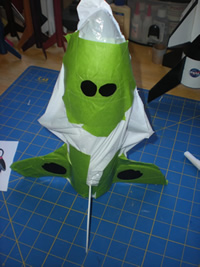
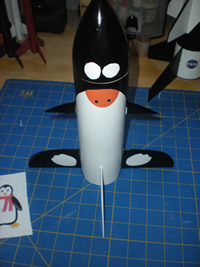
After my kids kept saying that the white rocket didn't look like a penguin to them, I decided to paint it black with a white belly. We looked up some cartoon penguins online to get an idea of how to paint it.


I had already painted the entire rocket white, so I had to mask and then cut out the white belly. I then painted the rest of the rocket and nose cone gloss black. After applying the beak decal, I realized why they show the rocket white. The decals are almost transparent. Their colors show up fine on gl;oss white paint, but are almost invisible on top of gloss black paint.

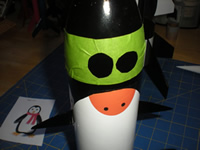
The beak ended up looking fine, but I had to cut out and trace the eyes and feet, remask and paint where they would be white again.
Overall, I really like how the paint scheme turned out. It looks much better than all white as in the drawings, but takes a little work. It would be nice if the decals could be made with a white background so that they would show up on black paint.

PROS: Very nice looking kit when painted black and white. Nice design overall.
CONS: Would like to see better materials for fins and would prefer Kevlar® and elastic used in the recovery system. Would also like decals that can effectively be applied to gloss black painted surfaces.
Construction Rating: 3½ out of 5
Flight: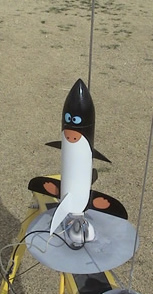
This little rocket flies awesome! We lauched it three times, twice on C11-3 motors which had perfect ejections at
apogee. It actually looks very cool climbing up with a very slow spin. that added a cool looking effect seeing the
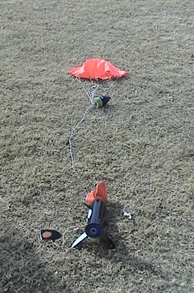
penguin pain job slowly turning as it rose. The only negative to the first launch was that, as I was afraid, one of the
too soft fins broke even with a good deployment and slow decent rate. We repaired the broken fin with thick CA out at
the field and completed some of the kids NARTREK Cadet flights. After a couple other flights we continued with the
second and third launches. This kit looks and flies so cool, that I really hope that Sunward does something to add
better fin material. I like it enough, I may build another with basswood fins myself if they do not.
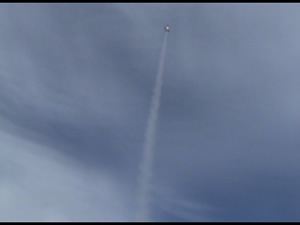
The third launch was on a D12-5, which was also a terriufic flight. Thie third flight went very high and the ejection was again very good, that time at apogee nose down, but great deployment.
It is no doubt a great flying bird...
Flight Rating: 5 out of 5
I would love to give this kit a 5 out of 5, because it looks and flies so good. I just really have a problem with the over soft fin material. I would suggest either skinning the fins with regular paper, silk paper or even fiberglassing over them. I was actually going to glass over them for higher powered flights, but got in a hurry to finish the rocket. Unfortunately, a fin broke as I expected. I was going to give it a 4 overall, but liked the kit too much and hence the 4 1/2 rating.
I highly recommend building this kit, just take care to strengthen it where needed.
Overall Rating: 4 ½ out of 5
 |
 |
Flights
|
|