| Construction Rating: | starstarstarstar_borderstar_border |
| Flight Rating: | starstarstarstarstar_border |
| Overall Rating: | starstarstarstarstar_border |
| Manufacturer: | Sunward Aerospace  |
Brief:
Large BT-80 based two-stage sport rocket.
Construction:
Two 18-inch BT-80s for main body, one 4-inch BT-80 for booster, two BT-50 sized motor mount tubes, four laser-cut
plywood centering rings, balsa nose cone, rubber shock cord, screw eye, 3/16" launch lug, laser-cut balsa fins,
24" nylon parachute, 2 couplers, 2 engine blocks, and a large self-adhesive decal.
Instructions are rudimentary as are the illustrations, and this is where this kit looses all of its points. Fortunately it's a fairly simple rocket except the gap staging and motor mount placement. The instructions basically drop the ball but exact placement is clarified on Apogee's web site with a PDF diagram of how the stages and vents should be built (in the "What Makes This A Skill Level 3 Rocket Kit?" section). This diagram is a must in order to build the kit properly.
The nose cone fit perfectly, is huge, and is well made. The centering rings are extremely nice for the price. The fins are excellent quality and beautifully cut. The motor mount tubes are kind of odd: a little thin and uncoated. The engine blocks fit loosely but hold fine once the glue dries.
 Once built, the friction between the booster and sustainer were perfect. The rocket is
plenty sturdy with no breakage (even on the booster) in two flights.
Once built, the friction between the booster and sustainer were perfect. The rocket is
plenty sturdy with no breakage (even on the booster) in two flights.
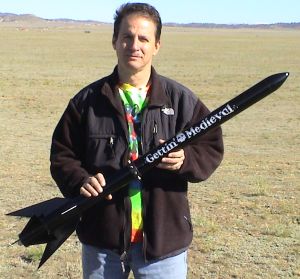
I followed Apogee's advice and painted mine black, renaming it "Gettin' Medieval". In addition, I added a studded dog collar, so the whole thing gets a lot of attention. It's like a big, nasty club.
Finishing:
I used one coat of Elmer's Wood Filler for the fins and nose cone, two coats of high-build automotive primer, and two
coats of automotive acrylic enamel for the final coat. I painted the new title by hand in silver automotive paint
rather than using the provided decal. It was very easy to finish, although it takes patience to sand eight fins. I
think it's one of my best-looking rockets. Certainly it's the meanest.
Construction Rating: 3 out of 5
Flight:
I used the D12-0/E9-6 combination for both flights. See video of the flight at
http://www.cosrocs.org/all%20other%20videos/2008videos/9-13-14/gettin'medieval.mov.
A C11-0/C11-5 combination would probably work fine, as well as a D12-0/D12-5. The Apogee E6-4 and Aerotech's E18-6 and F39-6 would also be great for single stage flights.
Even though you have to friction fit the motors, it's very quick and easy because there are engine blocks in both the booster and sustainer. It requires wadding. It flies perfectly straight and with the vented gap staging, stages perfectly every time. If you're afraid of trying a staged rocket because you've seen too many lawn darts after unsuccessful staging, try vented staging first. I've never seen one fail.
Recovery:
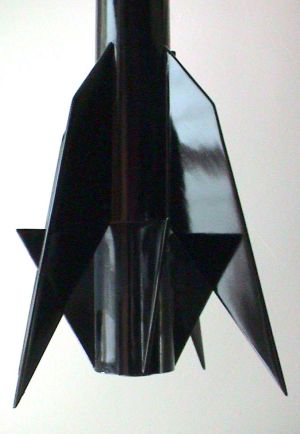
The nylon parachute is very nice. I followed Apogee's advice regarding cutting the booster fins down so it doesn't
come in ballistic, which works perfectly (1/2 point off here). The shock cord (with tri-fold mount) seems thin but has
not broken yet. Recovery time is perfect. Pointy fins stick in dirt, so I would not want to see this rocket land on
road surface or a car.
Flight Rating: 4 out of 5
Summary:
This is a distinctive design, it's mean and nasty looking, it's big, it is majestic in flight, and has extremely high
quality parts for the price. The gap staging is so good, it makes you wonder why any manufacturer would design a staged
rocket the old-fashioned way.
Cons: Instructions.
Overall Rating: 4 out of 5
 |
 |
Flights
|
|