Thrustline Aerospace Smoke and Fire
Thrustline Aerospace - Smoke and Fire {Kit}
Contributed by Joe Policy
| Construction Rating: | starstarstarstarstar_border |
| Flight Rating: | starstarstarstarstar_border |
| Overall Rating: | starstarstarstarstar_border |
| Manufacturer: | Thrustline Aerospace |
Brief:
A big 3 motor cluster with a payload section. Its 5 lower/5 upper fin design
helps this beast to stand out at a launch. It is rated at level 2/3.
Construction:
The parts list:
- 1 Fin Stock 1/8" Balsa
- 2 1/8" Launch Lugs
- 2 3/16" Launch Lugs
- 2 Swivels
- 2 Small Eyelets
- 1 Large Eyelet
- 3 Engine Hooks
- 3 Engine Blocks
- 2 Centering Rings
- 1 Kevlar® Shock Cord Tether
- 1 1.25" wide Elastic Shock Cord
- 2 3/8" wide Elastic Shock Cord
- 2 18" Mylar Parachutes
- 1 Balsa Transition
- 1 Balsa Nose Cone
- 3 24mm Motor Tubes
- 1 .8 ounce BB's for Nose Weight
- 1 14" Payload Tube
- 1 12" Main Body Tube
You know that when the kit arrives and the bag it is comes in looks impressive, you know the rocket will be as well. Thrustline hand packs their kits and I have yet to have a kit from them that was missing a part. The only complaint I have is the instructions. Although quite thorough, the photos are fuzzy and lack detail. Also, I think they should be printed front and back to conserve paper.
Construction starts with the 3x24mm motor mount. You have the option of using motor clips for retention or friction fit. I opted to use the clips which meant putting three notches in the aft plywood centering ring. The forward ring needs to have a hole drilled in it for the Kevlar® shock cord tether. I would have been nice to have this hole pre-drilled since I had no small drill bits. (I do now!)
As you mark the body tube for alignment of the 5 fins, the instructions mention you are on your own for placement of the lugs. I had to eyeball a spot between the fins. I believe the fin alignment guide should have a spot marked for lug placement. You have the option of using 2 x 1/8" or 2 x 3/16" lugs or both. I used the 3/16" lugs only.
There is just enough balsa to cut all 10 fins, so there is no room for mistakes. You must be careful in how you cut the upper fins since the rear root edge rides on top of the transition. I had some minor gaps in mine which I filled with glue.
After your fins are glued, you build the payload section. It is enormous. One nice feature is that the nose cone is tethered to the transition via elastic shock cord so there is no chance of losing the nose during deployment--unless you lose the whole payload section of course!
The nose cone needs holes drilled in it to accept BBs for nose weight. I had a little trouble holding onto the nose cone during drilling, but I got the job done.
Both the upper payload and the lower boost section get their own 18" Mylar parachutes. The elastic shock cord on the lower section is tied to the Kevlar® tether. This helps protect the elastic from the hot ejection gasses and is a nice feature on any kit. Overall, this is a fairly easy build for the experienced modeler.
Finishing:
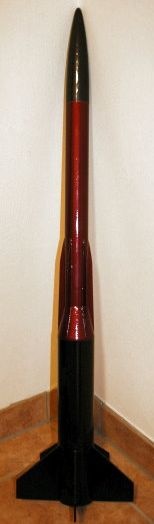
I needed this rocket completed quickly for a launch, so I kept the color scheme
easy. The photo of the finished model in the instructions shows the lower and
upper fins a different color from the rest of the rocket. This would need a lot
of time and a lot of masking. I applied sanding sealer to all balsa surfaces.
The spirals were quite light, so I opted not to fill them. I applied two coats
of primer and painted the lower section/nose cone one color and the payload
section another. No decals were provided or suggested.
Construction Rating: 4 out of 5
Flight:
My instructions had no motor recommendation, so I used the ones from the
Thrustline website. First flight was with 3 C11-5s. I used a Nomex®
heat shield since the main body is a BT-80 and would require a lot of wadding.
The rocket really lived up to its name, plenty of smoke and fire took this bird
way up and way fast. Both halves were recovered successfully.
Next flight was on 3 D12-7s. Only two the motors lit but is was still an impressive site to see. The 7 second delay may have been a bit long because two of the shroud lines tore out of the parachute. I still had a good recovery and the parachute was easily repaired.
Last flight of the day was again on 3 C11-5s. This flight was perfect in all aspects. Although this rocket can be flowing on 3 C6-5s (although no adapters were included), I think the C11 or D12 cluster truly lets this rocket live up to its name.
Recovery:
The mylar parachutes really shine on a sunny day and can handle the wear and
tear of multiple flights when you use the correct delay. The Kevlar®
tether is showing no signs of stress and the Nomex®
I added has done it's job of protecting the recovery components.
Flight Rating: 4 out of 5
Summary:
This is a great big, albeit expensive kit. The instructions could use a little
work and some decals would have helped to really set this kit apart from the
others.
Overall Rating: 4 out of 5
Other Reviews
- Thrustline Aerospace Smoke and Fire By Joe Policy
I picked up the Smoke and Fire kit when I bought the A-SLAM from Thrustline Aerospace via eBay (Not thrilled with that, but did it anyway). Many of Thrustline's kits draw me to them and this one was no different. I loved the fact that it was a larger rocket with 3x24mm cluster configuration and the many fins and transition. The kit's price starts at $34.75 (starting bid on eBay). Int ...
 |
 |
Flights
|
|