| Construction Rating: | starstarstarstar_borderstar_border |
| Flight Rating: | starstarstarstarstar_border |
| Overall Rating: | starstarstarstar_borderstar_border |
| Published: | 2010-11-13 |
| Manufacturer: | U.S. Rockets  |
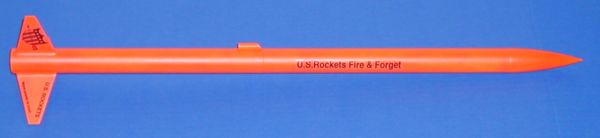
(10/01/04) U.S. Rockets states that the "Fire & Forget is the reference model rocket for U.S. Rockets. It is a near minimal diameter rocket in 24mm mode and a minimal diameter rocket in 29mm mode. The maximum 29mm motor length is 9" (H120-12). Aerospace specification airframe tubing is used to assure high performance and high strength."
What caught my attention was "reference model". This is interesting, because used in this fashion it would indicate that the Fire & Forget would "furnish as a reference" or "provide proof of a person's [or thing's] character, abilities, etc." or "something for which a name or designation stands" according to Random House. So, this would mean to me, that the Fire & Forget would typify what one could expect from U.S. Rockets' other kits.
The Fire & Forget is my first U.S. Rockets kit. It is considered a Level 1 kit by U.S. Rockets.
The kit includes two 12" body tubes and a 3.5" balsa nose cone to make up the 27.5" total length. There is a 2" coupler to join the two body tubes, a 1/4"-wide elastic shockcord, and a 3"x36" plastic streamer. Also included were three pre-cut 1/16" plywood fins, a single 1/4" launch lug, and a decal sheet. Lastly, there as a 24mm adapter (Interchangeable™ mount).
CONSTRUCTION:
The instructions are printed on a single page (both sides) of 8½ x 11" paper (orange, if that matters). There are a number of diagrams to assist in building the kit. A tube marking guide is in the instructions. There are some optional construction ideas as well.
The Fire & Forget is simply a three-fin-nose-cone (3FNC) rocket and is very easy to assemble. I will highlight a few points of the construction of it:
First, it should be noted that the 29mm tubes are thicker than what you would get from an Estes-like kit. This makes for a strong, rigid rocket, which if the flier were to use up to the "H" motor, would need.
The tube marking guide is the kind that the body tube is placed on (flat surface) and then mark with hash marks. These lines are extended using the "door frame" method. This is just a good as a wrap-around type of fin marking guide to me, when you are dealing with simple three or four fin rockets.
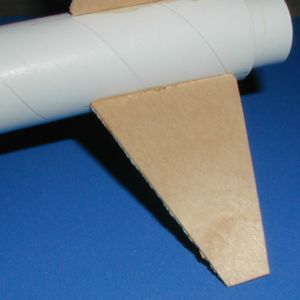
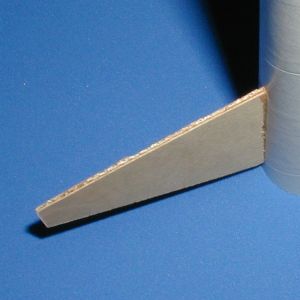
The three pre-cut plywood fins are definitely not laser-cut. In fact, they were quite ragged. It will make the builder question the quality. After they are airfoiled, there is some improvement, so filling is necessary when finishing the rocket. I "filled" them using wood glue to start with, then relied on primer for the rest.
After the fins were attached, I made good fin fillets with 5-Minute epoxy.
 The 1/4" elastic is glued into the bottom body tube of the rocket. The other end is glued into the upper body tube. The coupler is then glued into the bottom body tube. It really quite loose, but if the elastic is sandwiched between the body tube and coupler it is snug. The instructions suggest using tape to make it a snug fit into the upper body tube (this makes the ejection point mid-rocket). The streamer is taped to elastic shock cord.
The instructions say to friction fit the nose cone, but I chose to glue my nose cone in place.
The ¼" launch lug is cut "in half with scissors". I did this at a 45 degree angle and glued in place.
The 24mm adapter is made. It is a nice addition to the kit. There are also instructions for making an 18mm adapter.
Some of the optional ideas include: 1) having nose cone ejection verses middle ejection (which after flying this rocket, I would recommend), and 2) permanent 24mm mount with through-the-wall fins.
U.S. Rockets does give finishing guidance including using sanding sealer on the wood parts, sanding, and repeating until smooth. They suggest painting the rocket gloss white with a single black fin.
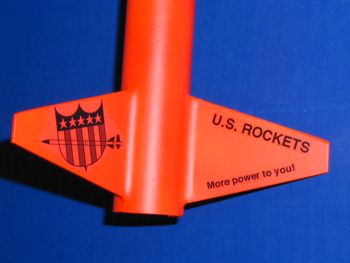
I used my typical multiple coats of Plastic-Kote Primer and sanding in-between. I then used Walmart Flat White paint (additional comments about Walmart paint). After waiting 1 week, I then painted the rocket with Krylon Fluorescent Orange. Lastly I added the peel-n-stick decals.
Overall, for CONSTRUCTION I would rate this kit 3 ½ points. The instructions are adequate and do provide some nice alternate build ideas. Although, not a significant build impact, the ragged edges on the plywood fins was disappointing. Was pleased to have a 24mm adaptor provided and the peel-n-stick decals added to the finish.
FLIGHT/RECOVERY:
The list of motors that U.S. Rockets recommends is impressive. It ranges from 24mm D12's to 29mm H120's. The provided altitudes were from 66 feet (using an A8-3 (not in recommended motors since it is an 18mm motor) to 7109 feet on a H60.
U.S. Rockets gives a bunch of stats on the rocket, but I personally think the most important is where the CP is supposed to be: 22.5" from the nose cone. Why important? With the range of motors that can be used in this rocket, one may need to add nose weight to maintain the U.S. Rockets' desired stability of 1.5 calibers (CG at 20.65").
U.S. Rockets does not provide a thrust ring nor motor retention since they don't want to limit any motor selection. They give instruction on using fiction-fit and tape-wrap retention.
I do plan on using the rocket for it "to experience its namesake" using a G25 or G125, but first I decided to fly it on a C11-5.
I stuffed in four sheets of Estes wadding, friction-fit the C11-5 into the 24mm adapter then friction-fit the adapter into the rocket.
The flight was straight as an arrow flight and it was fairly high (RockSIM says around 650 feet). Even at this relatively low altitude, compared to what the Fire & Forget could do, it was hard to track because it is a smaller rocket. The streamer ejected right at apogee and the rocket descended fast and hard. I spent about 10 minutes looking for it in the tall grass, but found it.
Upon inspection there was damage to the coupler and upper tube. At first I thought this was due to the speed that it descended, but later determined that it was definitely an Estes-dent (U.S. Rockets dent?) caused by the shortness of the elastic shock cord. I will bend this damage outward and go again.
The next flight was long-in-coming, but I was able to load it up with a AT G25-10. I was very excited, because this would soon become my highest flying rocket... to just under 1 mile.
Everything was ready and the count down began. When the button was pushed, the ignitor popped, the motor chuffed, chuffed, 3...2...1, varoom! It only went to about 50 feet and did a loop. Went up another 50 feet and did a loop and a loop and another. Then, when thrust stopped in pointed down and fell to the ground. After a couple of seconds it ejected.
A young man that was visiting the rocket launch for the first time was looking for it with me. We found it. Damage report: Melted paint around the motor, one broken fin, and one very melted streamer.
After looking it over, I handed it to this young man and told him he could have it. Interestingly, after about an hour, he came back to me and showed me that he had glued (CA'd) the fin back on and installed a parachute. Remember, he had never flown rockets before. He got his supplies from another club member.
Well, I was impressed, but I didn't have another 29mm motor to let he use. So, instead, I took an Estes E9-6 and wrapped it with enough masking tap to adapt it to the 29mm mount. I installed an ignitor and handed it to him. He took it and presented it for launching and within 10 minutes, he had launched his first rocket!
The flight? Excellent, straight, stable and very high! With the parachute it drifted quite a bit, but he recovered it. I'm amazed.
For FLIGHT/RECOVERY, I would rate this rocket 4 points. The rocket, as built is very stable and versatile. The variety of motors makes it impressive. The short elastic shock cord caused damage on just the first test flight, but perhaps if you are going to fly it in "Fire & Forget" mode, you don't care. I would recommend building it, as optionally described, with nose cone ejection (but you will need to add an eye-screw). The friction-fit and tape-wrap retention doesn't concern me for this type of rocket, but if it is not going to be "Fire & Forget", I like hooks and thrust rings.
I give the rocket an OVERALL rating of 3 ½ points. The rocket can be assembled in about 1 hour. It can be flown in small fields or pushed to fly over a mile high. The thick body tubes give it a steadiness that if not lost would make the body hold up to a lot of abuse. Not thrilled with the elastic shock cord system, nor the "look" of the pre-cut fins. All-in-all, I'm glad I built it.
Other Reviews
- U.S. Rockets Fire and Forget By Frank G. Whitby
Brief: The USR Fire and Forget is a small 29mm minimum diameter rocket. It is a 3FNC style rocket with trapezoidal fins. I like this styling in general and I think that this makes for and attractive rocket. It should be able to fly on anything from C to G power and USR suggests flying it on a couple of H motors as well. The rocket is very stout, considering the light weight and small ...
 |
 |
Flights
|
|
|
|
J.I. (October 8, 2004)