U.S. Rockets Weightlofter
U.S. Rockets - Weightlofter {Kit} (1019, K-19) [1979-]
Contributed by Nick Esselman
| Construction Rating: | starstarstarstarstar_border |
| Flight Rating: | starstarstarstar_borderstar_border |
| Overall Rating: | starstarstarstar_borderstar_border |
| Manufacturer: | U.S. Rockets  |
I took a big jump with my second U.S. Rockets' rocket, from the minimum diameter Fire and Forget to the seven (7) motor cluster Weightlofter. I've have been enjoying various clusters over the past year or so, but usually 2 or 3 motors. To date, my Phoenix Mighty Kat has the most clustered motors; 8 of them. So, I was looking forward to the Weightlofter for comparison sakes.
 U.S. Rockets (USR) says the "Weightlofter was designed to accept the widest variety of motor combinations as well as fly on a single motor." The central 29mm motor is all that is needed to fly the rocket with its ejection charge being used for parachute deployment. The six (6) surrounding 24mm tubes can either stay empty or be loaded with (3) or (6) motors.
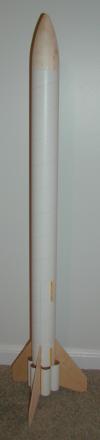
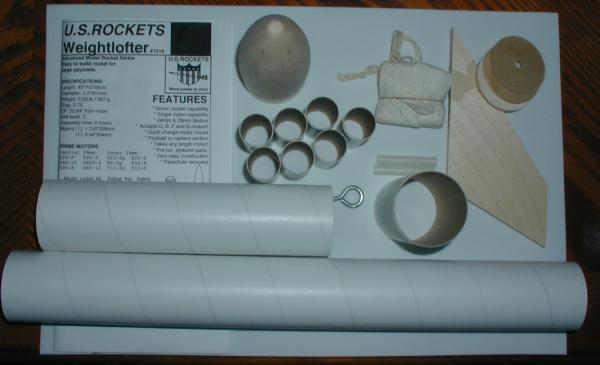
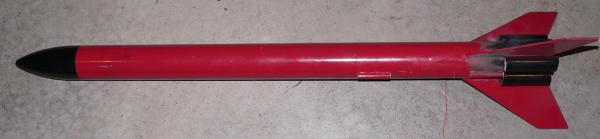
The kit includes a 9" long, 2.25" diameter lower body tube, an 18" long, 2.25" diameter upper payload tube, a 6" 29mm motor tube that extends out the rear, and a 4.5" solid balsa nose cone to make up the overall 36.25" length (after fins are added). The motor mount is made up of the 29mm tube that has two plywood centering ring. This is mounted into the lower body tube and is then surrounded by the six 24mm tubes. The fins are pre-cut plywood fins. This kit also includes the payload bulkhead and coupler which joins the lower body tube to the payload section. The recovery system includes a 16" paper (?) parachute, 7' of 1/4" elastic shockcord, and a eye-screw for the bulkhead. Finally there are two 1/4" launch lugs and some peel-n-stick decals.
CONSTRUCTION:
The instructions are printed on a 4 pages of 8½ x 11" paper (single sided). There is also an 11-page booklet titled "ACE Information Report" with "Motor Installation", '"Clustering" and "Staging" information. Both have illustrations to assist in the clarity of the instructions.
The instructions are adequate to allow most builders to build up the Weightlofter. With that being said, there were two areas that I feel need some touch-up.
First, in step 2. I found the text to be easy to follow, but the picture threw me a bit. It says to glue one of the centering rings 1/2" from one end of the motor tube and the picture shows it at 1/2" and says 1/2". It then says to glue the second ring 2.5" from the same end so 3.5" is extended beyond the back ring. The picture then shows the second centering ring with 3-1/2" written under it. If someone, perhaps someone you know, only looked at the picture and glued the two centering rings in place, they would glue one at 1/2" and the other at 3-1/2". [Note: catch this before the glue dries and it is completely correctable... I'm positive]
 Second, in step 8, the fins are glued in place. They will not fit because the 24mm tubes hold them higher than the main body tube. At first I said, huh, this should have been addressed in the instructions. Well, behold, step 1 says "Sand a 45 degree taper onto the root edge of each fin...". The picture under step 1 doesn't depict that at all.
So the net of this: Read all the instructions and follow what is written. Don't rely on your previous experience and/or just follow the pictures.
Construction of the rocket is really quite easy.
Fit of the centering rings was excellent. You may want to take the handle of a hobby knife or a pencil and run it around the inside edge of the body tube to correct where the tube was cut. This is typical of most kits.
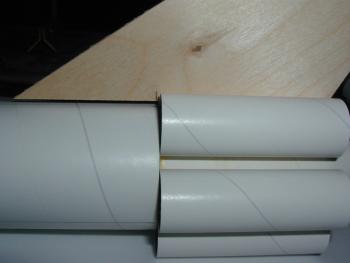
The six 24mm motor tubes are glued together in pairs in preparation to be mounted to the 29mm motor tube. Once the 29mm motor tube and centering rings are glued into the lower body tube, each of the pairs are aligned with fin lines and glued in place. They butt up against the 2.25" lower body tube leaving 1/2" of the 29mm motor tube extending. This is used for tape/friction motor retention.
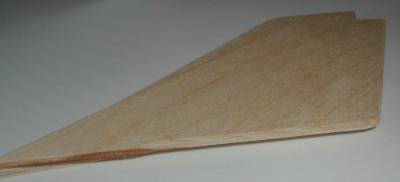 The fins are then glued into place. After the root edge has been tapered to 45 degrees, they fit perfectly between the 24mm tubes and mounts to the 2.25" lower body tube just fine. You can see that I only tapered my root edge where it rests on the 24mm tubes.
The bulkhead is assembled by gluing the plate into the coupler and adding the eye-screw. This is then glued into the bottom of the payload body tube.
The balsa nose cone is either glued in place or is friction fit in place so that payloads can be added. I found the balsa nose cone to be very loose. I wrapped some masking tape around it and glued it into place (which eliminated the payload capability).
The elastic shockcord is tied to the bulkhead eye-screw on one end. The other end is 3-fold paper mounted to the inside of the lower body tube.
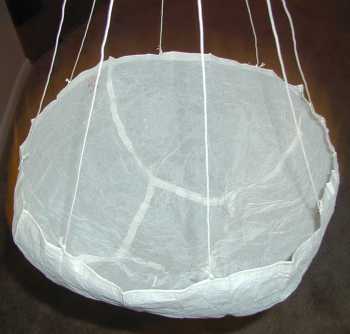 The parachute... hmmm, this needs some discussion. First, the shape is excellent. It is a paneled Hemispherical parachute. This is a very high drag parachute allowing a smaller size for heavier rockets. Second, it is made of paper and uses strings for shroud lines. That doesn't see impressive, but the paper is closer to a fabric than the paper you might have envisioned. I personally like it, but how it looks is much less important than how it performs, so we will save that for the Flight/Recovery section.
Since we are in the midst of winter, I have not finished this rocket yet and will report back when I do.
Overall, for CONSTRUCTION I would rate this kit 4 points. The instructions are adequate for instruction, especially if you focus on the text. The quality of parts is good. Centering rings and fins quality and fit were excellent. The parachute? Well, let's see after a few flights and we'll rate it in the Flight/Recovery section. Nice to have some decals, although nothing snazzy about them.
FLIGHT/RECOVERY:
USR recognizes that there are many, many combinations that can be flown in the Weightlofter. They simply say, "Try D12-7 or F25-8 and 0-6 D12-0(P) or single F20-4, G30-8 or G60-8."
USR indicates the finished rocket should weigh 8.75 ounces. My unfinished rocket weighed 9.5 ounces. I must build a little heavy.
 Update 06-30-07: This might be considered the rocket that has really "gone places". I finished it to fly at NYPower in 2006 and didn't get to it. It then travelled to NARAM49 (2007) in Michigan to fly and didn't. So this trip, to NERRF4 I was determined to put it in the air.
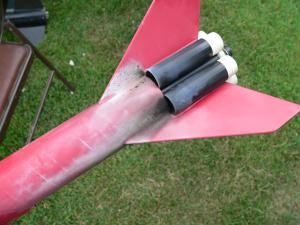
For the Weightlofter's first flight, I loaded it up. I used 1x AT EconoJet F42-8 + 4x Est SU D12-4 + 2x Est SU E9-4 motors. I wired all the Estes motors together and used a QuickBurst ignitor for the F42. Truly an impressive looking "business end" once all loaded and ready.
The rocket came off the pad with a roar. It flew straight to about 50 feet and then... did several loops... took off horizontal for about 25 feet... crashed into the ground and laid there.
Upon inspection, all the Estes motors had lit but the central F42 did not light. I know it is tough to light a cluster that has black-powder and composites together, but I have done this successfully before. In this case I think I didn't leave my QuickBurst leader-wire long enough. Basically if the leader is long enough to stay in the motor while the Estes motors lit and start to lift the rocket, the composite motor will still light. I could see the burn from the ignitor on the outside of the nozzle.
Perhaps the CG was off, as well, with all the motors loaded. Something to give consideration to.
 Another observation was how charred the rocket was from the Estes ejection charges burning up the side of the rocket.
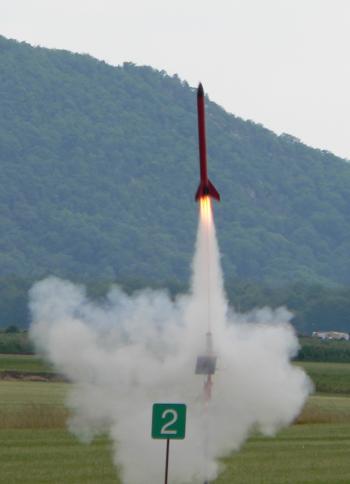
For the second flight I simply took all the spend Estes motors out and flew it on the AT F42-8. That flight took off quickly and the rocket flew straight and true. Nice launch. Ejection was perfect at apogee and the "paper" parachute brought the rocket down at a good rate.
Upon retrieval, one fin and two outside motor tubes were loose (most likely from the first flight and then from the second's lift-off because landing was fine. I will repair this and give this rocket another chance fully loaded with motors.
For FLIGHT/RECOVERY, I would rate this rocket 3 ½ points. There are many flight options available, however, as built and in my first attempt with seven motors the rocket proved unstable. It could be argued that I should have checked the CG or that trying to loaded black-powder with composites is a "user" error. Go ahead, argue it. I'm also glad I didn't spend a tremendous amount of time finishing this rocket because of the charring that occurred!
I give the rocket an OVERALL rating of 3 points. If you can get one (USR seems to be in a pause mode right now) and have a desire to try a 7-motor cluster, this rocket may be right up your alley. It is quite easy to build. It has a large payload section in-case you wanted to try some electronics.
Other Reviews
- U.S. Rockets Weightlofter By Lance Alligood
Brief: The U.S. Rockets (USR) Weightlofter is a 7-motor mid power cluster rocket with six 24mm outboard tubes and one central 29mm motor tube. This also is a great kit for someone that is looking for a challenging, labor intensive mid power rocket build. A 24mm motor adapter is included so that it can be flown on a smaller central motor as well. Construction: I ordered this ...
 |
 |
Flights
|
|